Page 1 of 1
Cresting Jig with wiring instructions
Posted: Sun Apr 25, 2010 4:01 pm
by Jeffro
Re: Finally finished cresting jig best one yet
Posted: Sun Apr 25, 2010 4:13 pm
by Alex
Bloody good job there.
Looks really professional
By the way Jeff, when are you going to restart making those D97 strings again.
Alex.
Re: Finally finished cresting jig best one yet
Posted: Sun Apr 25, 2010 5:37 pm
by Jeffro
Im not mate,too time consuming for little return im afraid.
Re: Finally finished cresting jig best one yet
Posted: Sun Apr 25, 2010 5:46 pm
by Gringa Bows
looks good Jeff,should make the job easier

...............Rod
Re: Finally finished cresting jig best one yet
Posted: Sun Apr 25, 2010 8:37 pm
by stringnstik
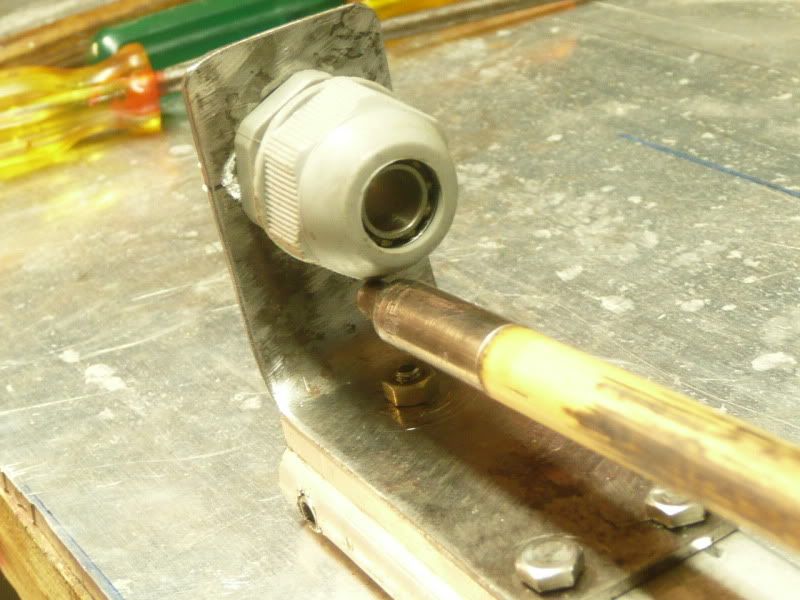
Love the cable gland bearing housing

I tips me lid to the.
Re: Finally finished cresting jig best one yet
Posted: Sun Apr 25, 2010 9:52 pm
by Jeffro
stringnstik wrote:Love the cable gland bearing housing
I tips me lid to the.
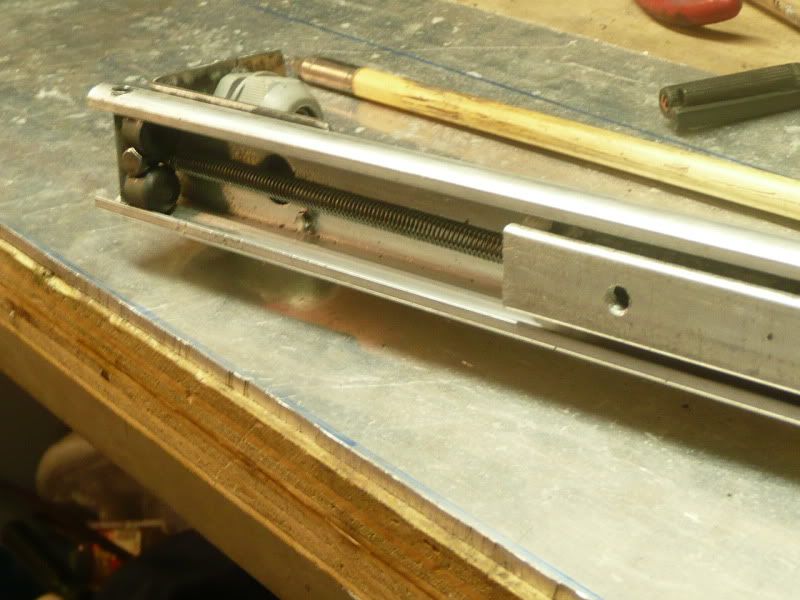
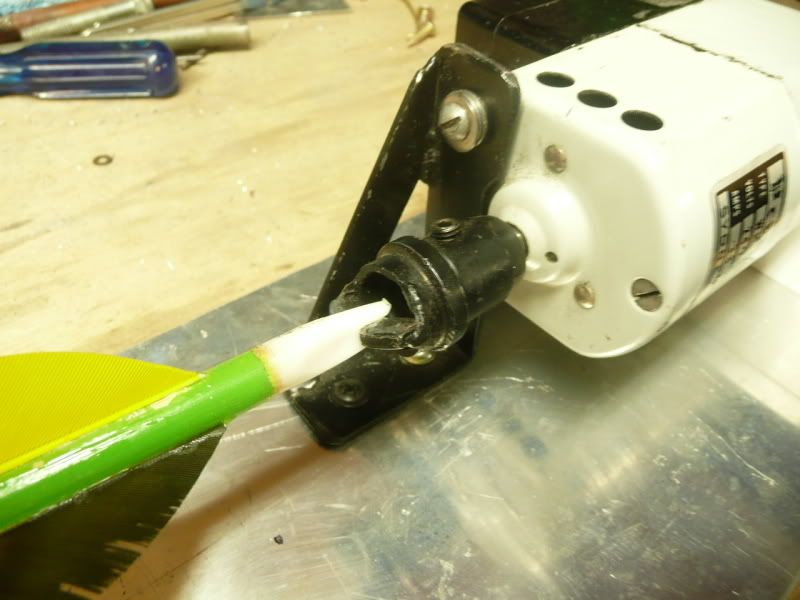
I was going to use a bit of pipe welded to the bit the glands in and put the bearing in the front of the pipe and then I noticed the glands I have in the garage.It works really well,cable glands will accept a variety of sizes of bearings,I had to remove the plastic gripping teeth from inside the gland.The bearings are 2 identical ones back to back out of an old diawa fishing reel.I might add a scale for when your cresting
The "chuck" is a tungsten holesaw with the teeth cut off and a bit of a large washer welded onto it.
It has a v cut in the middle of it so the nock is centered when you push it on.
The main thing I use the machine for is for reshaping the feathers after they got wet.After hunting trips I usually have a few arrows with crispy stuck down red colored feathers.
I soak them in warm water then wash the blood off them and spin the arrow in the machine.For timber maybe a sponge will do instead of the soaking.
You can turn the speed up or down and get the right ammount of centrifical force going on the feathers.
The feathers take the right shape depending on the speed adjustment then I lightly blow dry them with a heat gun while its still spinning.
You can also just leave them spinning for 5 minutes or so if no heat gun is available and they dry anyway.
The Mrs might have a fit if she finds her hair dryer in the garage so the latter is reccommended

Re: Finally finished cresting jig best one yet
Posted: Sun Apr 25, 2010 11:52 pm
by ivorycollector
Ingenious Jeffro. Looks practical.
Re: Finally finished cresting jig best one yet
Posted: Mon Apr 26, 2010 6:45 pm
by Stickbow Hunter
Looks good Jeffro but it wouldn't work for me as I crest all my arras before any nocks or points are fitted.
Jeff
Re: Finally finished cresting jig best one yet
Posted: Mon Apr 26, 2010 9:48 pm
by wal
Very smick Jeffro , I love seeing how blokes put stuff together out of gear in their sheds, like your chuck end, i only used a piece of air hose, got a new Idea now thanks.
Is there much to wiring the dimmer in ? mine was put together out of a sewing machine motor (bit rougher than yours

) but it spins at approx' 100000 rpm , I have the pedal chocked to try and slow it a bit, I even got that much spatter of it one night I had paint spatter on my glasses
Are the dimmers very expensive ?
edit= I forgot to add that I am a total klutz with electricity
Cheers
Re: Finally finished cresting jig best one yet
Posted: Tue Apr 27, 2010 6:34 am
by Jeffro
It has to be a leading edge dimmer for an iron core transformer...(the thing that runs a 12 volt down light) or a universal dimmer which does both leading and trailing edge.Trailing edge dimmers are for electronic transformers and they are the lightweight little plastic ones.
You need the one that runs the heavy long transformers for downlights.
The universal is about 45 bucks and the leading edge is cheaper.
Pretty easy to wire up ill get a photo later and try to explain it.They come with a diagram but that can still be difficult if not trained.
Mine will go really fast or really slow.
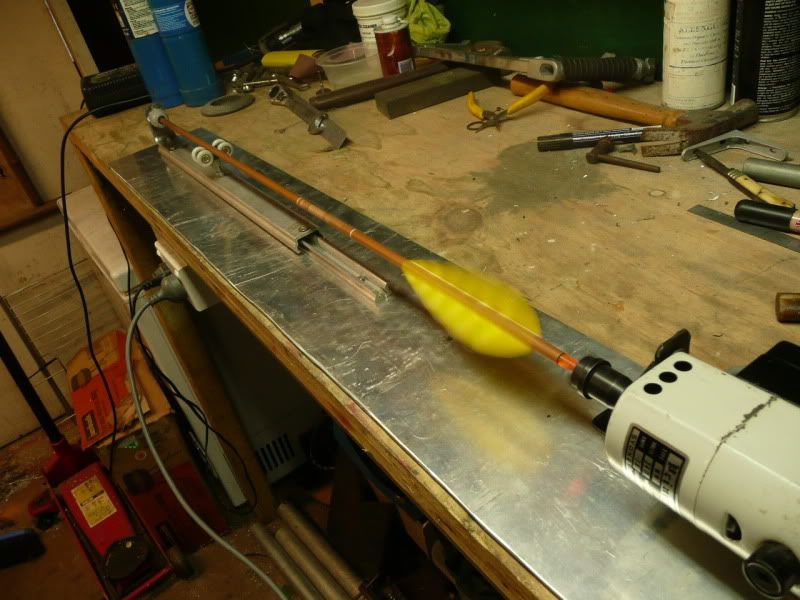
I can spin it at full speed to dry feathers.With this bearing set up it will spin an arrow at full speed without wobbling.
Re: Finally finished cresting jig best one yet
Posted: Tue Apr 27, 2010 5:44 pm
by Jeffro
Ok this is how to wire up a dimmer\speed controller
I will have to explain this in a basic fashion .Sorry if it sounds dumb but some people cannot get a grip on wiring and it can be confusing.
some terminology to save any cofusion:
lead=the lead that plugs into the power point
terminal=point where a wire is terminated or joined
Your sewing machine motor should have a
lead going into it and another cable out going to the foot pedal.
open the terminal box or section of the motor(where the wires are)
take a photo of the it or mark down on a bit of paper which wires went to which screws and draw a little diagram showing the colors just in case you need it later.
The green(earth) wire from the
lead should be by itself on a
terminal
The blue(possibly black) or neutral wire from the
lead should also be by itself on a
terminal
That leaves 2
terminals
One of these
terminals will have the brown or active wire(possibly red) from the
lead plus another one joined to it at this point.It will be one of the wires that is in the pedal cable
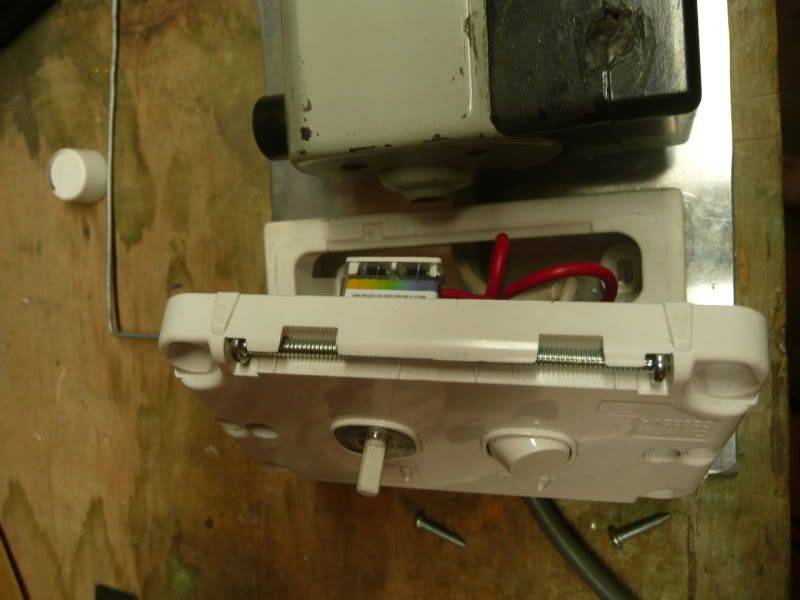
The cable that goes to the foot pedal is going to be cut off about 300mm from the motor and used for joining to the dimmer assembly.
Then proceed to lob the foot pedal into the bin
Dimmer assembly showing mounting block and 2 gang switch plate with switch and dimmer module clicked into it
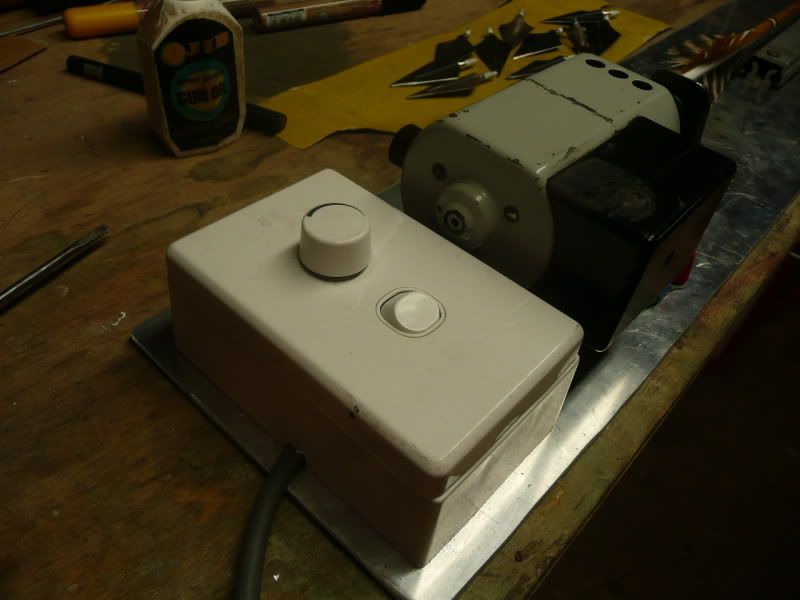
The dimmer module
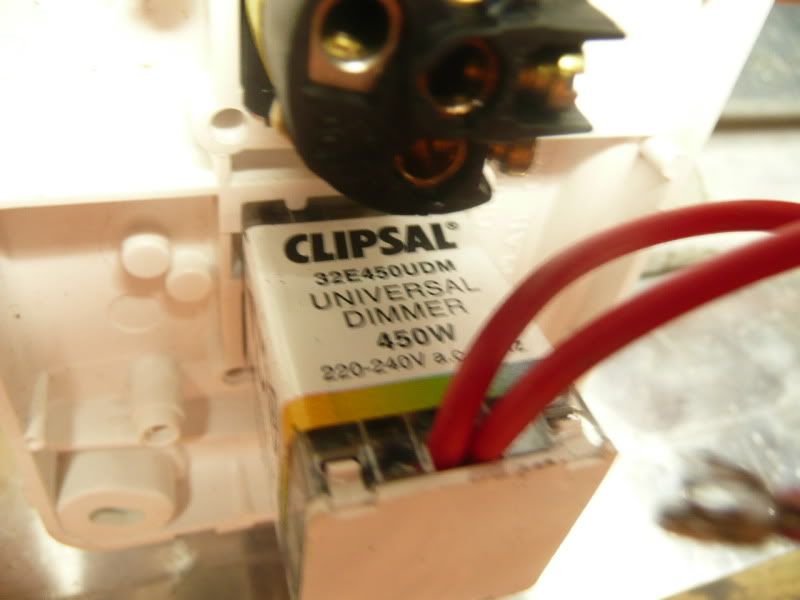
this is how to connect it.
Strip back the sheath of the pedal cable a bit,50mm is plenty to expose the 2 wires in the pedal cable and then bare about 5mm of the actual copper on each wire.
make a small hole at the bottom of the mounting block to get the cable inside.
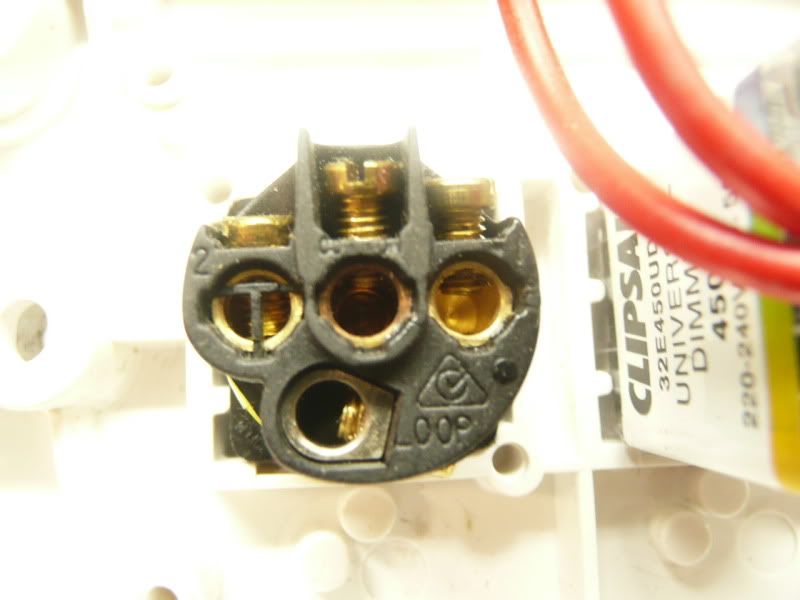
The wire in the pedal cable that is joined with the brown or active wire from the
lead goes to the centre
terminal on the back of the switch.
That position is known as the common.It might have a letter C printed next to it but it may not,either way its the one positioned between the ones marked 1 and 2.
In the
terminal marked number 1 put one of the wires from the dimmer module.
In the
terminal marked "loop" put the other wire from the dimmer module together with the remaining wire from the pedal cable.
If it doesn't work send me a photo of the exposed terminal box on your motor showing all the terminals.
Re: Finally finished cresting jig.Wiring instructions now added
Posted: Wed Apr 28, 2010 3:50 pm
by wal
Thanks heaps man , that has just sold another dimmer switch for an Australian company.
Next job after the casting deck in my tinnie, which starts tonight.
Excellent how to, I battle to get the photos to work, lucky we have you blokes that are savvy to help us goofers out.
You have done well , thank you.
Cheers
Re: Finally finished cresting jig best one yet
Posted: Thu Apr 29, 2010 8:38 am
by stringnstik
Stickbow Hunter wrote:Looks good Jeffro but it wouldn't work for me as I crest all my arras before any nocks or points are fitted.
Jeff
interesting, i have been playing with that concept too.
Re: Finally finished cresting jig best one yet
Posted: Tue May 25, 2010 7:25 pm
by Jeffro
Stickbow Hunter wrote:Looks good Jeffro but it wouldn't work for me as I crest all my arras before any nocks or points are fitted.
Jeff
Jeff I have a bare nock with a bit of tube on it for that purpose.The machine will do a bare shaft no problem
at the bearing end I have a small cone shaped bit.Its actually the red plastic lid of an aquadhere bottle and the bare shaft will sit in it.
Or you can just taper one end and then put it in the bearing end.
Cheers
Re: Finally finished cresting jig.Wiring instructions now added
Posted: Tue May 25, 2010 8:45 pm
by Stickbow Hunter
Thanks mate, good idea. I actually place the point end in the machine and crest up close to the shaft support as that is my wobble control.
Jeff
Re: Finally finished cresting jig.Wiring instructions now added
Posted: Wed May 26, 2010 8:46 am
by UPTHETOP
Jeffro great piece of work there. Good to see the aussies havnt stopped inventing gear in there own back yard sheds.
Congradulations and have fun many a hour cresting.
Cheers Wayno
Re: Finally finished cresting jig.Wiring instructions now ad
Posted: Mon Jun 06, 2011 7:17 am
by Jeffro
Stickbow Hunter wrote:Thanks mate, good idea. I actually place the point end in the machine and crest up close to the shaft support as that is my wobble control.
Jeff
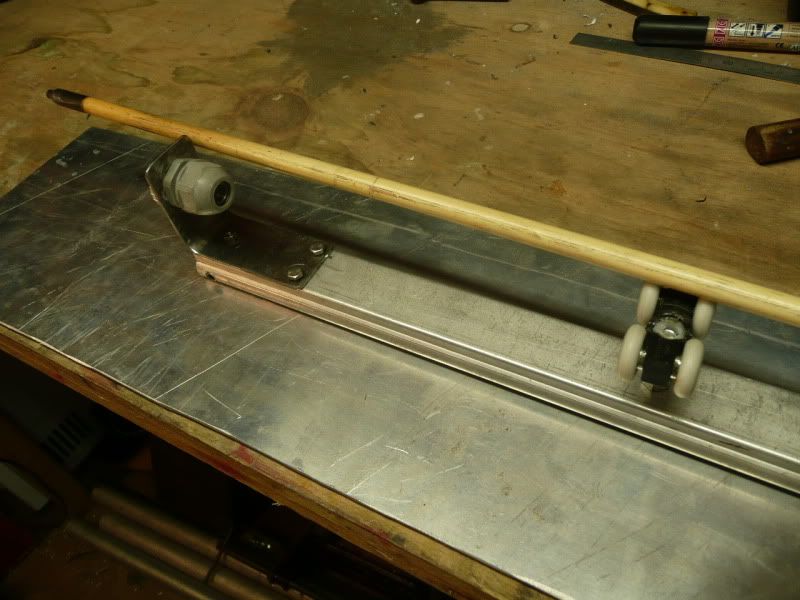
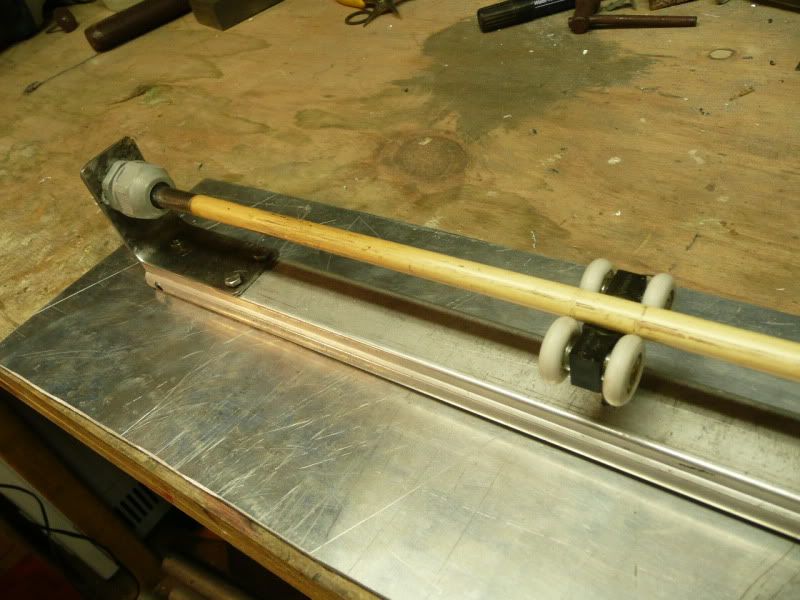
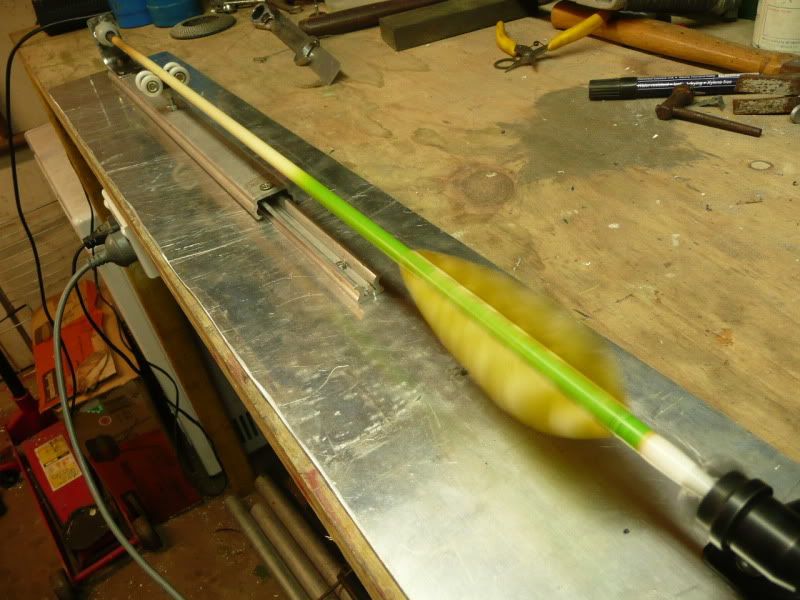
with this machine Jeff,the 4 little white wheels are adjustable up and down and the remove the wobble by applying a bit of tension to the spine of the arrow so it eliminates the wobble.
The 4 wheel bit is a roller from a sliding door.
Re: Cresting Jig with wiring instructions
Posted: Mon Jun 06, 2011 8:26 am
by rodlonq
Good work Jeffro,
Your design solves all of the problems I had when I tried (3 unsuccessful attempts) to build a cresting machine, being speed control, wobble control and an effective "chuck" mechanism. I got sick of it after wasting 3 full Saturdays of dithering about the shed and not being able to find just the right parts. The next Saturday I went to work specifically to earn the $ to buy a 'spinrite' crester. I wish I had done that in the first place. Thanks for your explanations anyway, I reckon a lot of people on here will benefit.
Cheers....... Rod
Re: Cresting Jig with wiring instructions
Posted: Thu Jan 24, 2013 7:19 pm
by pkearney
I have a oven rotisserie motor slow speed would that work for cresting or do you need high speeds ?
Re: Cresting Jig with wiring instructions
Posted: Thu Jan 24, 2013 7:24 pm
by Jeffro
sure I think the rotisserie motor would work but it may be too slow.
A sewing machine motor with speed controller gives fast and slow so if you want to reshape wet feathers it needs to be fast.
Jeff