The Prentice Piece - Lots and Lots of Photos

How to make a Bow, a String or a Set of Arrows. Making equipment & tools for use in Traditional Archery and Bowhunting.

Moderator: Moderators

Post Reply
Message
Author
User avatar
GrahameA
Posts: 4692
Joined: Thu Mar 10, 2005 4:28 pm
Location: Welcome to Brisneyland, Oz

The Prentice Piece - Lots and Lots of Photos

#1 Post by GrahameA » Mon Mar 22, 2010 5:25 pm

Afternoon All

(Following in the process of Guildes of Olde this is my first prentice piece.)

Remember my Italian Longbow which some would call a Recurve and keeping mind Glenn's comment from a year or so ago that it would be good for people to build a new bow for each Trad Shoot - so here is my new Bow. I have also made an effort to have a fair few photos so that members can get a fair idea of what is involved in such a project. As a comment this bow took me twice as long as building a plain Longbow.

This time around I decided I wanted to try a few different things.
1. I wanted to see if I could make veneers from two different timbers
2. Last time I stiffened the tip section by overlaying strips of glass and I had problems with it. This time I decided to insert timber wedges into the recurved section of the bow.
3. I wanted something a little higher in poundage - but not overly killing on me.
4. This time the bow would have a shelf cut in.

The whole procees started with a trip to Watt's Woods (http://www.wattswood.com.au) to see what timbers they had. After a bit of searching we ended up with 2metre long piece of New Guinea Rosewood which will be used for veneers and handle sections.

Next step was to do a few calc's based on the previous one to come up with some dimensions for the laminations plus veneers plus fibreglass strip so I would know how "big" things would need to be.

So on with the show:

Here I am grinding the Wenge higlight strip that will go into the laminated handle.
001.jpg
001.jpg (68.1 KiB) Viewed 7291 times
Slicing the Rosewood Plank to provide timber for the handle sections and for the two piece veneers.
003.jpg
003.jpg (56.72 KiB) Viewed 7291 times
Slicing the Wenge highlight strip.
005.jpg
005.jpg (34.79 KiB) Viewed 7291 times
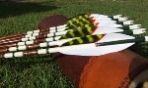
These are the components that will make up the handle.
Rosewood
Hard Rock Maple
Wenge
Hard Rock Maple
Rosewood.
002.jpg
002.jpg (30.71 KiB) Viewed 7291 times
Slicing the Blackwood which will be used in veneers
006.jpg
006.jpg (42.48 KiB) Viewed 7291 times
Cutting the Rosewood insert piece that will be inserted into the Blackwood section.
007.jpg
007.jpg (40.79 KiB) Viewed 7291 times
008.jpg
008.jpg (30.4 KiB) Viewed 7291 times
Sanding the Rosewood Wedge so that it is straight and has a good edge for glueing, etc.
009.jpg
009.jpg (61.19 KiB) Viewed 7291 times
Grinding the Rosewood for the handle
011.jpg
011.jpg (53.81 KiB) Viewed 7291 times
Glueing up the timber stack that forms the handle. Small lesson here pieces thicker than 1/4" don't bend that well. Note also that I am wearing an apron - glue does not come out of clothes.
012.jpg
012.jpg (44.58 KiB) Viewed 7291 times
Last edited by GrahameA on Mon Mar 22, 2010 6:43 pm, edited 2 times in total.
Grahame.
Shoot a Selfbow, embrace Wood Arrows, discover Vintage, be a Trendsetter.

"Unfortunately, the equating of simplicity with truth doesn't often work in real life. It doesn't often work in science, either." Dr Len Fisher.

User avatar
GrahameA
Posts: 4692
Joined: Thu Mar 10, 2005 4:28 pm
Location: Welcome to Brisneyland, Oz

Re: The Prentice Piece - Lots and Lots of Photos

#2 Post by GrahameA » Mon Mar 22, 2010 5:38 pm

Laminating up the pieces of the handle on the form.
013.jpg
013.jpg (43.35 KiB) Viewed 7287 times
The handle block all clamped up on the form.
014.jpg
014.jpg (42.66 KiB) Viewed 7287 times
Next day using a drum dander to form the shape of the handle.
015.jpg
015.jpg (42.13 KiB) Viewed 7287 times
Then it is out with the rasps and files to work ob refining the shape of the handle.
016.jpg
016.jpg (41.26 KiB) Viewed 7287 times
First view of the veneer block. This a strip of Blackwood that was sawn down the centre and than a wedge of Rosewood was epoxied in place (like when you foot arrows). Now the block has to be taken back to square and parallel.
017.jpg
017.jpg (35.09 KiB) Viewed 7287 times
019.jpg
019.jpg (37.9 KiB) Viewed 7287 times
After it has been sawn it needs to be ground.
022.jpg
022.jpg (67.43 KiB) Viewed 7287 times
Then sanded.
024.jpg
024.jpg (41.91 KiB) Viewed 7287 times
Then ground to thicknees.
025.jpg
025.jpg (34.63 KiB) Viewed 7287 times
Then split to provide the veneers and then the veneers ground to 0.020" thick. Notice how floppy the veneer is as it comes out of the grinder.
028.jpg
028.jpg (50.48 KiB) Viewed 7287 times
Last edited by GrahameA on Mon Mar 22, 2010 6:45 pm, edited 1 time in total.
Grahame.
Shoot a Selfbow, embrace Wood Arrows, discover Vintage, be a Trendsetter.

"Unfortunately, the equating of simplicity with truth doesn't often work in real life. It doesn't often work in science, either." Dr Len Fisher.

User avatar
GrahameA
Posts: 4692
Joined: Thu Mar 10, 2005 4:28 pm
Location: Welcome to Brisneyland, Oz

Re: The Prentice Piece - Lots and Lots of Photos

#3 Post by GrahameA » Mon Mar 22, 2010 5:50 pm

So this is what the veneers look like after all that.
029.jpg
029.jpg (36.29 KiB) Viewed 7284 times
Notice the veneers staring to curl. This is due to stress relieval in the timber and is a real problem. Whilst you start off with everything nice and straight as the stresses are relieved the timber will move.
030.jpg
030.jpg (27.53 KiB) Viewed 7284 times
Sanding the timber for the tip overlays.
031.jpg
031.jpg (36.38 KiB) Viewed 7284 times
Cutting the belly Veneers to length. The timber is so thin that a pair of scissors are the best tool to cut things to length.
033.jpg
033.jpg (33.95 KiB) Viewed 7284 times
This will give some idea how flexible the veneers are.
035.jpg
035.jpg (26.91 KiB) Viewed 7284 times
Cutting the back Veneers to length.
036.jpg
036.jpg (28.61 KiB) Viewed 7284 times
Washing everything down with metho' so we clean gluing surfaces.
037.jpg
037.jpg (35.71 KiB) Viewed 7284 times
Buttering the back strip of glass. To this the back veneers will be glued and the whole thing clamped to a plank and allowed to go off. This will give a lamination of glass and veneer which is a lot easier to work with rather than veneers by themself.
038.jpg
038.jpg (36.04 KiB) Viewed 7284 times
Clamping the glass and the veneers.
039.jpg
039.jpg (38.44 KiB) Viewed 7284 times
And here it is all glued up.
040.jpg
040.jpg (73.82 KiB) Viewed 7284 times
Last edited by GrahameA on Mon Mar 22, 2010 6:46 pm, edited 2 times in total.
Grahame.
Shoot a Selfbow, embrace Wood Arrows, discover Vintage, be a Trendsetter.

"Unfortunately, the equating of simplicity with truth doesn't often work in real life. It doesn't often work in science, either." Dr Len Fisher.

Bill
Supporter
Supporter
Posts: 960
Joined: Tue Apr 27, 2004 6:24 pm
Location: Wodonga
Contact:

Re: The Prentice Piece - Lots and Lots of Photos

#4 Post by Bill » Mon Mar 22, 2010 5:57 pm

:) Yeah :D :D :D we're on the way :?: , good on you GrahameA.............Bill

User avatar
GrahameA
Posts: 4692
Joined: Thu Mar 10, 2005 4:28 pm
Location: Welcome to Brisneyland, Oz

Re: The Prentice Piece - Lots and Lots of Photos

#5 Post by GrahameA » Mon Mar 22, 2010 6:01 pm

The Tip overlays clamped up.
041.jpg
041.jpg (51.29 KiB) Viewed 7276 times
A day later and I am positioning the glued back lamination on the form and driving in some small pins to keep everything in place.
042.jpg
042.jpg (50.13 KiB) Viewed 7276 times
Test fitting things and marking the odd line before mixing up some glue and clamping it all together.
044.jpg
044.jpg (49.99 KiB) Viewed 7276 times
So it really is just a task of mixing some glue and buttering the pieces and then clampping them in place.
045.jpg
045.jpg (46.02 KiB) Viewed 7276 times
046.jpg
046.jpg (50.38 KiB) Viewed 7276 times
047.jpg
047.jpg (49.53 KiB) Viewed 7276 times
048.jpg
048.jpg (53.03 KiB) Viewed 7276 times
And the next day you get to clean everthing up ready to fit the belly lamination, veneers and glass. Remember how I glued the back veneer and the back glass - should have done the same for the belly of the bow.
049.jpg
049.jpg (47.73 KiB) Viewed 7276 times
Preparing the belly laminations.
050.jpg
050.jpg (37.26 KiB) Viewed 7276 times
052.jpg
052.jpg (39.01 KiB) Viewed 7276 times
Last edited by GrahameA on Mon Mar 22, 2010 8:50 pm, edited 2 times in total.
Grahame.
Shoot a Selfbow, embrace Wood Arrows, discover Vintage, be a Trendsetter.

"Unfortunately, the equating of simplicity with truth doesn't often work in real life. It doesn't often work in science, either." Dr Len Fisher.

User avatar
GrahameA
Posts: 4692
Joined: Thu Mar 10, 2005 4:28 pm
Location: Welcome to Brisneyland, Oz

Re: The Prentice Piece - Lots and Lots of Photos

#6 Post by GrahameA » Mon Mar 22, 2010 6:14 pm

Glue, glue and yet more glue.
053.jpg
053.jpg (43.8 KiB) Viewed 7271 times
Clamp, clamp, clamp.
054.jpg
054.jpg (52.62 KiB) Viewed 7271 times
And the next day you can pop it off the mould. Ready for a bit of shaping.
056.jpg
056.jpg (49.71 KiB) Viewed 7271 times
In with a bit of power sanding. Be careful as you can easily mess things up.
058.jpg
058.jpg (36.82 KiB) Viewed 7271 times
So not wanting mess things up it is hand sanding time.
059.jpg
059.jpg (46.76 KiB) Viewed 7271 times
And then it is a bit of power sanding using a linisher - I have to build a longer linisher.
061.jpg
061.jpg (40.14 KiB) Viewed 7271 times
And back to hand sanding. You get quite good at hand sanding after a while not to mention developing your Aerobic fitness abd sweating off a few lbs.
063.jpg
063.jpg (42.56 KiB) Viewed 7271 times
And eventually you get it on the tiller.
064.jpg
064.jpg (20.68 KiB) Viewed 7271 times
Hmm doesn't look to bad - and you can see the difference in tiller. As well you can see the Rosewood wedges I have inserted into the recurves to stiffen them slightly.
065.jpg
065.jpg (19.75 KiB) Viewed 7271 times
066.jpg
066.jpg (21.04 KiB) Viewed 7271 times
Last edited by GrahameA on Mon Mar 22, 2010 6:50 pm, edited 1 time in total.
Grahame.
Shoot a Selfbow, embrace Wood Arrows, discover Vintage, be a Trendsetter.

"Unfortunately, the equating of simplicity with truth doesn't often work in real life. It doesn't often work in science, either." Dr Len Fisher.

longbow steve
Posts: 3116
Joined: Tue Jan 30, 2007 3:29 pm
Location: BLUE MOUNTAINS

Re: The Prentice Piece - Lots and Lots of Photos

#7 Post by longbow steve » Mon Mar 22, 2010 6:16 pm

:D , Good read Grahame, Keep it coming :D

User avatar
GrahameA
Posts: 4692
Joined: Thu Mar 10, 2005 4:28 pm
Location: Welcome to Brisneyland, Oz

Re: The Prentice Piece - Lots and Lots of Photos

#8 Post by GrahameA » Mon Mar 22, 2010 6:26 pm

A bit more sanding and onto the tiller again. You get very good at sanding building things like this. To keep tings even you count the number of strokes you do on one side and repeat it on the other. And if anyone talks to you just start counting out loud.
068.jpg
068.jpg (14.08 KiB) Viewed 7266 times
Gluing on the tip overlays. Tomorrow I will cut some nocks and then test shoot it.
069.jpg
069.jpg (35.53 KiB) Viewed 7266 times
Okay test shot number one. Note that there has been no shaping of the handle and yes it hurts. The bow is pulling 65lb at this stage. There is very little shock and it does shoot nice.
shot 01.jpg
shot 01.jpg (61.36 KiB) Viewed 7266 times
Playing around with my hand position to see where the arrow rest should go. What I am looking for is minimal "rock" in the bow as it is drawn. If the tiller is wrong the bow will rock and the limbs will be out of time and the bow will jump around when the arrow is shot.
shot 02.jpg
shot 02.jpg (48.19 KiB) Viewed 7266 times
Hand position is about correct.
shot 03.jpg
shot 03.jpg (47.09 KiB) Viewed 7266 times
So out with a file or two and several hours later you have a shaped handle.
handle01.jpg
handle01.jpg (39.67 KiB) Viewed 7264 times
And it looks very nice.
hamdle timbers01.jpg
hamdle timbers01.jpg (45.71 KiB) Viewed 7264 times
Last edited by GrahameA on Mon Mar 22, 2010 6:52 pm, edited 1 time in total.
Grahame.
Shoot a Selfbow, embrace Wood Arrows, discover Vintage, be a Trendsetter.

"Unfortunately, the equating of simplicity with truth doesn't often work in real life. It doesn't often work in science, either." Dr Len Fisher.

User avatar
GrahameA
Posts: 4692
Joined: Thu Mar 10, 2005 4:28 pm
Location: Welcome to Brisneyland, Oz

Re: The Prentice Piece - Lots and Lots of Photos

#9 Post by GrahameA » Mon Mar 22, 2010 6:39 pm

Coming towards the end.

The bow was pulling 65lb initially and I wanted it around the mid 50's. So the first move was to narrow the limbs a bit and then I trapped them and then narrowed them again. All the time going back to the scales as I removed material to get a feel as to how it was all going. Eventually I had the poundage about right and so it was onto the finishing process.

Lots of final sanding to ensure that there are no sharp edges, glass splinters, etc. It took 4 hours to final sand the bow - and I sweated a few more pounds.
final sanding01.jpg
final sanding01.jpg (45.59 KiB) Viewed 7261 times
So this is what the final product looked like before spraying it.
finished.jpg
finished.jpg (48.31 KiB) Viewed 7261 times
And then it was time for spraying.
spraying.jpg
spraying.jpg (35.13 KiB) Viewed 7261 times
Now I need to to decide if I want a leather grip and fit it if I decide yes, Plus I need to polish the bow to get the level of gloss I desire.

Next job will be to confirm sll the dimensions of the bow, plus do the measurements for a Force/Draw Curve and shoot it through a Chronograph to determine its performance level. Finally I will take it down the range and see how it shoots overall. It will be brilliant. Plus I need to finesse a couple of things on it that I know could be better.

Thats is it for the moment. A bit more information in a couple of days.
Grahame.
Shoot a Selfbow, embrace Wood Arrows, discover Vintage, be a Trendsetter.

"Unfortunately, the equating of simplicity with truth doesn't often work in real life. It doesn't often work in science, either." Dr Len Fisher.

User avatar
GrahameA
Posts: 4692
Joined: Thu Mar 10, 2005 4:28 pm
Location: Welcome to Brisneyland, Oz

Re: The Prentice Piece - Lots and Lots of Photos

#10 Post by GrahameA » Mon Mar 22, 2010 7:07 pm

Hi Bill
Bill wrote::) Yeah :D :D :D we're on the way :?: , good on you GrahameA.............Bill
It just takes time. :D
Grahame.
Shoot a Selfbow, embrace Wood Arrows, discover Vintage, be a Trendsetter.

"Unfortunately, the equating of simplicity with truth doesn't often work in real life. It doesn't often work in science, either." Dr Len Fisher.

User avatar
Stickbow Hunter
Supporter
Supporter
Posts: 11637
Joined: Sat Jul 26, 2003 8:33 pm
Location: Maryborough Queensland

Re: The Prentice Piece - Lots and Lots of Photos

#11 Post by Stickbow Hunter » Mon Mar 22, 2010 7:36 pm

You have been busy Grahame, well done.

Jeff

piggy
Posts: 1167
Joined: Wed Sep 07, 2005 8:13 pm
Location: Melbourne

Re: The Prentice Piece - Lots and Lots of Photos

#12 Post by piggy » Mon Mar 22, 2010 7:46 pm

Great work well done

User avatar
Gringa Bows
Posts: 6331
Joined: Thu Aug 30, 2007 7:09 pm
Location: Bundaberg QLD

Re: The Prentice Piece - Lots and Lots of Photos

#13 Post by Gringa Bows » Mon Mar 22, 2010 7:56 pm

looking good Grahame................Rod

User avatar
otis.drum
Posts: 972
Joined: Wed Jan 28, 2009 5:30 am
Location: cape york

Re: The Prentice Piece - Lots and Lots of Photos

#14 Post by otis.drum » Mon Mar 22, 2010 8:34 pm

grahame,
love the pic-a-long...

could we see some more pics of the finished product please.
...otis...

User avatar
kimall
Posts: 1426
Joined: Tue Jun 08, 2004 9:21 pm
Location: Toowoomba

Re: The Prentice Piece - Lots and Lots of Photos

#15 Post by kimall » Mon Mar 22, 2010 10:04 pm

Mate that looks fantastic thanks for taking the time to put the pics up too.A quick question when you glue the veneers to the glass did you do that flat or on the form I have never thought of that it would make it much easier at glue up time with fewer moving parts.
Cheers KIM

User avatar
stringnstik
Posts: 1106
Joined: Tue Oct 21, 2008 12:09 pm
Location: Cranbourne

Re: The Prentice Piece - Lots and Lots of Photos

#16 Post by stringnstik » Tue Mar 23, 2010 7:03 am

Excellent Grahame, mighty use of the camera too really gives us a good idea as to whats going on and involved.
Fab looking bow too of course, always pleasant to know the effort and time is worth it :)
cheers
"I am the arrow..the arrow is me...together as one...I fly to thee"
"the stick maybe crooked and the string hath no form,
then married by bowyer, transforms when first drawn"
"twang....thud"

User avatar
GrahameA
Posts: 4692
Joined: Thu Mar 10, 2005 4:28 pm
Location: Welcome to Brisneyland, Oz

Re: The Prentice Piece - Lots and Lots of Photos

#17 Post by GrahameA » Tue Mar 23, 2010 7:06 am

Morning All

Thanks for the comments and bigger thanks to Greybeard for his photo taking and constant encouragement and help.

I will write a bit more about the bow (and some more photos) after I have done the measurements on it and shot it few times on the range.

kimall wrote:Mate that looks fantastic thanks for taking the time to put the pics up too.A quick question when you glue the veneers to the glass did you do that flat or on the form I have never thought of that it would make it much easier at glue up time with fewer moving parts.
Cheers KIM
The glass and the veneers were glued together on the flat. A slab of flooring laminations to be correct. The veneers are only 0.020" thick and they move all over the place. So the glass and them were glued separately which them gives a piece of laminated material that is reasonably rigid - still however easily flows into the shape of the form.

Working in stages with glue ups does have some advantages and it can be a way around issues.
Grahame.
Shoot a Selfbow, embrace Wood Arrows, discover Vintage, be a Trendsetter.

"Unfortunately, the equating of simplicity with truth doesn't often work in real life. It doesn't often work in science, either." Dr Len Fisher.

User avatar
Gringa Bows
Posts: 6331
Joined: Thu Aug 30, 2007 7:09 pm
Location: Bundaberg QLD

Re: The Prentice Piece - Lots and Lots of Photos

#18 Post by Gringa Bows » Tue Mar 23, 2010 8:19 am

Grahame,do you use a mask when sanding .if so what kind..................Rod

wal
Posts: 285
Joined: Mon Nov 27, 2006 7:27 am

Re: The Prentice Piece - Lots and Lots of Photos

#19 Post by wal » Tue Mar 23, 2010 8:47 am

Very impressive , thanks for sharing, neat shed/workshop too :D :D

User avatar
Chase N. Nocks
Posts: 1463
Joined: Thu Jan 04, 2007 10:33 am
Location: Brisbane, Australia

Re: The Prentice Piece - Lots and Lots of Photos

#20 Post by Chase N. Nocks » Tue Mar 23, 2010 11:36 am

Thank you Grahame and thanks to Greybeard, this is a great effort..very interesting

I have a particular fondness for picture 048. the mad scientist with Igor taking pictures. :wink:
I am an Archer. I am not a traditional archer, bowhunter, compound shooter or target archer.....I am an Archer
"Shooting the Stickbow"

....enforced by the "whistling grey-goose wing."
"The Witchery of Archery"

User avatar
Steven J
Posts: 797
Joined: Fri Apr 27, 2007 10:13 pm
Location: away for a while...
Contact:

Re: The Prentice Piece - Lots and Lots of Photos

#21 Post by Steven J » Tue Mar 23, 2010 1:38 pm

LB rod 55 wrote:Grahame,do you use a mask when sanding .if so what kind..................Rod

Grahame, what a great achievement! We would all like to see you stick around for a while longer. We hope that you removed your mask for the photos only so we could see your handsome face. Both fiberglass and wood dust are both nasty.

Steve
http://www.stevenjawerth.weebly.com

On Christ the solid rock I stand, All other ground is sinking sand. Edward Mote, 1797-1874

User avatar
GrahameA
Posts: 4692
Joined: Thu Mar 10, 2005 4:28 pm
Location: Welcome to Brisneyland, Oz

Re: The Prentice Piece - Lots and Lots of Photos

#22 Post by GrahameA » Tue Mar 23, 2010 6:53 pm

Evening All.

Rod - The power sanding gear and the saws are connected to one of two seperate high volume dust extraction systems. Plus the workshop has a very effective cross ventilation system - fan assisted if the wind velocity is low. Experience suggests that the best way of handling dust is to remove it at the source. If I considered it an issue I would not bother with dust masks/filters - they are not my cup of tea and instead move to a force fed air system.

Wal -that is Daryl's Workshop. My workshop is much smaller and a tad cramped and in the process of being tidied and cleaned. To many arrows recently all done in a rush.

Otis - will take some more pics later and will post them.

Jeff - that was all my recent spare time consumed and I am now trying to catch up on things. It was a challenge. :D

Troy - your turn will come.
Grahame.
Shoot a Selfbow, embrace Wood Arrows, discover Vintage, be a Trendsetter.

"Unfortunately, the equating of simplicity with truth doesn't often work in real life. It doesn't often work in science, either." Dr Len Fisher.

User avatar
Stickbow Hunter
Supporter
Supporter
Posts: 11637
Joined: Sat Jul 26, 2003 8:33 pm
Location: Maryborough Queensland

Re: The Prentice Piece - Lots and Lots of Photos

#23 Post by Stickbow Hunter » Tue Mar 23, 2010 9:09 pm

Jeff - that was all my recent spare time consumed
Well, I think you made the most of it and I could think of a lot worse things to use up my spare time. :D

Jeff

User avatar
Gringa Bows
Posts: 6331
Joined: Thu Aug 30, 2007 7:09 pm
Location: Bundaberg QLD

Re: The Prentice Piece - Lots and Lots of Photos

#24 Post by Gringa Bows » Tue Mar 23, 2010 9:46 pm

they're a good invention those dust extracters ,i use one too but i still use a mask just incase,besides the mask i use now ,my son paid $700 for it so i make sure i wear it :wink: .....Rod

User avatar
g_r
Posts: 524
Joined: Thu Apr 16, 2009 7:07 am
Location: Germany,Wanna hear me bugle?

Re: The Prentice Piece - Lots and Lots of Photos

#25 Post by g_r » Wed Mar 24, 2010 12:05 am

I am so jeaulous! To build youre own bow, and not just a primitive selfbow but such a thing of craft and beauty.....mighty fine!
Thanks for takin us along so detailed!
watch youre feet, you may never know where they might take you....

Always scout like you are scouting scouts!

nimrod
Posts: 253
Joined: Wed Jan 11, 2006 6:21 am

Re: The Prentice Piece - Lots and Lots of Photos

#26 Post by nimrod » Wed Mar 24, 2010 6:04 am

what can one say simply a joy to watch as a walkthrough thanks hugh

ppofandt
Posts: 41
Joined: Mon Aug 10, 2009 7:46 am
Location: Oxenford, SE Qld, Australia

Re: The Prentice Piece - Lots and Lots of Photos

#27 Post by ppofandt » Wed Mar 24, 2010 8:38 am

My most profound thanks for posting this.

Loved every word and picture.

Cheers.

User avatar
NCArcher
Posts: 176
Joined: Wed Sep 21, 2005 4:54 pm
Location: Newcastle

Re: The Prentice Piece - Lots and Lots of Photos

#28 Post by NCArcher » Fri Mar 26, 2010 10:33 am

As usual, very nice Grahame.
Great job.

User avatar
UPTHETOP
Posts: 1187
Joined: Mon Jun 11, 2007 9:03 pm
Location: Dalby
Contact:

Re: The Prentice Piece - Lots and Lots of Photos

#29 Post by UPTHETOP » Tue Mar 30, 2010 1:45 pm

Great buildalong Grahame. I shore do like the slender curves on the ends and yet the bow looks balanced and yes you have that tillering down to an art alright.
Must of looked great when you brought her to life with a few coats of clear.
Thanks again for the effort.

Cheers Wayno
Justastik Arrow Craft, Its all about the Wood.

User avatar
ole_silver
Posts: 451
Joined: Sat Jan 01, 2005 9:15 am
Location: Townsville, Qld

Re: The Prentice Piece - Lots and Lots of Photos

#30 Post by ole_silver » Fri Apr 02, 2010 3:17 pm

congrates Grahame.............

very well presented and shared, n one great looking bow there mate..

many thanks for allowing us to see you in action.

best regards,
Steve...
ole_silver1..................

"have a go now, 'fore ya can't have a go at all"

Post Reply