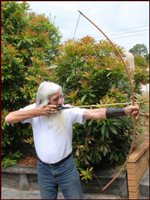
Its only the second bow I have ever made so dont mind all the imput and critics no problems.
I have down sized the photos a little as to not make it to big for downloading as some of us are still on dial up even in this day and age.
I still have to work out how to put the photos and text in order so there may be a few stuff ups along the way.
Alright I sent of to get an Binghams blue print or an 60'' one peace recurve plans and they were very helpfull I must admit.
I built the form up after watching there DVD a few times and it all looked and measured pretty square when I finished it.
( I an't no chippie either so if I can do it anyone can).
Alright a picture of the form some of you have seen it before.
- DSCF0018.jpg (35.01 KiB) Viewed 7448 times
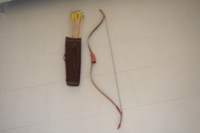
The Core lams where bamboo, black glass over top and the riser was to be Queensland maple. I was going for 50lb@ 26 When finished. My first bow I made was a single block of cocobolo so this time I wanted to try some accent strips as the Queensland maple is a little bland in the colour department.
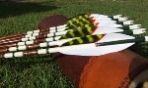
This is the block I used it had fairly strait grain.
- DSCF0044.jpg (20.41 KiB) Viewed 7445 times
- DSCF0041.jpg (34.26 KiB) Viewed 7445 times
I dont have hardly any wood work tools so borrowed a jig saw cutt the riser and the cutt the accent strips to suit.
I had to sand the riser smooth to get the right shape then pressed the lot together before gluing to see if it all went together with minimum gaps. It wasnt perfect but the glue would fill the smaller gaps with minimal fuss.
- DSCF0003.jpg (30.3 KiB) Viewed 7445 times
- DSCF0010.jpg (31.93 KiB) Viewed 7445 times
Cheers Wayno