Arrows and cresting

How to make a Bow, a String or a Set of Arrows. Making equipment & tools for use in Traditional Archery and Bowhunting.

Moderator: Moderators

Post Reply
Message
Author
User avatar
stringnstik
Posts: 1106
Joined: Tue Oct 21, 2008 12:09 pm
Location: Cranbourne

Arrows and cresting

#1 Post by stringnstik » Thu Feb 12, 2009 9:32 am

Hi all,
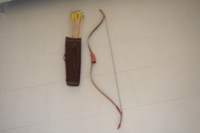
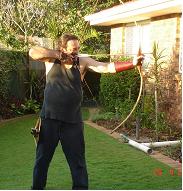
As i have to maintain my family of 4 in arrows I have spent some time investigating and playing Mr arrow manufacture man.
Im still perfecting the tool chain and have a new crest jig on the build. But the one shown here was slapped together in about 20min from stuff in the shed. I admit the motor was a bit special and made things easy. Unfortunately the motor is heavy and has a dead winding and runs hot. The version 2 uses an old cordless drill with my new electronic controller.(coming soon).

This post is more about resourcefulness and hopefully triggers the old noggin into using things we have laying about.

I have had trouble with paints, for now I have settled on the typical Mr Hobby water acrylic modelers paints available from most hobby shops. I didn't want a full crown because the wood grain on these sitka spruce look so nice and I liked the way it was going to show up in between the crest. Dont trust paints and use the "Lots wife" code of ethics...ie dont look back. Dont paint over previous if you can avoid it. Ill explain this later.. You cant trust paints to not run. Be quick and decisive, dont dwell the paint brush over spots. Even a Mr Hobby paint over itself (one day between coats)(different colour) can cause the under layer to run.

day 1)SS wool the shafts and shape the nock end.
day1a)Stain varnished the shafts with a cloth, ie rub on.
day2)Apply another coat to darken if need be.
day3)coat of wood sealer (again by cloth rub). Not sure if this was necessary but the varnish was an solvent based type and I wasnt sure if the acrylics would take to it.
day4)Crest underlay, any white acrylic was placed under where the cresting paints were going to go as a background/foundation.
day4a)The family crest was simple black|white|black|white|individual colour|white|black|white|black with the other bands emphasising the individuals colour as will the fletching. I had a piece of wood parallel and about 2 mm away from the arrow shaft which had all these marking on it. Measurements were made from the nock end. This helped to keep the arrows all looking the same,, well almost ;) The "end of feather" band will match either 4" or 5" feathers. the "finger" or nock band sets the finger to feather distance. This all helps alignment in the fletching stage. The jig has a block with a felt v groove in it to steady the shaft.
day5) Individuals colour, in this case my red and my wifes green went on next.
day5a) Then the black.
day6) Now we add the thin copper bands. This tidies up the edging on the previous bands. Please note that the true spin on the shaft is paramount at this point. If the shaft has a wobble chances are the band will wobble. (become thicker n thinner). I use a piece of a pool noodle as a slideable rest, just poke the arrow thru the noodle (will be tight to start with). ( I squared the bottom of the noodle first) which allows me to get real close to the band Im painting. At all times I found that having the nock taper in the end foam support was worthwhile.
day7)I went looking for polyurathene as a top coat but could only find gloss and I really wanted satin. It just looks and feels better IMO. I ended up with this ultra clear top stuff which was enviro nice, all be it expensive. It flows on well (except for small bubbles now and then). Only available in a 1 liter tin it will last for ever or simply die like most old paints. I painted this on with the arrows in the jig. This was the moment of truth would the paints underneath run. All but the copper seamed ok. I dwelled on one band a little too long and it started to leach into the copper. remember Lot's wife. Dont look back, dont paint over the same spot while its wet.
day8)a quick SSwool and then another layer. Boy it brings up the grain real nice and feels sexy smooth..erm apart from those ones that formed those wittle bubbles. Must work out why that happend on only a few of them.
Note the shaft drip dry hanger. My wife says I never hang out the washing for drying..this proves I do , well at least knew how too :) A quick pvc tube and some nails provided a compact hanger for my arrows. A small piece of tube attached to the point end serves as the connection to the motor for spinning and the hand hold and the hanger point.
day8a) About 2 hours later it was touch dry. Time to glue the nocks on whilst watching telly. I used construction adhesive (baby liquid nails). Squirt of goop in the nock. Gently put it on the shaft, twist, take it off (yes take the nock off) set it aside. I did them in groups of 3. By then the first one is ready to place the nock back on again. Dont answer phone calls during this period. This time round it grips real well!! Wipe off excess.
day9)fletching time. to be continued....
Attachments
Arrows in the holder waiting for the next process
watg4nxtlyr.jpg (74.78 KiB) Viewed 5608 times
Alignment of bands.. ok I need to so some more work on my accuracy
align.jpg (33.75 KiB) Viewed 5607 times
Drip dry rig zoomed up.
drip_dry_rig_zm.jpg (80.94 KiB) Viewed 5604 times
Drip dry
Drip dry
drip_dry_rig.jpg (75.77 KiB) Viewed 5602 times
Crest rig shown in last top coat mode.
crest_jig.jpg (30.53 KiB) Viewed 5594 times
20 min cresting rig. Lump of wood, bolt on geared down motor, made a v rest our of another block and some felt. Notice the end (nock support) pool noodle and the middle support (slideable rest used for the fine banding work)
crest_jig_acc.jpg (46.58 KiB) Viewed 5589 times
"I am the arrow..the arrow is me...together as one...I fly to thee"
"the stick maybe crooked and the string hath no form,
then married by bowyer, transforms when first drawn"
"twang....thud"

User avatar
pdccr
Posts: 1285
Joined: Sun Jan 25, 2009 7:07 pm
Location: Mackay

Re: Arrows and cresting

#2 Post by pdccr » Thu Feb 12, 2009 10:26 am

Nice! So you got your paint from a hobby shop? I had tried just normal paint and used sticky tape to cover the part i didnt want to paint, worked OK but nothing as good as yours. Very nice :)
Cheers, Toby

jape

Re: Arrows and cresting

#3 Post by jape » Thu Feb 12, 2009 11:42 am

Looking good Mark! I spent ages wondering what pool noodles were then it clicked, good one. I do mine in a similar way but by hand and with a variation of black ends for field-points and red for broadheads so I can tell when they are in a quiver. You can look up the family coat of arms for a laugh, it is unlikely to be the right one as those sites have very suspect genealogists working for them but yours for example have black and yellow/gold colours!

User avatar
stringnstik
Posts: 1106
Joined: Tue Oct 21, 2008 12:09 pm
Location: Cranbourne

Re: Arrows and cresting

#4 Post by stringnstik » Thu Feb 12, 2009 1:38 pm

thanks Jape, I like the idea of differnt colour ends for the different heads. Not much call for anything but field points here :( worst luck.. but ill keep that in mind. I did have a different colour for flu flus but it was a tad obvious ;) Ive also reserved red for a different weight but again chances of having them in the quiver at the same time are remote.

coat of arms.. never checked. We just sat around the table..I trying to keep it as simple as poss :) and the others being creative.

pdccr, tried the tape, too much hassle even used drafting tape pin striping (cause I had some).
I played with a few paints, the cheap craft acrylics etc. Others have gotten them to work, there is plenty on the forum to search. These will do for now. They come under a wide variety of names but all have the trade name Gunze Sangyo on it somewhere. Im not saying these are the best by a long shot. But they work, available anywhere, and a large choice of colours.

jape wrote:Looking good Mark! I spent ages wondering what pool noodles were then it clicked, good one. I do mine in a similar way but by hand and with a variation of black ends for field-points and red for broadheads so I can tell when they are in a quiver. You can look up the family coat of arms for a laugh, it is unlikely to be the right one as those sites have very suspect genealogists working for them but yours for example have black and yellow/gold colours!
"I am the arrow..the arrow is me...together as one...I fly to thee"
"the stick maybe crooked and the string hath no form,
then married by bowyer, transforms when first drawn"
"twang....thud"

User avatar
GrahameA
Posts: 4692
Joined: Thu Mar 10, 2005 4:28 pm
Location: Welcome to Brisneyland, Oz

Re: Arrows and cresting

#5 Post by GrahameA » Thu Feb 12, 2009 1:52 pm

Afternoon Mark and Jape
jape wrote:You can look up the family coat of arms for a laugh, it is unlikely to be the right one as those sites have very suspect genealogists working for them but yours for example have black and yellow/gold colours!
Being an Armiger I based my cresting on the device - without the cadence mark. However, if you want to get carried away with such you can use transfers and apply the actual device to your shafts. Makes for a conversation topic if nothing else.

Do the research yourself and it will be correct. You also need to have an understanding of colours involved. This is a good a site as any to get an understanding on the topic.
Grahame.
Shoot a Selfbow, embrace Wood Arrows, discover Vintage, be a Trendsetter.

"Unfortunately, the equating of simplicity with truth doesn't often work in real life. It doesn't often work in science, either." Dr Len Fisher.

User avatar
pdccr
Posts: 1285
Joined: Sun Jan 25, 2009 7:07 pm
Location: Mackay

Re: Arrows and cresting

#6 Post by pdccr » Thu Feb 12, 2009 3:18 pm

Haha thats fair enough, I will pop down to a hobby shop we have in mackay to see if they have some paint, what other motors could you use for the jig?
Cheers, Toby

User avatar
Stickbow Hunter
Supporter
Supporter
Posts: 11637
Joined: Sat Jul 26, 2003 8:33 pm
Location: Maryborough Queensland

Re: Arrows and cresting

#7 Post by Stickbow Hunter » Thu Feb 12, 2009 3:32 pm

Good job Mark, great to see. You can just use a varnish over the stain and then the acrylic cresting paints and then seal with a couple of coats of varnish. I use the Humbroil acrylic hobby paints.

pdccr,

Sowing machine motors work well. You can buy the jigs from FORRO on this site at a good price.

Jeff

User avatar
Trad Bound
Posts: 828
Joined: Sun Sep 10, 2006 3:29 pm
Location: Melbourne,Australia

Re: Arrows and cresting

#8 Post by Trad Bound » Thu Feb 12, 2009 3:59 pm

Mark
Looks really good. With all of you now trad bowers you could be or need to be the arrowsmith of Cranbourne. Or is it Robin and Marion and their merry team of Cranbourne forest. Now on with the leatherwork. Quivers , arm guards, finger tabs, knife sheaths and possibles bags for 4 please. Well done on the arrows.
TonyJ

User avatar
pdccr
Posts: 1285
Joined: Sun Jan 25, 2009 7:07 pm
Location: Mackay

Re: Arrows and cresting

#9 Post by pdccr » Thu Feb 12, 2009 4:11 pm

Haha yer i might have to contract you to be my full time supplier ;) But back on topic, Stickbow, i have an old sowing machine somewhere but i dont think it works. I think i read that a drill works, who has had success with that?
Cheers, Toby

Jaydo
Posts: 595
Joined: Sun Nov 18, 2007 9:36 pm
Location: Canberra ACT

Re: Arrows and cresting

#10 Post by Jaydo » Thu Feb 12, 2009 4:13 pm

Stickbow Hunter wrote: Sewing machine motors work well. You can buy the jigs from FORRO on this site at a good price.

Jeff
is that cresting jigs or tapering jigs jeff ?

jayden
A smile is priceless, yet can make so much difference

User avatar
Stickbow Hunter
Supporter
Supporter
Posts: 11637
Joined: Sat Jul 26, 2003 8:33 pm
Location: Maryborough Queensland

Re: Arrows and cresting

#11 Post by Stickbow Hunter » Thu Feb 12, 2009 4:58 pm

Jaydo,

Yes Keith does the tapering jigs and spine jigs but he used to do a few cresting jigs but he may not be doing them anymore.

Jeff

heavybows
Posts: 57
Joined: Sun May 04, 2008 2:16 pm

Re: Arrows and cresting

#12 Post by heavybows » Thu Feb 12, 2009 6:12 pm

Very Nice arrows. Marlon

User avatar
stringnstik
Posts: 1106
Joined: Tue Oct 21, 2008 12:09 pm
Location: Cranbourne

Re: Arrows and cresting

#13 Post by stringnstik » Fri Feb 13, 2009 12:16 pm

Update - nock glue liquid nails no good!!

right that was the first and last time I use liquid nails.. It didnt hold up to my testing rigors 2 days after gluing. Its not adhering to the plastic nock. Tarzan grip in fact did a better job than construction adhesive. Havent tested the points yet I can test them tomorrow, only fair to give em two days.


Drills,
cordless drills from bunnings or elsewhere. They are cheap now and have a good speed range. Target around 300rpm these drills will go up to 500ish. You can pull it all apart, motor gearbox as one and clamp it to jig and the swtich/throtle mount in a small box. I adjust my speed with a hand knob as you dont need to adjust it that often and I found always having to have my foot on the pedal like a sewing machine was a pain, I do have an on off foot switch tho.

Taper jig
I was lucky here in that I made a sanding disk a while back for general woodwork. All I had to do was add on a 11 and 5 deg setting jig. You can just see? the two nail "stops" which set the depth. No lavish adjustments.
Its all a bit backyardish I admit but then, im working in the backyard!!
Attachments
Taper jig
Taper jig
taper_jig.jpg (41.97 KiB) Viewed 5357 times
"I am the arrow..the arrow is me...together as one...I fly to thee"
"the stick maybe crooked and the string hath no form,
then married by bowyer, transforms when first drawn"
"twang....thud"

User avatar
stringnstik
Posts: 1106
Joined: Tue Oct 21, 2008 12:09 pm
Location: Cranbourne

Re: Arrows and cresting

#14 Post by stringnstik » Fri Feb 13, 2009 12:26 pm

GrahameA wrote:Afternoon Mark and Jape

Being an Armiger I based my cresting on the device - without the cadence mark. However, if you want to get carried away with such you can use transfers and apply the actual device to your shafts. Makes for a conversation topic if nothing else.

Do the research yourself and it will be correct. You also need to have an understanding of colours involved. This is a good a site as any to get an understanding on the topic.

Very interesting Grahame Ill take a few more moments to have a read thru that but so far its interesting to say the least.
"I am the arrow..the arrow is me...together as one...I fly to thee"
"the stick maybe crooked and the string hath no form,
then married by bowyer, transforms when first drawn"
"twang....thud"

jape

Re: Arrows and cresting

#15 Post by jape » Fri Feb 13, 2009 2:30 pm

Mark, I know Grahame had suggested 'construction glue' in other threads so I too tried 'liquid nails' and had my first failures at both ends. Maybe a different formulation in Victoria or maybe it just needs a week to cure and I was too impatient! I have used it building and stuck all sorts of things to each other with it. I have gone back to $2 tubes of superglue which many dislike. I have had no problems with it apart from sticking my fingers to everything and if you use it quite liberally you do have a brief time to adjust feathers and nocks or tips before it sets.

User avatar
stringnstik
Posts: 1106
Joined: Tue Oct 21, 2008 12:09 pm
Location: Cranbourne

Re: Arrows and cresting

#16 Post by stringnstik » Fri Feb 13, 2009 2:47 pm

thanks Jape, I thought it was at least worth a try ;)I dont think 2 days is being impatient. If its not stuck by then I dont think it will. Its not as if the glue broke. Its just not bonding to the plastic. We are funny beings, one works for one another it doesn't. Some like the super glue gel for fletching etc.. I way prefer the more liquid.. Each to their own I guess. I have SG nocks on b4 with no real problem.

I continue the hunt for the ever elusive perfect nock glue ;)
"I am the arrow..the arrow is me...together as one...I fly to thee"
"the stick maybe crooked and the string hath no form,
then married by bowyer, transforms when first drawn"
"twang....thud"

User avatar
Stickbow Hunter
Supporter
Supporter
Posts: 11637
Joined: Sat Jul 26, 2003 8:33 pm
Location: Maryborough Queensland

Re: Arrows and cresting

#17 Post by Stickbow Hunter » Fri Feb 13, 2009 2:59 pm

Some of your glue problems maybe caused from the finish you use on your arra If the finish goes on the nock taper some glues may not stick to it properly. Any glue that melts the plastic on the nocks a little will most likely work well - Fletchtite, C23, Trazans Grip etc. For your points Araldite seems to work as good as anything and I have used it for twenty odd years for that purpose.

Jeff

User avatar
GrahameA
Posts: 4692
Joined: Thu Mar 10, 2005 4:28 pm
Location: Welcome to Brisneyland, Oz

Re: Arrows and cresting

#18 Post by GrahameA » Fri Feb 13, 2009 3:46 pm

Afternoon Jape and Mark
stringnstik wrote:If its not stuck by then I dont think it will. Its not as if the glue broke. Its just not bonding to the plastic. We are funny beings, one works for one another it doesn't. Some like the super glue gel for fletching etc.. I way prefer the more liquid.. Each to their own I guess. I have SG nocks on b4 with no real problem.
Mark the issue with nocks is that the surface is slippery and you need and adhesive that will both bond to it and the shaft material. For plastic nocks I just a fletching glue, C23. Have done so for a long time and do not have issue.

Points. My glue of choice is for metal tips is 24 hour Araldite. I only ever had it fail once and that was the other month. The cause was I glued some tips with cleaning them thoroughly - I pu it down to grabbing the wrong plastic bin of points. The anti-rust coating will stop a good bond - actually it works as a good release agent.

Construction adhesive will bond tips. But you need once again to clean the point and roughen the inside to provide a key for it. Read this>>

My experience indicates that if you do not clean and then roughen the inside of metal tips then the glue will fail. Bond them properly and they are fine. To clean them you need a solvent that will dissolve the protectant (I throw them into a container of the solvent and next day or so get them out) and individually wipe out the inside of everyone. To roughen the inside of the points I use some rough abrasive wrapped around an old drill shaft and the cordless drill. Go to the workshop, take a Coffee with you and listen to the radio whilst do at least 50

As I said earlier, my glue of choice for metal points is 24 hour Araldite - forget the five minute stuff.
Last edited by GrahameA on Fri Feb 13, 2009 7:54 pm, edited 1 time in total.
Grahame.
Shoot a Selfbow, embrace Wood Arrows, discover Vintage, be a Trendsetter.

"Unfortunately, the equating of simplicity with truth doesn't often work in real life. It doesn't often work in science, either." Dr Len Fisher.

User avatar
stringnstik
Posts: 1106
Joined: Tue Oct 21, 2008 12:09 pm
Location: Cranbourne

Re: Arrows and cresting

#19 Post by stringnstik » Fri Feb 13, 2009 6:22 pm

Thanks fellas, I have been using 24 araldite.
Was looking for something a little quicker/easier and trying to simplify reduce my tackle box. C23 I use as well and prefer it just a tad to tarzan grip , its probably the same stuff. I did hunt around to try and find what plastic the nocks were made out of but didnt have much luck. I did clean them but I didnt roughen them up.. about 4 of the 12 failed. The points seem to be ok . I have re tapered and c23 the nocks.
Ill give he points a good test tomorrow and see if I need to redo them.

Its all learning ;)
"I am the arrow..the arrow is me...together as one...I fly to thee"
"the stick maybe crooked and the string hath no form,
then married by bowyer, transforms when first drawn"
"twang....thud"

Coach

Re: Arrows and cresting

#20 Post by Coach » Fri Feb 13, 2009 6:56 pm

Nocks to wood ,, Loctite 406 or 401 ,, its all you will ever need and it does a great job on feathers as well :wink:

User avatar
Antonio
Posts: 210
Joined: Tue Aug 05, 2008 2:47 am
Location: Eastern Suburbs Sydney NSW

Re: Arrows and cresting

#21 Post by Antonio » Fri Feb 13, 2009 9:00 pm

great arrows I have been reading all the posts .has any body tried or thought about using a fan motor.I haven't done any cresting yet but its something I want to do for my next arrows .also thank you for the ideas specially the one about hanging them I never thought of that one .I will use that one thanks. :)

User avatar
pdccr
Posts: 1285
Joined: Sun Jan 25, 2009 7:07 pm
Location: Mackay

Re: Arrows and cresting

#22 Post by pdccr » Fri Feb 13, 2009 9:16 pm

String, where do you get your arrow parts from?
Cheers, Toby

User avatar
Stickbow Hunter
Supporter
Supporter
Posts: 11637
Joined: Sat Jul 26, 2003 8:33 pm
Location: Maryborough Queensland

Re: Arrows and cresting

#23 Post by Stickbow Hunter » Fri Feb 13, 2009 9:42 pm

pdccr,

I would suggest that you try the suppliers on the front page of this site.

Jeff

User avatar
pdccr
Posts: 1285
Joined: Sun Jan 25, 2009 7:07 pm
Location: Mackay

Re: Arrows and cresting

#24 Post by pdccr » Fri Feb 13, 2009 9:43 pm

Ok checking it out now.
Cheers, Toby

User avatar
Stickbow Hunter
Supporter
Supporter
Posts: 11637
Joined: Sat Jul 26, 2003 8:33 pm
Location: Maryborough Queensland

Re: Arrows and cresting

#25 Post by Stickbow Hunter » Sat Feb 14, 2009 10:09 am

pdccr,

I guess because you don't allow PM notifications etc you haven't noticed that you have a PM in your inbox. :wink: :D

Jeff

User avatar
pdccr
Posts: 1285
Joined: Sun Jan 25, 2009 7:07 pm
Location: Mackay

Re: Arrows and cresting

#26 Post by pdccr » Sat Feb 14, 2009 11:05 am

I got it mate :)
Cheers, Toby

wal
Posts: 285
Joined: Mon Nov 27, 2006 7:27 am

Re: Arrows and cresting

#27 Post by wal » Mon Feb 16, 2009 9:36 pm

Stick, bloody good thread mate, got me lookin' at the tradbits.com.au site for some gear myself.

Cheers

User avatar
Stickbow Hunter
Supporter
Supporter
Posts: 11637
Joined: Sat Jul 26, 2003 8:33 pm
Location: Maryborough Queensland

Re: Arrows and cresting

#28 Post by Stickbow Hunter » Mon Feb 16, 2009 9:43 pm

Stick,
I think you meant 'String'. :D I agree though, great thread.

Jeff

Post Reply