Flu-Flu Buildalong (Pic Heavy)

How to make a Bow, a String or a Set of Arrows. Making equipment & tools for use in Traditional Archery and Bowhunting.

Moderator: Moderators

Post Reply
Message
Author
User avatar
hillbilly WA
Posts: 122
Joined: Wed Jun 27, 2007 8:15 pm
Location: Hills of Perth, WA

Flu-Flu Buildalong (Pic Heavy)

#1 Post by hillbilly WA » Sun Oct 26, 2008 12:23 pm

Hi guys and galls
Don't know if anyone wants this, but as i was building them anyway, thought i would take some progress shots of how i built my Flu-flus.

For these i used Victorian Ash Shafts from FORRO on this site. VA is really nice, bit heavier than POC, but much stronger.

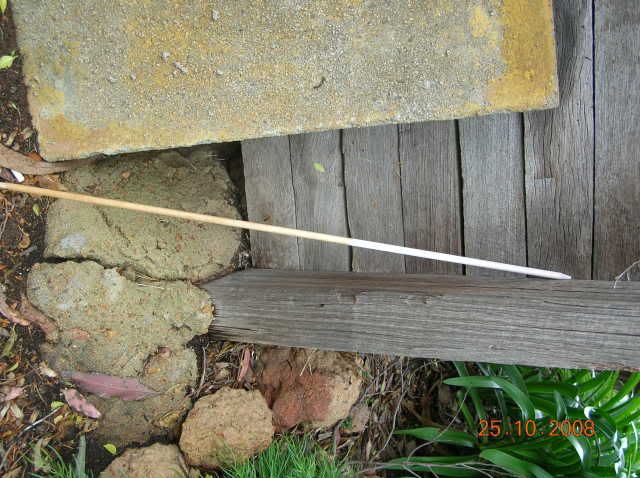
First the shaft is cut down to length, before being tapered with a tapering tool, then sanded with fine grit sandpaper (i think i used 1200), and finally coated with a sealant. For the sealant i used some varnish which we had in our shed. Then after a couple of coats and leaving to dry for a long time (i do mine just before i go to school), paint can be added. Some people do 'dipping', but i prefer to spray mine.
Here's where were up to:
Image
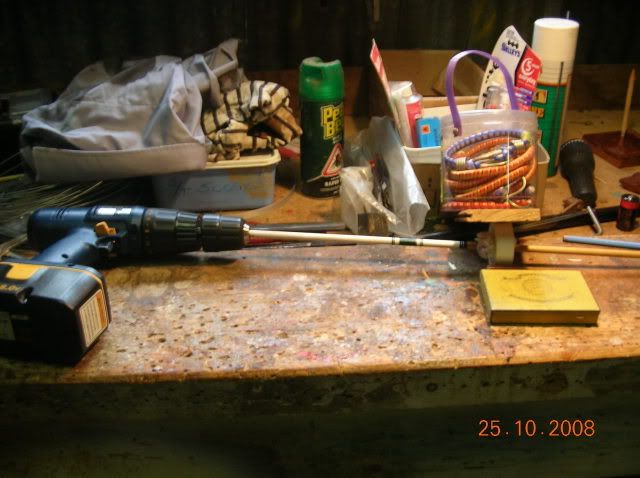
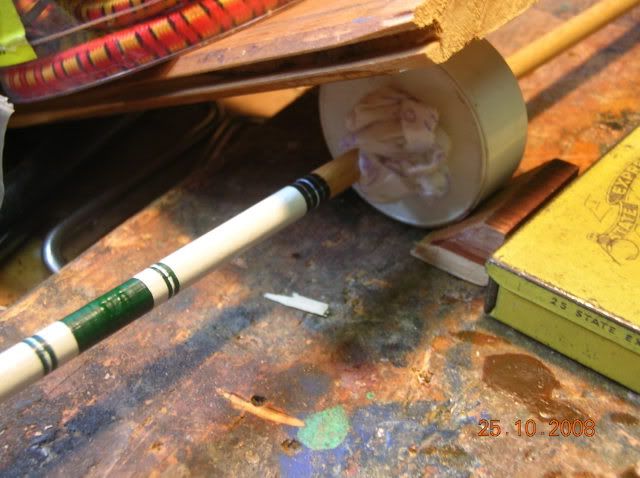
After this comes the cresting. This is an optional stage and lots of people prefer to just keep their arrows simple, however i usually do cresting as i like doing it and it makes the arrows look impressive, as well as adding a personal touch. For this i used citadel paints (they are very good!), a cordless drill for my lathe, and roll of tree-marking tape (the stuff that builders use to mark off areas and loppers use to mark trees) stuffed with a tissue. Very complex i know :P .
Here's the Jig.
Image
Image
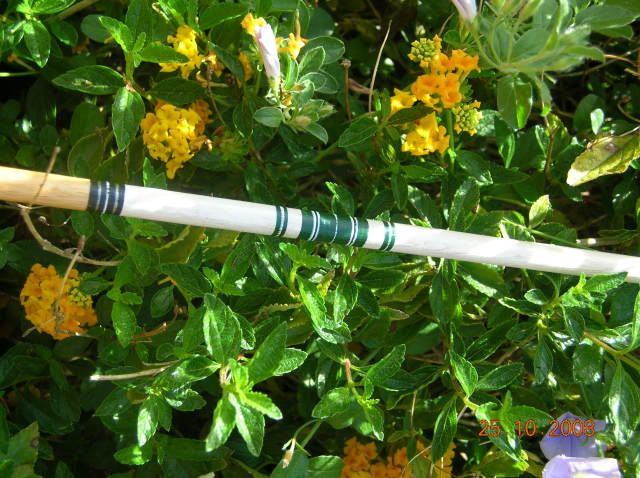
And the finished cresting
Image
Next comes the fletching. I did not have a fletching jig at the time so i had to hand fletch it. With a bit of cheating :wink: .

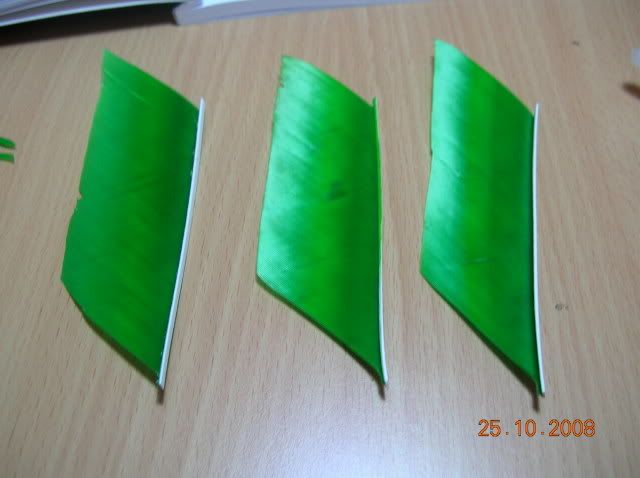
First cut the leading and trailing edges of the feather about 3mm in, then put a dab of glue down at the leading edge of the feather on the shaft and hold the edge of the feather in it till it is holding, this is just to hold it for you until you get the binding on the leading edge of the feather, i used Fletch-Tite, however there are much better glues for this job, this was a real pain in the rear end. Also, i used a random full length feather that my brother had in his box, cut into two, i would advise the use of Trueflight as they're really nice.
Feathers cut and ready.
Image
Glued on the shaft.
Image

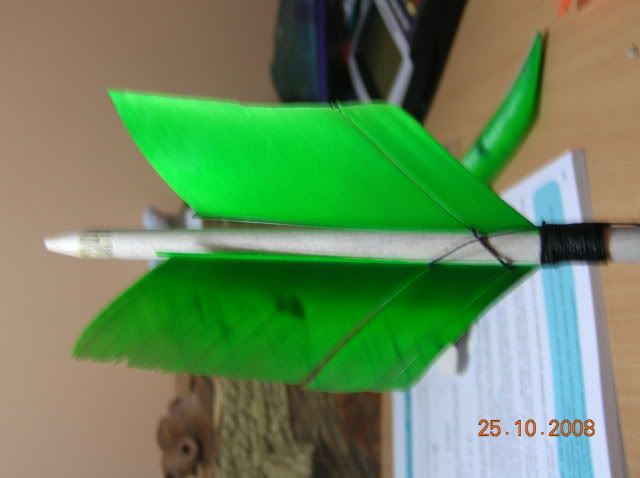
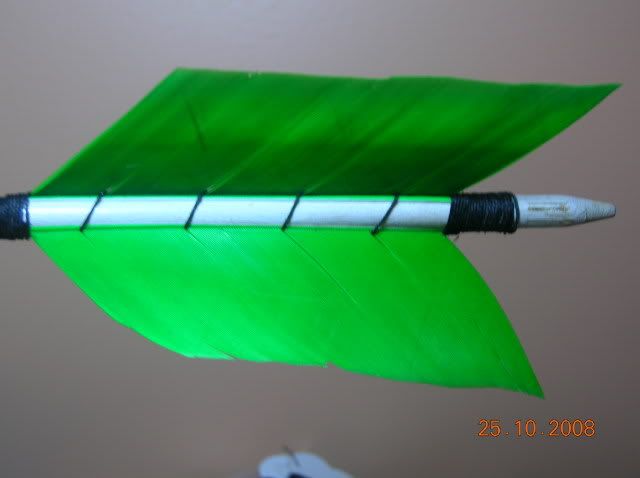
After this comes the Binding.
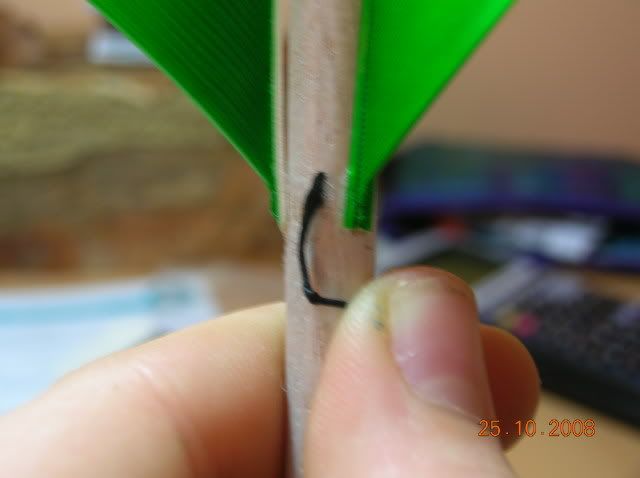
I used some upholstery thread as it is strong and waxy, however i have also used cotton and lots of other threads, basically anything works. Starting with a tree-hitch (i forgot the name of this knot?) you make a curve in the thread, before wrapping the binding back over itself. Once on the leading edge, make sure the feathers are straight and in the place where you want them. Then wrap the binding around the feathers, splitting them apart for each wrap. Once you get to the top, bind past the feathers and finish it off with a knot. I use a really basic modification of an hitch then an overhand with a bit of glue to help.
Starting the binding:
Image
Working up:
Image
Finished:
Image

After this, nocks and points are added with an epoxy (araldite 24 hour works really well), and then the arrow is finished.
Now do this times three, six, or twelve :wink: :P

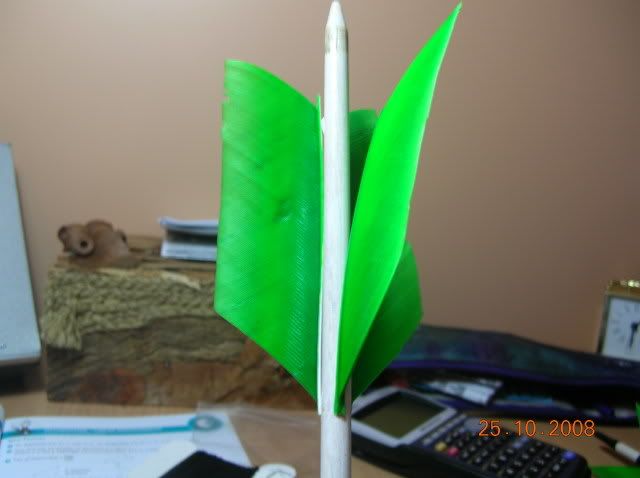
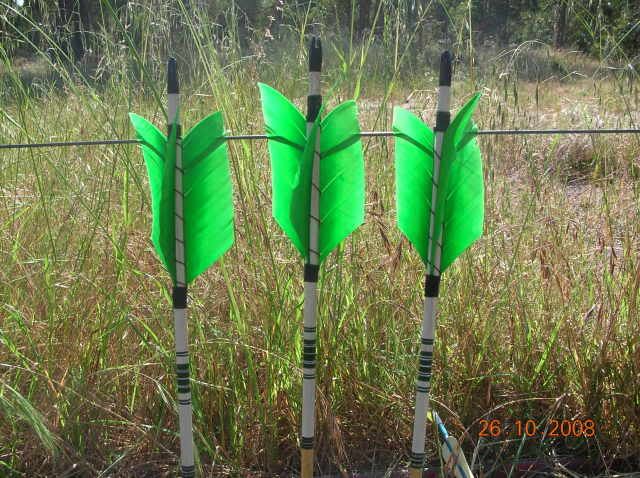
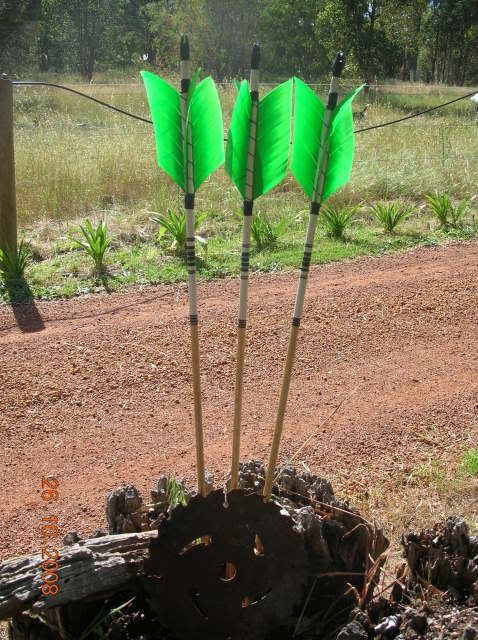
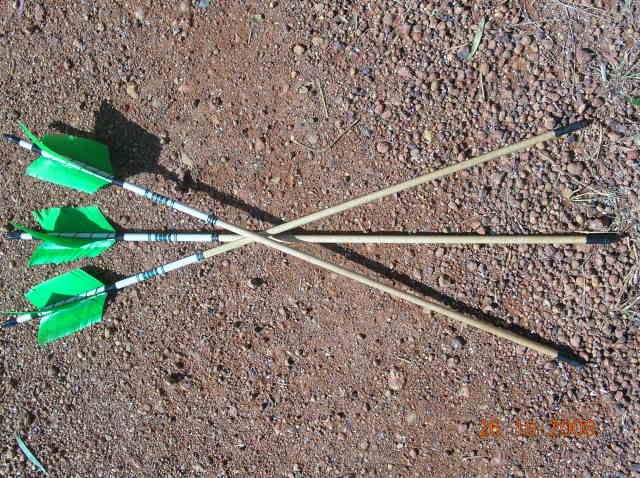
Finished pics:
Image
Image
Image

Thanks, Carl
Last edited by hillbilly WA on Sun Oct 26, 2008 12:44 pm, edited 2 times in total.
I did have a signature... It was a very good one in fact... It made me laugh... But i lost it... So i dont have one anymore.

User avatar
outbackarcher
Site Admin
Posts: 255
Joined: Mon Oct 20, 2008 1:02 pm
Location: dalby QLD

Re: Flu-Flu Buildalong

#2 Post by outbackarcher » Sun Oct 26, 2008 12:35 pm

wow

nice job carl those are some nice arrows nice job on the cresting
Trad archery and bowhunting all the way.

User avatar
Gringa Bows
Posts: 6331
Joined: Thu Aug 30, 2007 7:09 pm
Location: Bundaberg QLD

Re: Flu-Flu Buildalong (Pic Heavy)

#3 Post by Gringa Bows » Sun Oct 26, 2008 1:02 pm

very good job Carl,i'll have to have a go at making some one day.

User avatar
UPTHETOP
Posts: 1187
Joined: Mon Jun 11, 2007 9:03 pm
Location: Dalby
Contact:

Re: Flu-Flu Buildalong (Pic Heavy)

#4 Post by UPTHETOP » Sun Oct 26, 2008 3:17 pm

Carl nice flu flu's do you glue or seal your thread on the feathers at each end. ?

I like the green .

Cheers Wayno
Justastik Arrow Craft, Its all about the Wood.

User avatar
Stickbow Hunter
Supporter
Supporter
Posts: 11637
Joined: Sat Jul 26, 2003 8:33 pm
Location: Maryborough Queensland

Re: Flu-Flu Buildalong (Pic Heavy)

#5 Post by Stickbow Hunter » Sun Oct 26, 2008 5:10 pm

They look great mate - congrats!!!

Jeff

User avatar
hue
Posts: 643
Joined: Tue May 22, 2007 5:37 pm
Location: Blackburn,Melbourne,Australia

Re: Flu-Flu Buildalong (Pic Heavy)

#6 Post by hue » Sun Oct 26, 2008 6:14 pm

hey Hilly

you put me to shame, i've never made my own flu flus' and i learnt more in the last 5 minutes than i have for quite a while.
great job and they look terrific!

Hue
I can only be who I am

User avatar
prasamaccus
Posts: 71
Joined: Wed Jul 02, 2008 1:21 pm
Location: Penguin Tas

Re: Flu-Flu Buildalong (Pic Heavy)

#7 Post by prasamaccus » Mon Oct 27, 2008 7:38 am

Good job, another thing to add to my to do list.
"These new arrows are useless they keep going where I'm aiming instead of where they are supposed to go"

User avatar
White Hawk
Posts: 436
Joined: Tue Aug 15, 2006 11:26 am
Location: Melbourne
Contact:

Re: Flu-Flu Buildalong (Pic Heavy)

#8 Post by White Hawk » Mon Oct 27, 2008 9:32 am

Good on ya Carl, these kind of build-a-longs are very useful for newbies to trad archery or to people wanting to give making their own arrow a go. A great resource.

An excellent job mate

Gav
~ The wise man seeks the harmony of the circle
The spiritual man seeks the nothingness it surrounds
The complete man understands they are the same

User avatar
hillbilly WA
Posts: 122
Joined: Wed Jun 27, 2007 8:15 pm
Location: Hills of Perth, WA

Re: Flu-Flu Buildalong (Pic Heavy)

#9 Post by hillbilly WA » Mon Oct 27, 2008 11:10 am

Wow, thanks for all the comments guys!
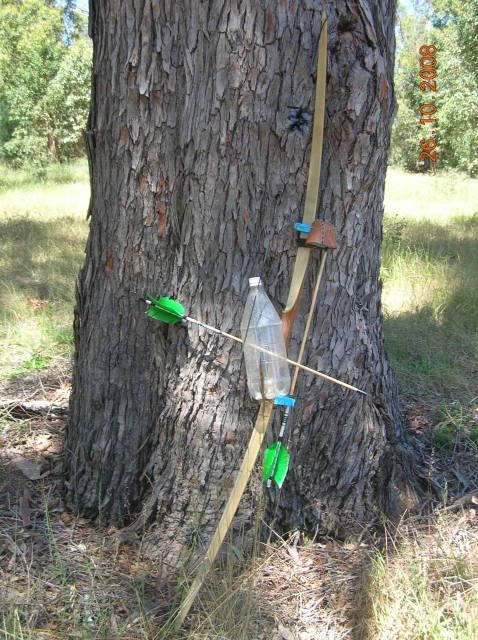
I took them out for a shoot in the beautiful weather yesterday.
First kill :lol: :D Brother threw it up and i hit it first shot. It felt beautiful.
Image
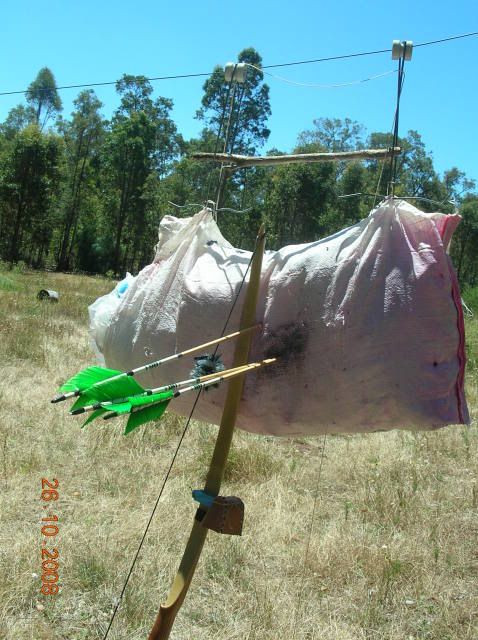
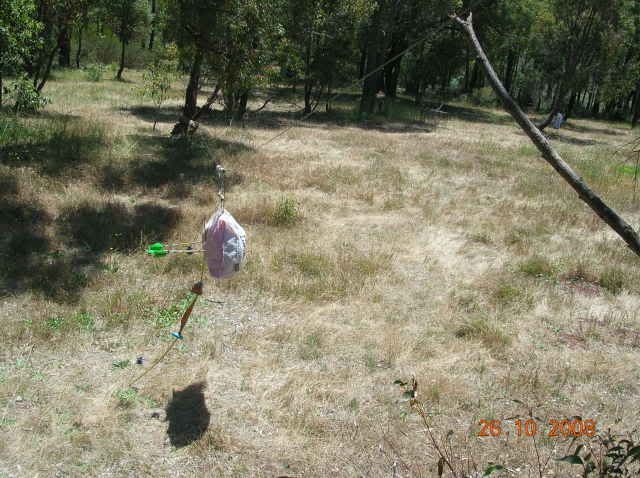
and our moving target that me and my brother set up two weeks ago. It's wire with ceramic electric fence insulators as the runners. And the target is a horse feed bag stuffed with plastic. I would strongly recommend you guys to try these targets, they are really light - only a bit heavier than my bow - and cheap, the only thing bad about them is hitting the edges can sometimes be a pass-through.
Image
Image
Thanks guys, Carl
I did have a signature... It was a very good one in fact... It made me laugh... But i lost it... So i dont have one anymore.

User avatar
hue
Posts: 643
Joined: Tue May 22, 2007 5:37 pm
Location: Blackburn,Melbourne,Australia

Re: Flu-Flu Buildalong (Pic Heavy)

#10 Post by hue » Mon Oct 27, 2008 12:52 pm

well Hilly

what can i say. i am so rapt to see someone your age go to that kind of trouble and your own handiwork, Works! proud feeling isn't it? who knows, we might have another "Hill" soon.

Hue
I can only be who I am

User avatar
Stickbow Hunter
Supporter
Supporter
Posts: 11637
Joined: Sat Jul 26, 2003 8:33 pm
Location: Maryborough Queensland

Re: Flu-Flu Buildalong (Pic Heavy)

#11 Post by Stickbow Hunter » Mon Oct 27, 2008 3:09 pm

Excellent mate!!!

Jeff

User avatar
stringnstik
Posts: 1106
Joined: Tue Oct 21, 2008 12:09 pm
Location: Cranbourne

Re: Flu-Flu Buildalong (Pic Heavy)

#12 Post by stringnstik » Tue Oct 28, 2008 12:11 pm

Nice work Hilly, I hope all the other lads out there put down their silly Nintendo DS pacifiers and get into something more constructive like this ;)

BTW as a newb great resource and I noticed the quiver dodad you have on the bow. The blue looking thing. info and or close up on that would be useful to me.

ta
"I am the arrow..the arrow is me...together as one...I fly to thee"
"the stick maybe crooked and the string hath no form,
then married by bowyer, transforms when first drawn"
"twang....thud"

jape

Re: Flu-Flu Buildalong (Pic Heavy)

#13 Post by jape » Tue Oct 28, 2008 3:03 pm

Yeah, well done Carl! Simple and straightforward and informative. I just hung a plastic bottle from a tree out the paddock to see how I went, missed it six out of six! So good shooting as well as good constructing. Keep it up. Make me feel better and tell me you didn't really get those three arrows so close on that target ....

Hills Twinky
Posts: 33
Joined: Tue Oct 21, 2008 11:32 pm
Location: Perth Hills (the sticks)

Re: Flu-Flu Buildalong (Pic Heavy)

#14 Post by Hills Twinky » Tue Oct 28, 2008 3:38 pm

Nice work carl :D i forgot to check your arrows out last night, bugger, i cant wait to come down and have a shoot at moving target, i havent got to see it yet! keep up the good work mate and cheers for being my teacher in the art of Trad Archery!
Catcha soon
Vaughn
If A is success in life, then A equals x plus y plus z. Work is x; y is play; and z is keeping your mouth shut.
Albert Einstein

User avatar
Nephew
Posts: 3046
Joined: Thu Aug 23, 2007 1:28 pm
Location: Coochiemudlo Island,Moreton Bay, Qld.

Re: Flu-Flu Buildalong (Pic Heavy)

#15 Post by Nephew » Tue Oct 28, 2008 8:59 pm

Mate, you are obviously fair dinkum about your archery and that is just great to see! Good onya young fella!! A very good tutorial as well. Good lad.
Lately, if life were treating me any better, I'd be suspicious of it's motives!

User avatar
hillbilly WA
Posts: 122
Joined: Wed Jun 27, 2007 8:15 pm
Location: Hills of Perth, WA

Re: Flu-Flu Buildalong (Pic Heavy)

#16 Post by hillbilly WA » Tue Oct 28, 2008 11:12 pm

Wow, thanks for all the comments guys,
Stringnstik, it's just a bow quiver that i made from some plans i got on the internet, with leather and some blue foam i bought from Clarke Rubber. If you've got a bandsaw and some basic tools you can make it. The only thing that you need 'specialised' tools for is to make the form to put the hood on to allow it to take the shape. I kept my form block and the plans, i can mail them to you if you want, if you PM me your address. I also added an extra piece of foam on the hood piece of mine, which is that big blue bit that you can see, it works but if i did it i would use a better system of securing it to the limbs, just stops it being held on by foam, string, and leather straps :lol: .
Carl
I did have a signature... It was a very good one in fact... It made me laugh... But i lost it... So i dont have one anymore.

User avatar
pdccr
Posts: 1285
Joined: Sun Jan 25, 2009 7:07 pm
Location: Mackay

Re: Flu-Flu Buildalong (Pic Heavy)

#17 Post by pdccr » Wed Feb 04, 2009 8:21 am

Nice buildalong! I am going to have a try at making some one day.

Cheers, CCR
Cheers, Toby

Post Reply