Time for the next post. I told you it wouldn’t take long. In this thread we will be figuring out how wide to make our bow’s limb now that we know how thick to make it.
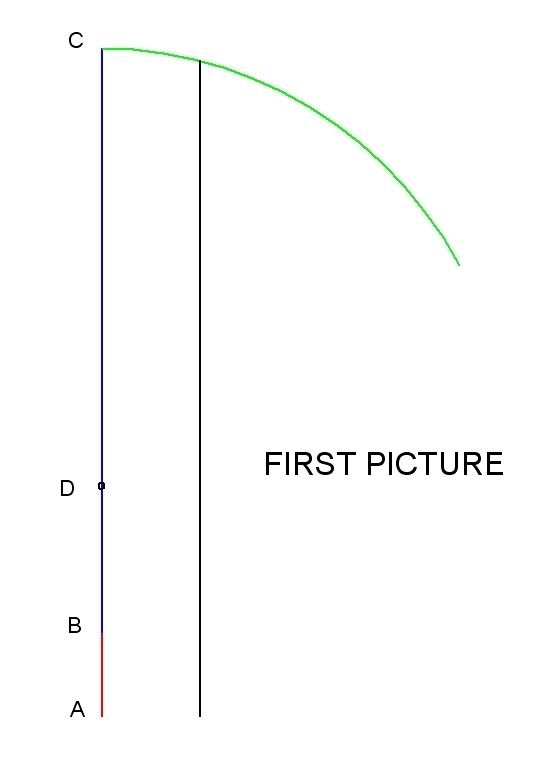
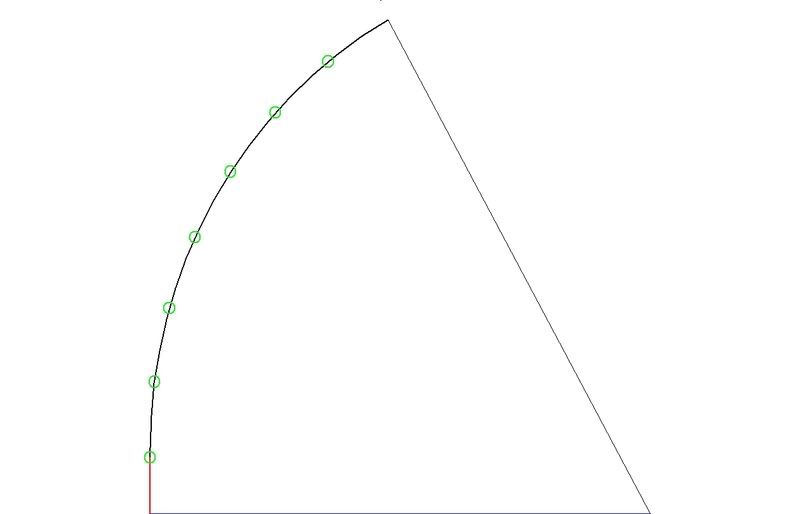
See below for an image of half the previously described bow, with some green dots. I have in this picture divided the limb up into 10cm sections. Seven of them. More is better, but seven will do.
An interesting feature of a bow’s width profile is that it is always proportional. If a given optimum bow has, at a particular draw weight fades 50mm wide and tips 10mm wide, then a bow with twice the draw weight will have fades 100mm wide and tips 20mm wide. Actually, ideally a bow’s tips should have a width of zero but I’ll save that for when we have the chat about the tooth fairy and the easter bunny.
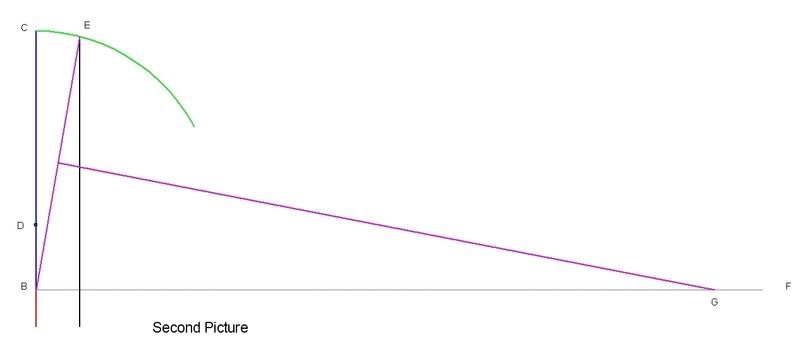
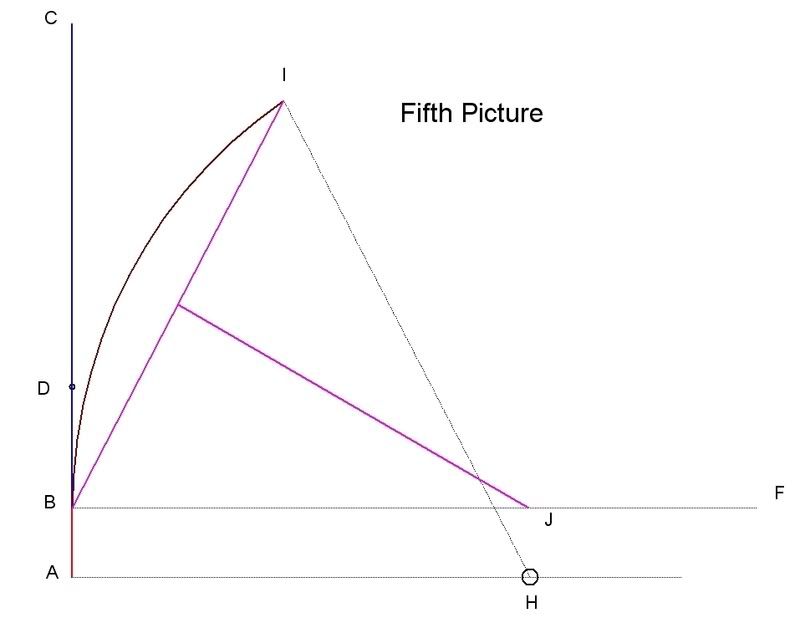
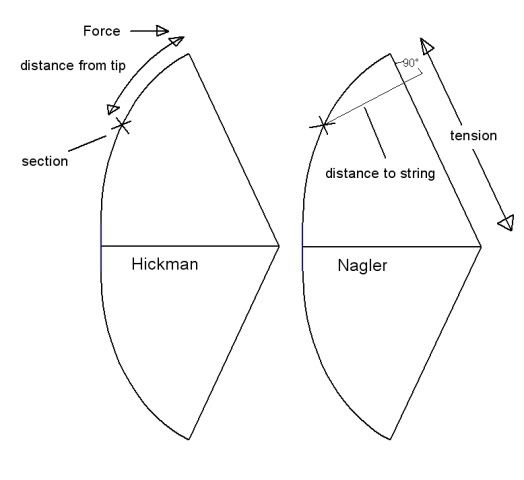
Another peculiarity, this time of only pyramid bows, is that the length of lines we use to calculate the bending moment (see the line marked ‘distance to string’ on the pic below) are representative of the relative widths of each segment of the bow. I know, you must have the confused puppy face again by now so it’s time for another piccie.
If I draw a line from each little green circle to the string, so that the line I draw is at right angles to the string, then I’ll get a diagram like the following:
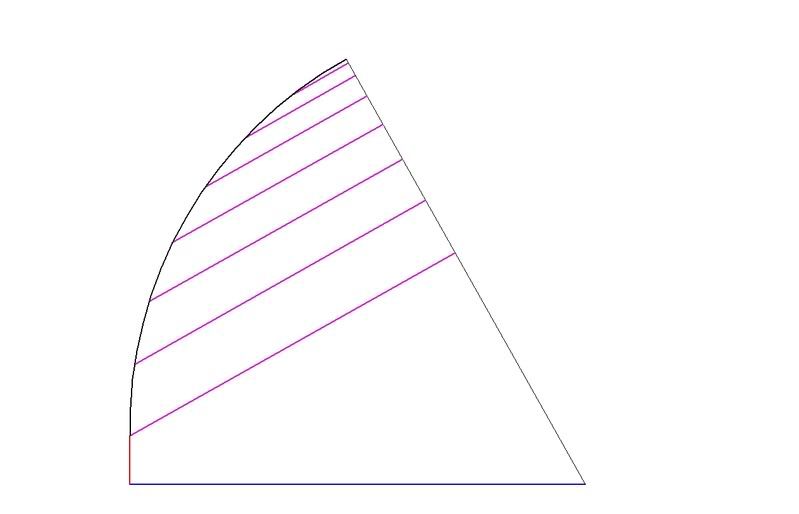
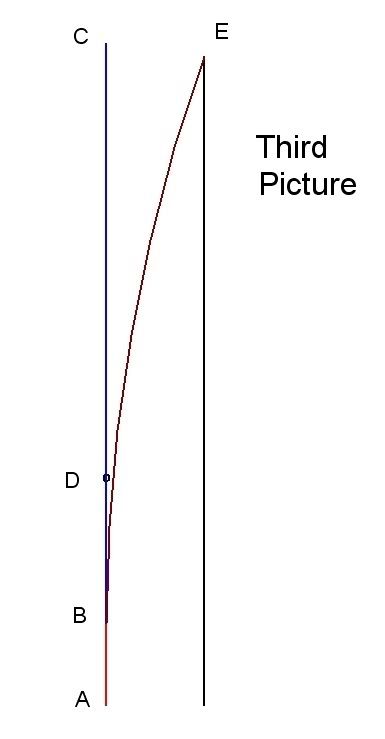
If I then draw a straight line the same length as the length of the limb, and split it into the same number of sections that I split the limb into, and redrew each purple line at its corresponding point on the straight line (wait for it) I will get a diagram as follows:
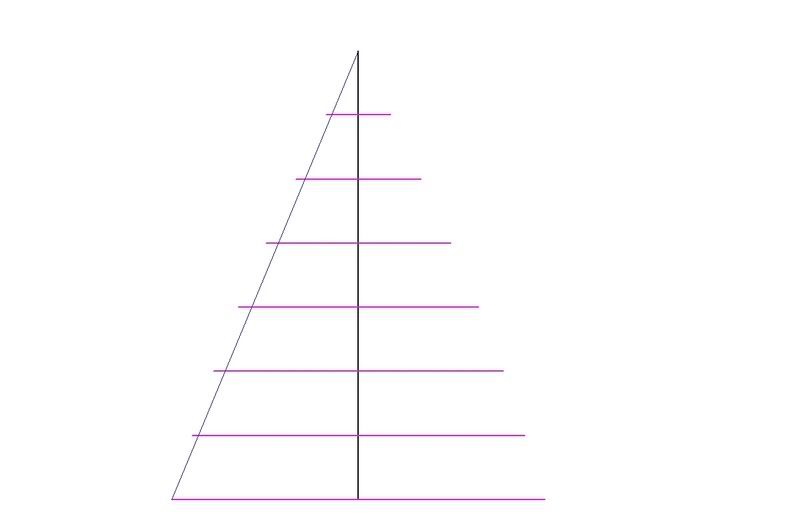
The thin blue line is a straight line between the widest section and the end of the bow limb. This is to illustrate that the limbs of a pyramid bow do NOT taper in straight lines but rather bulge slightly. This diagram also goes some way to demonstrating that in an ideal world, the tips of bows would have zero width.
The ratio of the length of these lines is the same as the width profile of a finished bow. Of course, the proportion of the length of these lines are not also in proportion to the length of the limb!!
From here, there are a couple of ways to proceed. If you wanted to make a bow of the length, draw length and whatnot of the one I have drawn, you can stop reading before the end of this post and go and do it. What you do is this:
Figure out how thick you need the limb to be.
Draw your width profile such that the fades are 2†wide, and the rest of the sections are to scale. To make it easy for you here are the numbers calculated for you:
Distance from fade (mm) --------width (mm)
0----------------------------------------50
100-------------------------------------44.6
200-------------------------------------38.9
300-------------------------------------32.2
400-------------------------------------24.8
500-------------------------------------16.8
600-------------------------------------8.6
700 (tip) ------------------------------8.6
So draw that out, make up a handle/fade configuration, cut it out, and cut some nocks in. Measure the draw weight at full draw (see note below).
Divide the weight you want by the weight you have. For example, if you had 65lb but wanted 44, divide 44 by 65, which equals 0.67.
Multiply the width of each section by this number, draw new lines on, then carefully plane down to those new lines. This could potentially leave your tips as narrow as 3-4mm. If you’ve not made many bows, let no part of your bow be narrower than say 8-10mm. This means having slightly wider tips proportionately, but never mind. Having a bow that shoots is a Good Thing.
There you go. Go to it and make yourselves some pyramid bows.
NOTE I skipped a large bit there. When I say measure the bow at full draw, I didn’t mention that you have to carefully brace the bow and slowly bring it up to full draw, just like you would need to on a normally tillered bow. Make sure you check for stiff spots or hinges. Proceed as you would with a normal bow but tiller VERY carefully if it needs any.
Right, for those of you who are still awake, and still here, let’s move on. The others will be back in a bit when they’ve conquered that beast.
To figure out exactly how wide the limbs need to be for your intended draw weight, we need to use some more formulas. I know, I can hear you groaning. I’ll try to keep this as painless as possible.
First, you have to know the angle between the arrow (which is the direct line of force) and the string (which is the means by which the force is transmitted to the bow tips).
For the 62†bow pictured, it’s easy. I’ll tell you. It’s 61 degrees. If you’re drawing your own bow, you’ll have to figure it out yourself.
With this, we need to figure out how much tension will be in the string at full draw, at our intended draw weight. For this example, I will use a figure of 44lb. This is 20kg, just for you young spring chickens. Knowing the kg is good here. This is so you can more easily convert your draw weight into a draw FORCE proper, in newtons. To get newtons, multiply your draw weight by 9.8. Thus, our 44lb bow will have a draw force of 195.7 Newtons. Who picked my mistake? The force we need is actually HALF of that number I just told you. This is because we are actually calculating HALF a bow, which we will make two of to make whole bow. So HALF of 195.7 is 97.85 Newtons.
To find the tension in the string, put your draw force (in newtons) into this formula:
Tension = draw force/(COS angle) you need a scientific calculator to figure out what cos of the angle is. Why? Just cos. The calculator built into Microsoft windows has a cos function. Change the view to ‘scientific’.
So back to our example, if this bow were to draw 44lb the string tension would be about 201.8 N. Remember this number.
The formula for figuring the width of a bow’s section is given as:
W=(6dt)/(S(T^2))
Where:
W= width
d= distance to string
t= tension
S= desired stress
T= thickness
Now don’t be scared by the formula. It’s not that bad. The ‘distance to string’ is that same annoying thing I keep going on about. From your bow section where you want to calculate the width, draw a line to the string, such that it is a right angles to the string.
It’s for this reason that drawing in a CAD program is really good. You can also do it on a massive sheet of paper. The bigger the better. Can get fiddly though. To make it easy for you, here are some measurements for the bow in this example:
Section-----distance to string (mm)
1 (fades)-----------------582.5
2--------------------------520.1
3--------------------------453.6
4--------------------------375.9
5--------------------------289.7
6--------------------------196.9
7--------------------------99.5
Of course you’ll get far more satisfaction measuring up a bow you drew yourself.
So, using the above numbers, formulas and mechanical properties, we get some dimensions as follows:
Distance from fade------width
0-----------------------------------67
100--------------------------------59.9
200--------------------------------52.2
300--------------------------------43.3
400--------------------------------33.3
500--------------------------------22.7
600--------------------------------11.5
Just out of interest, compare these figure with the table I put in above showing the relative widths of the ‘distance to string’ lengths above. Pretty darn close in proportion. Not exact, which is a pain, but when you’re dealing with four variables and four decimal places, these things are bound to happen.
Why was it so wide? Well, there's a couple of reasons. Firstly, is the short length. The shorter you make a bow the wider and thinnner it must be to reduce string follow.
Secondly, the figure I used for the allowable stress may have been too low. It is possible that perhaps in my bend test I should have carried on a little longer to get a bigger set and a bigger bending stress. Doing this would have resulted in a thicker bow, which would automatically have made it narrower. So in your own bend tests and bow-dimension calculations, play around with how much bending stress you use and see how much it affects the final dimensions. To get a narrower bow, you mayhave to put up with slightly more set.
That’s pretty much it for pyramid bows. As long as you undermestand what I’ve written, you can pretty much make whatever pyramid bow to whatever specification you like.
I’ll give you some time to read through all this before we move onto the real toughy- elliptically tillered bows.
NOTE: this thread is about using maths to make bows, not about how to work wood. While I didn’t say at any point that you should pencil in your lines, cut to just outside them and then sand down to them, this is of course best practise. It may also be worth adding just a couple of mm to the thickness and width for the first few, just as insurance.
Ciao,
Dave