Big Brother's first trad bow - fourth update

How to make a Bow, a String or a Set of Arrows. Making equipment & tools for use in Traditional Archery and Bowhunting.

Moderator: Moderators

Message
Author
User avatar
rodlonq
Posts: 2096
Joined: Wed May 06, 2009 3:02 pm
Location: Ingham NQ

Big Brother's first trad bow - fourth update

#1 Post by rodlonq » Mon May 23, 2011 10:59 pm

Back again to take up your time. Today I took the first bow out of my new DR form that I have been working on for months in the bit of spare time I get. I am making this one for Mike's big brother Jesso who is a 120 kg refrigerator style of bloke about 6"3 tall. I am hoping it comes out around 55#@28" 70"NTN to suit his 30-31" which should have about 60#+ draw weight (he uses a 70# wheelie bow up till now, and we don't have to cut down his shafts). Problem is he is a lefty so I won't be able to tune it and his form is crappy from more time on WOW than practicing form. I probably can't draw it anyways cos I'm getttin' too soft for that kind of poundage. There are a few photos of the progress from the new form being laid out to the first blank from it. Sorry I didn't take more photos because I REALLY VALUE THE TIME YOU BLOKES ON HERE TAKE TO PUT ON BUILD-ALONGS FOR US NEWBIES but I really don't feel qualified to be giving advise to anyone about bow making. In order are photos of the form marked out (my own hair-brained design), the form ready to use, the parts assembled for a first look-see, a picture of the riser with glue showing up the colours of the kwila, bamboo, New Guinea rosewood (thanks Wayno), Burdekin plum and a little bit more NG rosewood, and a picture of the blank with all the glue drippings cleaned off. Some of you will probably notice I put 2 lams in back of the riser and 2 at the face, instead of the traditional 3 at the back and 1 at the face. I don't know if it makes any difference but my OCD condition couldn't let me go without the symmetry from the first option. I hope this is not disadvantageous to performance? Will take some more photos as it progresses and add to this thread. Thanks again for looking fellas.
DRFormMarkedOut.jpg
DRFormMarkedOut.jpg (105.82 KiB) Viewed 4330 times
DRForm.jpg
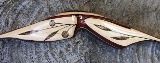
DRForm.jpg (128.03 KiB) Viewed 4330 times
Layup1.jpg
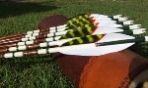
Layup1.jpg (136.8 KiB) Viewed 4330 times
Layedup2.jpg
Layedup2.jpg (148.55 KiB) Viewed 4330 times
JessosBlank.jpg
JessosBlank.jpg (157.68 KiB) Viewed 4330 times
Cheers.............. Rod
Last edited by rodlonq on Thu Jun 02, 2011 8:21 pm, edited 3 times in total.

User avatar
Gringa Bows
Posts: 6331
Joined: Thu Aug 30, 2007 7:09 pm
Location: Bundaberg QLD

Re: Big Brother's first trad bow

#2 Post by Gringa Bows » Mon May 23, 2011 11:26 pm

looking good too ,doing your lams like that wont effect performance... :wink:

User avatar
rodlonq
Posts: 2096
Joined: Wed May 06, 2009 3:02 pm
Location: Ingham NQ

Re: Big Brother's first trad bow

#3 Post by rodlonq » Mon May 23, 2011 11:31 pm

Thanks Rod, I am glad I didn't make a bad blue doing it that way.

Cheers..... Rod

User avatar
Gringa Bows
Posts: 6331
Joined: Thu Aug 30, 2007 7:09 pm
Location: Bundaberg QLD

Re: Big Brother's first trad bow

#4 Post by Gringa Bows » Mon May 23, 2011 11:35 pm

Rod what length riser did you use.?

User avatar
rodlonq
Posts: 2096
Joined: Wed May 06, 2009 3:02 pm
Location: Ingham NQ

Re: Big Brother's first trad bow

#5 Post by rodlonq » Mon May 23, 2011 11:40 pm

16" Rod.

User avatar
Stickbow Hunter
Supporter
Supporter
Posts: 11637
Joined: Sat Jul 26, 2003 8:33 pm
Location: Maryborough Queensland

Re: Big Brother's first trad bow

#6 Post by Stickbow Hunter » Tue May 24, 2011 8:51 am

Another one of those whoopy bows. :wink: :lol:

Jeff

User avatar
Steven J
Posts: 797
Joined: Fri Apr 27, 2007 10:13 pm
Location: away for a while...
Contact:

Re: Big Brother's first trad bow

#7 Post by Steven J » Tue May 24, 2011 11:49 am

I think that your form needs some work. Some drips of epoxy and a few superfluous holes should be drilled in for good measure. Then you need to stuff some mud in the holes to simulate what the mud wasps will do. Only then will you get a good bow :wink:

Almost all of my bows have been 2 lams on the back and 2 on the belly. I think it looks better when you use different timbers in the core. They sort of wrap around the riser wood and frame it. The only bows that have not had 2/2 are bows that only have 3 laminations.

Well done mate. It looks like a promising bow.

Steve
http://www.stevenjawerth.weebly.com

On Christ the solid rock I stand, All other ground is sinking sand. Edward Mote, 1797-1874

User avatar
rodlonq
Posts: 2096
Joined: Wed May 06, 2009 3:02 pm
Location: Ingham NQ

Re: Big Brother's first trad bow

#8 Post by rodlonq » Tue May 24, 2011 6:45 pm

Jeff, yer I reckon it's a bit chicken too. Its very easy to see when something that is supposed to be straight is not (like the 1/4" string follow in my straight laid bow drives me nuts). It would be nigh impossible to tell if the limbs follow the string with the whoopy design :D .

Steven, it wont take long for the form to start looking pretty ordinary. I am already working on a mechanism to hold the riser in the centre of the form but still allow it to move down as the pressure is applied. Every bow I have made so far has had the riser slip toward one limb tip a little bit while trying to get the face side lams taped down :roll: .

Cheers, Rod

User avatar
Flatliner
Posts: 449
Joined: Fri Apr 08, 2011 6:12 pm
Location: Gordonvale NTH QLD

Re: Big Brother's first trad bow

#9 Post by Flatliner » Tue May 24, 2011 9:17 pm

Jeese Rod your set up looks way more pro than mine :oops: :lol: . What's the electrical gizzmo you've got pluged in above the riser, a temp gage or something?
Very nice work, on both the form and the bow 8) . Just saw your other thread and I reckon you're well qualified to hand out a bit of advice, I'd listen :D .

Rob.
Last edited by Flatliner on Fri May 27, 2011 10:07 pm, edited 1 time in total.
The shortest distance between two points is a FLATLINE
ImageEmail; robnicoll(at)bigpond(dot)com
www.flatlinebows.com.au

User avatar
rodlonq
Posts: 2096
Joined: Wed May 06, 2009 3:02 pm
Location: Ingham NQ

Re: Big Brother's first trad bow

#10 Post by rodlonq » Wed May 25, 2011 8:18 am

Gidday Rob,

Thank you for your kind words. The gizmo is a thermocouple probe. It measures temperature which is read from the multimeter ($40 something from Dick Smiths). I am using Bingham's heat strip set up to cure the smooth-on and I like to keep a close eye on the temperature at least until I know it is consistent. So far I have worked out that if I turn it up to full power for 1/2 hour then back to 2/3 power it will stay very close to 65C . I note that before Christmas when I made my first bow it was about 40C in the shed and it only needed 1/2 power to maintain temp. I should do the right thing and record the temp setting relative to ambient to future reference.

The reason I have it in the little spacer above the riser is because they recommend putting it between the metal pressure strip and the glass at the end. Well with 65 psi in the hose I reckon that has to deform the bow blank some what and bend things. I reckon the best place is out of the way in the middle in a part that should be at the same temperature as the rest of the blank.

One other thing I do to ensure consistency is I keep the pressure connected to the air hose the entire time and simply set the pressure regulator at 65 psi. I leave the pressure on the blank while it is cooling as well.

Cheers, Rod

User avatar
rodlonq
Posts: 2096
Joined: Wed May 06, 2009 3:02 pm
Location: Ingham NQ

Re: Big Brother's first trad bow - second bit

#11 Post by rodlonq » Fri May 27, 2011 9:54 pm

HaHa, I just spent an hour building the post for the next bit and must have hit delete instead of submit - what a tool!

User avatar
Flatliner
Posts: 449
Joined: Fri Apr 08, 2011 6:12 pm
Location: Gordonvale NTH QLD

Re: Big Brother's first trad bow - second bit

#12 Post by Flatliner » Fri May 27, 2011 10:06 pm

Don't Ya hate that :x . I might have to go the heat strip way too cause my heat box is powered by incandescent bulbs and they are getting a bit hard to find these days.
Man your shed's way to clean, how can you work in cleanliness? :lol:

Rob.
Last edited by Flatliner on Fri May 27, 2011 10:11 pm, edited 1 time in total.
The shortest distance between two points is a FLATLINE
ImageEmail; robnicoll(at)bigpond(dot)com
www.flatlinebows.com.au

User avatar
rodlonq
Posts: 2096
Joined: Wed May 06, 2009 3:02 pm
Location: Ingham NQ

Re: Big Brother's first trad bow - second bit

#13 Post by rodlonq » Fri May 27, 2011 10:07 pm

Sorry guys, I just spent ages building a sensible post on the progress of this build and lost it, so the following will be more brief.

The template for marking it out.
TemplateOnBlank.jpg
TemplateOnBlank.jpg (108.88 KiB) Viewed 4201 times
The blank cut out on the table saw.
BlankCutOut.jpg
BlankCutOut.jpg (91.86 KiB) Viewed 4201 times
Cutting the grooves with a rod saw (this is so easy compared to a hacksaw cut and chainsaw file).
RodSaw.jpg
RodSaw.jpg (116.2 KiB) Viewed 4201 times
First check on the tiller tree at 4 1/2 inches brace height
4HalfInchBrace.jpg
4HalfInchBrace.jpg (130.49 KiB) Viewed 4201 times
And at 6 1/2 inches brace height. I found it interesting that it took 40# of draw force to pull the work string into place. Sorry about the photo, I was in a hurry and neglected to check the quality (not that any of them are very good - bad camera and even worse driver :oops: ).
6HalfInchBrace.jpg
6HalfInchBrace.jpg (107.35 KiB) Viewed 4201 times
Cheers......... Rod

User avatar
Flatliner
Posts: 449
Joined: Fri Apr 08, 2011 6:12 pm
Location: Gordonvale NTH QLD

Re: Big Brother's first trad bow - second bit

#14 Post by Flatliner » Fri May 27, 2011 10:17 pm

Looking very nice Rod 8) . Wow forty # to brace at 6.5", what poundage are you aiming for at 28"s?
The shortest distance between two points is a FLATLINE
ImageEmail; robnicoll(at)bigpond(dot)com
www.flatlinebows.com.au

User avatar
rodlonq
Posts: 2096
Joined: Wed May 06, 2009 3:02 pm
Location: Ingham NQ

Re: Big Brother's first trad bow - second bit

#15 Post by rodlonq » Fri May 27, 2011 10:26 pm

Flatliner wrote:Don't Ya hate that :x . I might have to go the heat strip way too cause my heat box is powered by incandesant bulbs and they are geting a bit hard to find these days.

Rob.
Rob,

I went this way because I only started this last year and couldn't buy incandescent globes and fittings (the Bunnings person tried to convince me I would get more heat from fluoro or LED for much less power :lol: ). I hooked up 6x150W flood lights and tested them before trying to put them in the oven. They don't like being switched on and off by a thermostat so it seems I also reckon there would be hot spots beyond control unless the oven was huge.

I have had a bit to do with heat and mass transfer, and I believe the principle behind the silicone heating strips makes them perfect for this job. I have done a lot of trial measurements on a dummy run and the temp seems to be very uniform along the form and very little fluctuation throughout the cure time. If you (or anyone else on here) would like to have a look at it in action give me a yell and we can lay one up sometime. I reckon I can also use the lower half of the form and heat strip with some clamps to cook the riser and tip overlays onto the shaped bow in one easy session with little fuss - will take some photos of this tomorrow I hope.

Cheers.......... Rod

User avatar
rodlonq
Posts: 2096
Joined: Wed May 06, 2009 3:02 pm
Location: Ingham NQ

Re: Big Brother's first trad bow - second bit

#16 Post by rodlonq » Fri May 27, 2011 10:32 pm

Flatliner wrote:Looking very nice Rod 8) . Wow forty # to brace at 6.5", what poundage are you aiming for at 28"s?
Thanks Rob, that was with a loose work string. I don't think it will take anywhere near that to pull the string at brace height with a correct length string. I am aiming for around 54# at 28" and hoping to come in around 60#@30" for the big fella. I will make up a string tomorrow and find out.

Cheers....... Rod

User avatar
rodlonq
Posts: 2096
Joined: Wed May 06, 2009 3:02 pm
Location: Ingham NQ

Re: Big Brother's first trad bow - third bit

#17 Post by rodlonq » Wed Jun 01, 2011 11:05 pm

This morning I got to the shed early and glued the riser and tip overlays onto Jesso's D/R bow. I used the lower half of the form for a caul including the lower heat strip so I could cook the overlays on. SteveJ, There are some nasty notches and some spilt glue on the form now so it should make better bows in the future :D

The bow clamped to the form with the overlays curing on. I hope this process works - just a stab in the dark really but I reckon it has to have less impact than sticking a whole bow back in the oven to cure the overlays.
OverlayGoinOn.jpg
OverlayGoinOn.jpg (91.83 KiB) Viewed 4165 times
The overlays shaped ready for fine sanding. I should have tillered and weighed it before doing the overlays but here's to a positive attitude - she'll be right mate. I love this B&D workmate gadget for holding the bow while shaping, it could be about 2 " higher to save a bit of bending, but the little plastic jaws will hold just about any part of the bow.
GettinThere.jpg
GettinThere.jpg (107.45 KiB) Viewed 4165 times
Tomorrow I will weigh it and determine which will be the top limb and whether I will cut the window lefty for Jess or righty for Rod and Jesso can have the next one :lol: . Thanks for looking.

Cheers........... Rod

User avatar
rodlonq
Posts: 2096
Joined: Wed May 06, 2009 3:02 pm
Location: Ingham NQ

Re: Big Brother's first trad bow - third bit

#18 Post by rodlonq » Thu Jun 02, 2011 8:19 pm

Got a string onto it this evening too have a look at how it is bending with the limbs basically finished but the handle still to do. Set it up with 6 3/4" brace height and put it on the tree. Pulled it down a couple of times and then thought to measure a force/draw curve for it so I can see if shaping the grip and window have any effect on the weight. I think the shape of the bent bow is OK (please feel free to comment if you can see any flaws - not the best photo though :oops: ). By the time I finished all the measurements the brace height had reduced to 6 1/2" - possibly the new string and some follow? It came in at 59#@28" (70" NTN) which is a little over my planned 55# at 28" but there is plenty of room to work it down if needed. I only sanded down to the outside of the line I traced around the template. I will get Jesso to have a few draws tonight and let me know what he thinks. I had a go myself and was very happy to find I could draw it with some stability and get one of my arrows (29" to back of point) back to have the point sitting on my knuckle, though I didn't fire it with about 5/8" off centre at the moment. I reckon I wont reduce the weight yet and see how the big fella handles it - he's 6" taller than me and about 70# heavier.

Limbs finished with 6/3/4"Brace height.
BraceHeight2.jpg
BraceHeight2.jpg (118.38 KiB) Viewed 4145 times
At 28" draw.
28InchDraw.jpg
28InchDraw.jpg (115.5 KiB) Viewed 4145 times
Force draw curve at this stage.
#3FDCurve.png
#3FDCurve.png (20.29 KiB) Viewed 4145 times
I am tempted to cut it right for a hunting bow and make another for Jesse, but I reckon I could use it 2" or 4" shorter without any string angle issues.

Cheers.......... Rod

User avatar
Stickbow Hunter
Supporter
Supporter
Posts: 11637
Joined: Sat Jul 26, 2003 8:33 pm
Location: Maryborough Queensland

Re: Big Brother's first trad bow - fourth update

#19 Post by Stickbow Hunter » Thu Jun 02, 2011 8:39 pm

It sounds like you just want an excuse to make another one. :lol: Good job mate.

Jeff

User avatar
Gringa Bows
Posts: 6331
Joined: Thu Aug 30, 2007 7:09 pm
Location: Bundaberg QLD

Re: Big Brother's first trad bow - fourth update

#20 Post by Gringa Bows » Thu Jun 02, 2011 8:55 pm

Lookin good Rod :wink:

User avatar
Flatliner
Posts: 449
Joined: Fri Apr 08, 2011 6:12 pm
Location: Gordonvale NTH QLD

Re: Big Brother's first trad bow - fourth update

#21 Post by Flatliner » Thu Jun 02, 2011 9:05 pm

Thats a nice curve in those limbs Rod. very hard to pick which should be the top or bottom, I reckon when you measure the tiller both limbs will be the same or that close it wont mater.
I don't think it's really necessary to cook the overlays on (I don't) and I would be worried about the heat affecting the existing glue bond in the limbs because they aren't under pressure when you do it. but I'm just learning too. If you cut the bow shorter wont that raise the poundage?
The bow's looking great though Rod, who ever ends up with it will have one very nice bow.
Cheers Rob.
The shortest distance between two points is a FLATLINE
ImageEmail; robnicoll(at)bigpond(dot)com
www.flatlinebows.com.au

User avatar
rodlonq
Posts: 2096
Joined: Wed May 06, 2009 3:02 pm
Location: Ingham NQ

Re: Big Brother's first trad bow - fourth update

#22 Post by rodlonq » Thu Jun 02, 2011 10:42 pm

Thanks Jeff, I reckon I may have been bitten by something :roll:

Thanks Rod.

Thanks Rob, it has 1/8" positive tiller at this stage. Sorry about the confusing garble. I meant that if I was to have one of these I would make a new one shorter for myself. It is a bit of a mind juggle dealing with shorter limbs, less nett reflex and changing materials but I have decided to give it a best guess and learn from the results.

Cheers...... Rod

User avatar
UPTHETOP
Posts: 1187
Joined: Mon Jun 11, 2007 9:03 pm
Location: Dalby
Contact:

Re: Big Brother's first trad bow - fourth update

#23 Post by UPTHETOP » Fri Jun 03, 2011 7:06 am

ITS got some great looking balance in the limbs by the looks of it Rod.
The big fella should grow fond of it pretty fast I recone,
Will be good to see a few coats on her to bring the timber to life, have you got a name to put on her yet?

Cheers Wayno.
Justastik Arrow Craft, Its all about the Wood.

User avatar
rodlonq
Posts: 2096
Joined: Wed May 06, 2009 3:02 pm
Location: Ingham NQ

Re: Big Brother's first trad bow - fourth update

#24 Post by rodlonq » Fri Jun 03, 2011 7:47 am

Thanks Wayno,

I was thinking of using minwax wipe on poly to finish it off. I did a trial on an off-cut of spotty gum and the depth is very nice even though it doesn't seem to build at all. Has anyone had any problems with this product?

No name....... yet :)

CHeers...... Rod

User avatar
rodlonq
Posts: 2096
Joined: Wed May 06, 2009 3:02 pm
Location: Ingham NQ

Re: Big Brother's first trad bow - fourth update

#25 Post by rodlonq » Wed Jun 29, 2011 3:19 pm

We still haven't finished the bow yet because Jesso hasn't put the time into final sanding. He did however find time to put a few of his Easton 400 carbons through it. After a while his groups got better, he is drawing it out to about 30" and it is averaging about 205 fps with 480 grn arrows. Will be interesting to see how much it looses when we make new arrows closer to the 10grn/# mark.

Was just wondering about opinions on calculating the change in velocity. Would it be fair to assume the potential energy from the bow will be entirely converted to arrow kinetic energy regardless of arrow mass (also assuming draw, release etc constant)?

I now have most of the bits ready to go to lay up a bow for myself from the new D/R form, just gotta find time away from work :).

Cheers, Rod

longbow steve
Posts: 3116
Joined: Tue Jan 30, 2007 3:29 pm
Location: BLUE MOUNTAINS

Re: Big Brother's first trad bow - fourth update

#26 Post by longbow steve » Wed Jun 29, 2011 3:36 pm

Looking great Rod, The Minwax works well, it does build but will take about 50 coats. It is durable and brings the wood out in its natural colour. Steve

User avatar
GrahameA
Posts: 4692
Joined: Thu Mar 10, 2005 4:28 pm
Location: Welcome to Brisneyland, Oz

Re: Big Brother's first trad bow - fourth update

#27 Post by GrahameA » Wed Jun 29, 2011 3:37 pm

Hi Rod.
rodlonq wrote:Was just wondering about opinions on calculating the change in velocity. Would it be fair to assume the potential energy from the bow will be entirely converted to arrow kinetic energy regardless of arrow mass (also assuming draw, release etc constant)?
No. As the arrow mass changes the bow efficiency changes. Heavier arrows give a higher bow efficiency than lighter arrows.

If you are interested - for a constant draw length, etc., plot arrow velocity against arrow mass to see the change.

I calculate the area under the force draw curve to determine the amount of energy stored in the bow - stored potential energy - and compare that against the energy in the traveling arrow. Thus you can determine the bow efficiency. If you do this for a range of arrow masses you can interpolate between values to give an approximate predicted value for a given viable arrow mass.
Grahame.
Shoot a Selfbow, embrace Wood Arrows, discover Vintage, be a Trendsetter.

"Unfortunately, the equating of simplicity with truth doesn't often work in real life. It doesn't often work in science, either." Dr Len Fisher.

User avatar
Gilly
Posts: 241
Joined: Sun Jun 15, 2008 8:30 am
Location: NSW Central Coast

Re: Big Brother's first trad bow - fourth update

#28 Post by Gilly » Wed Jun 29, 2011 6:00 pm

Nice looking bow!
Won't it be a bit light for your "refrigerator" friend? Or do you think he's a wimp? :wink:

User avatar
rodlonq
Posts: 2096
Joined: Wed May 06, 2009 3:02 pm
Location: Ingham NQ

Re: Big Brother's first trad bow - fourth update

#29 Post by rodlonq » Thu Jun 30, 2011 5:43 pm

Thanks Steve, I have bought some auto clear cot to do it and another with, will be interesting.

Thanks for the input Grahame. I don't have a selection of different weight arrows with right spine and length to take the long road which is why I was looking for a mathematical approach to predict the speed from a different weight arrow (i.e. normalise the result to what it would be with 10 grn/#). I will work on this though as it would be good to get some idea of the efficiency of the basic design of the bow to give some guidance for improvement wrt taper rates etc.

Gilly, he's a typical 18 yo, doesn't exercise too much, doesn't practice too much, doesn't put much effort into anything and has a lot more going on than getting his form up to speed :D . Also this is his first excursion into trad territory, has been using a high powered gunpound for a while and is a bit spoilt in result for effort. However I think it wont be too long before I need to make him a heavier bow. Shame this one is cut on the wrong side for the rest of us but it will be good enough for a backup bow if he ever gets into serious hunting trips.

Cheers........... Rod

User avatar
Gilly
Posts: 241
Joined: Sun Jun 15, 2008 8:30 am
Location: NSW Central Coast

Re: Big Brother's first trad bow - fourth update

#30 Post by Gilly » Thu Jun 30, 2011 7:12 pm

rodlonq wrote:Thanks Steve, I have bought some auto clear cot to do it and another with, will be interesting.

Thanks for the input Grahame. I don't have a selection of different weight arrows with right spine and length to take the long road which is why I was looking for a mathematical approach to predict the speed from a different weight arrow (i.e. normalise the result to what it would be with 10 grn/#). I will work on this though as it would be good to get some idea of the efficiency of the basic design of the bow to give some guidance for improvement wrt taper rates etc.

Gilly, he's a typical 18 yo, doesn't exercise too much, doesn't practice too much, doesn't put much effort into anything and has a lot more going on than getting his form up to speed :D . Also this is his first excursion into trad territory, has been using a high powered gunpound for a while and is a bit spoilt in result for effort. However I think it wont be too long before I need to make him a heavier bow. Shame this one is cut on the wrong side for the rest of us but it will be good enough for a backup bow if he ever gets into serious hunting trips.

Cheers........... Rod
I shoot left handed, I am right handed but left eye dominant! I am really broken!
Good to know that it won't be too long before he goes up the weights, you could always tell him what I shoot, at his age he should have no dramas working up to a good heavy bow!

Post Reply