
Clear glass was used on this initial project so I could verify that the air pressure had been applied correctly. Air was applied in 10# increments until 60# was reached. There were no trapped air bubbles under the clear glass so I am happy with the procedure.
Apart from using the system in my flat bow workshops it is also suitable for the deflex/reflex and Italian Renaissance bows that I make.
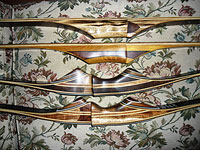
The bow depicted has not had a final cleanup or application of clear finish and the handle area has not been finished. It was purposely left this way so it would become a "stock" bow that could be shaped to the prospective customer's preference.
- 1 Heat Strip Bow Handle.jpg (22.65 KiB) Viewed 1411 times
- 2 Heat Strip Bow Handle.jpg (31.94 KiB) Viewed 1411 times
- 3 Heat Strip Bow Tip.jpg (43.38 KiB) Viewed 1411 times
- 4 Heat Strip Bow Limb.jpg (13.41 KiB) Viewed 1411 times
Whilst writing this story I received a phone call from a client wanting a bow in the 35# to 40# weight range. He is coming over Wednesday for a custom fit.
The bow specifications are as follows;
Draw weight is 38# @ 28" and the bow is 68" ntn.
Handle is Brigalow and Black Wattle separated with Black Bean and Bamboo.
The core is made up of one parallel and two tapered laminations of vertical bamboo and sandwiched between .043 clear Bo-tuff glass.
Tip overlays are late growth black wattle and clear glass.
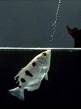
Unfortunately with the lousy weather I have not been able to put arrows through the chronograph but the bow seemed to like the 466 grain hoop pine Wallace Woods. The bow feels well balanced and there is no hand shock.
The second bow off the form is 48# @ 28" so it will become a “stock" bow.
First arrows out of the unfinished bow and no nocking point.
- 5 First Arrows Off Heat Strip Bow.JPG (47.17 KiB) Viewed 1411 times
Daryl.