Bamboo backed bow buildalong right here

Where to source materials etc. Also the place to show off your new bow or quiver etc.... Making things belongs in Traditional Crafts.

Moderator: Moderators

Message
Author
User avatar
yeoman
Posts: 1563
Joined: Mon Mar 08, 2004 1:32 pm
Location: Canberra

Bamboo backed bow buildalong right here

#1 Post by yeoman » Wed Nov 08, 2006 9:35 am

Hi all,

Well, I've finished uni. Not just this year, but my whole degree, which is kinda scary!

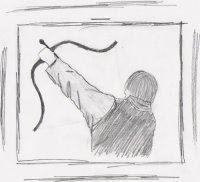
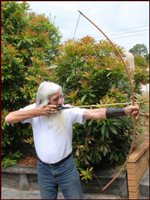
With honors starting next year, I've got about 4 months up my sleeve to flit away, so what better passtime is there than making bows?

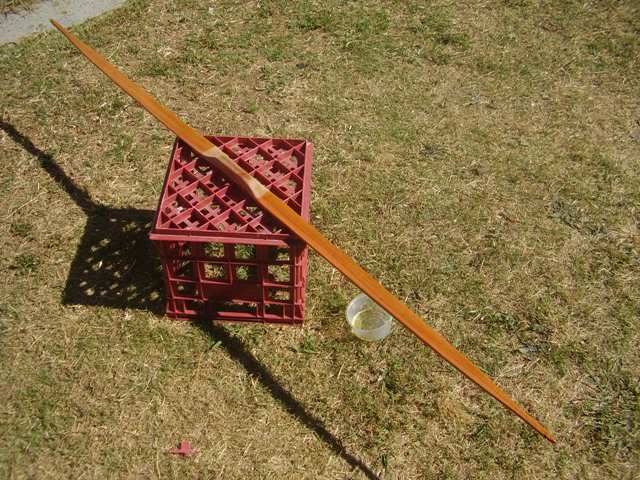
This thread will be a buildalong of two, maybe up to five, bamboo backed longbows that I'm trying to get finished ASAP.

The bows are all Ironbark, though I'm not quite sure of the variety more accurately than that. The bamboo is Moso.

Before I make a bow, I always do a bend test to find the modulus of elasticity and modulus of rupture (actually a bit below this figure), and with these figures, do some computations to give me dimensions down to .001mm accuracy for bows which have equal stress along their length.

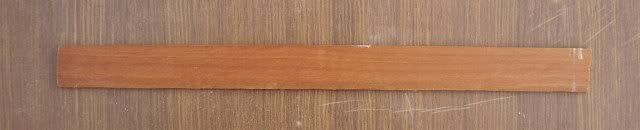
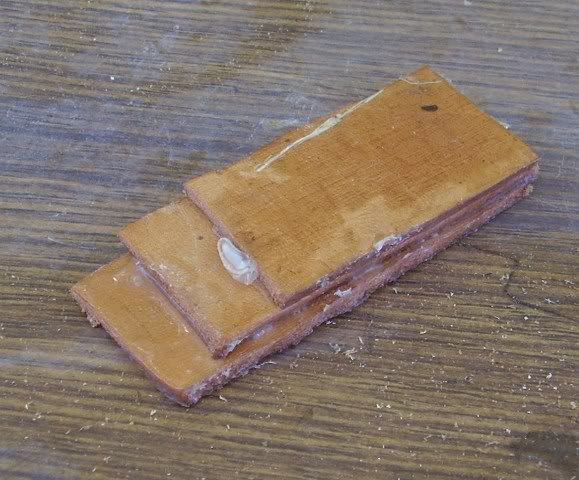
Perhaps the most important thing in doing a bend test is the accuracy of measurement of your test board.

Here is my test board. It measured 320x27x4mm.

Image

For those that have read TBB, you may not recognise my bend test. Tim Baker used a cantilever bend test, and mine is known as a simple supported beam bend test.

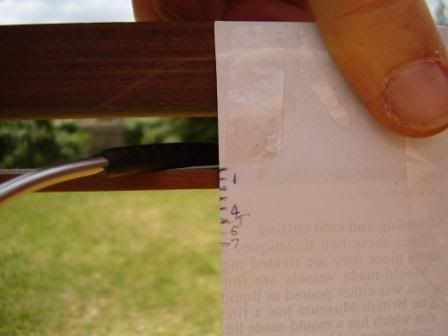
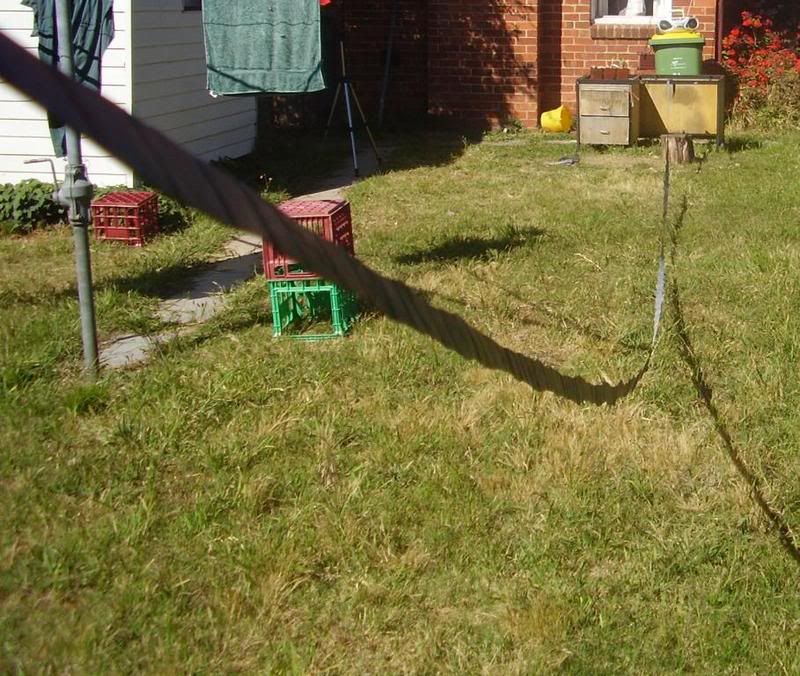
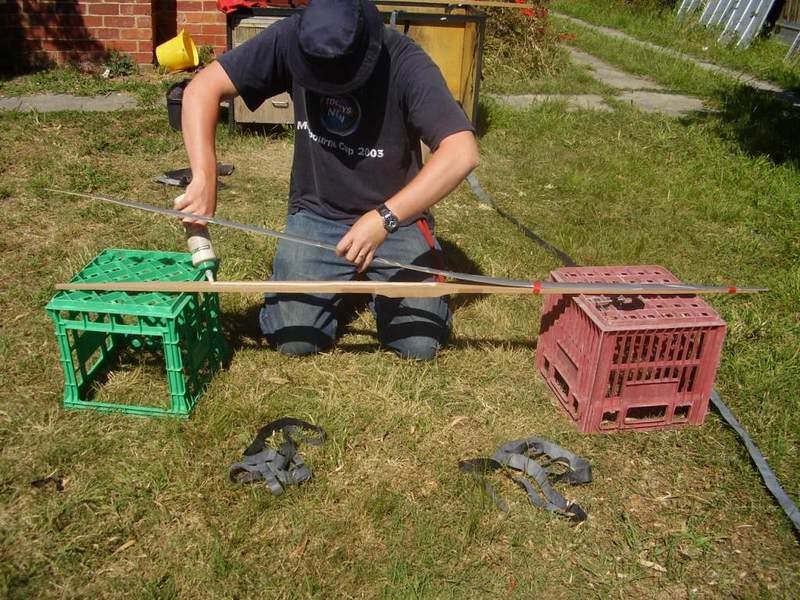
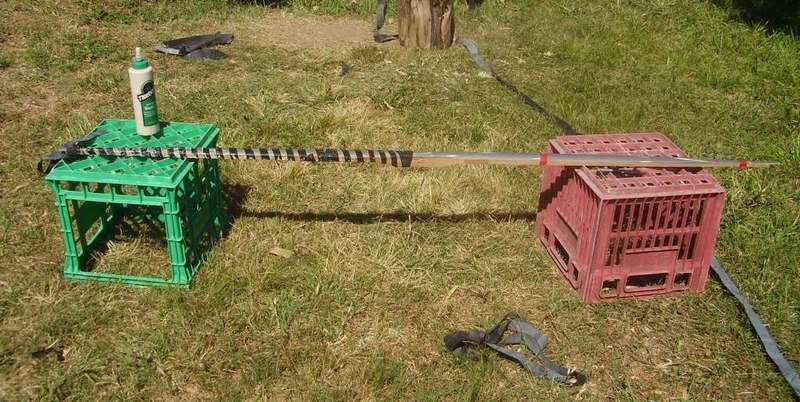
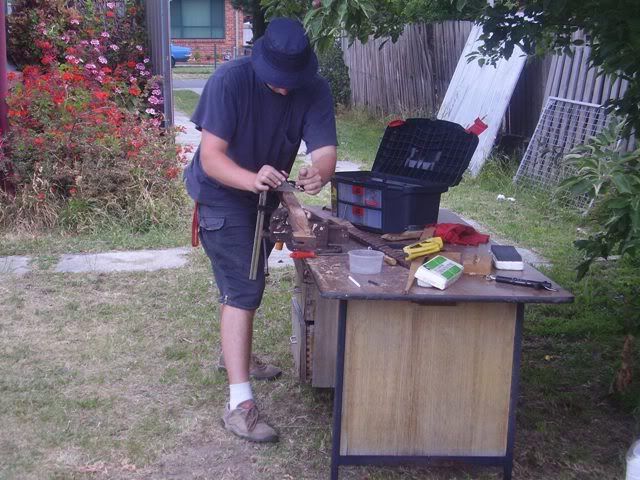
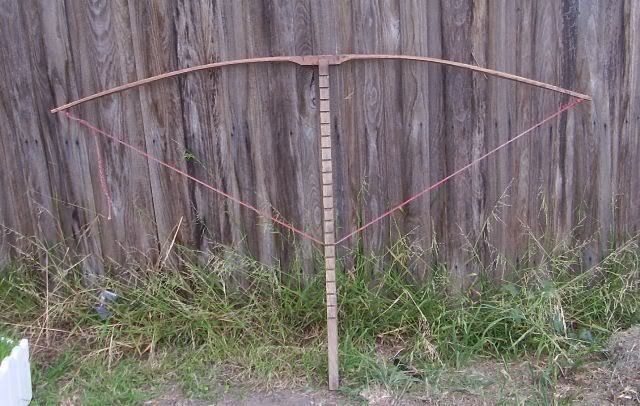
It's a fairly simple affair: the board is supported at either end, with a weight hung from the middle. Here is my setup. The board accross the top with the paper taped to it is for measuring and recording the deflection. It's also important to accurately measure the distance between the supports.

Image

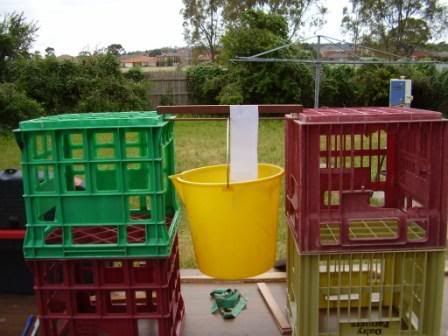
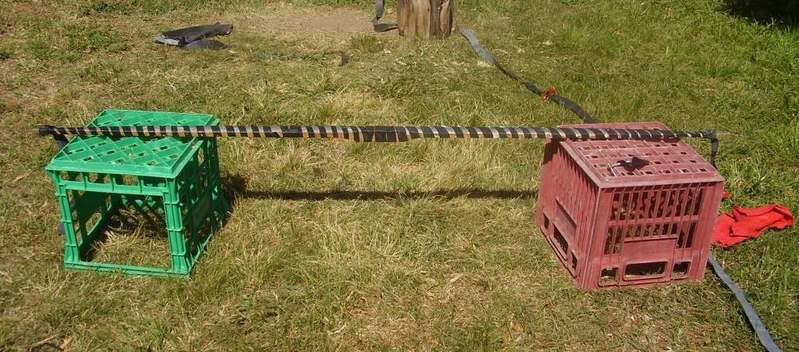
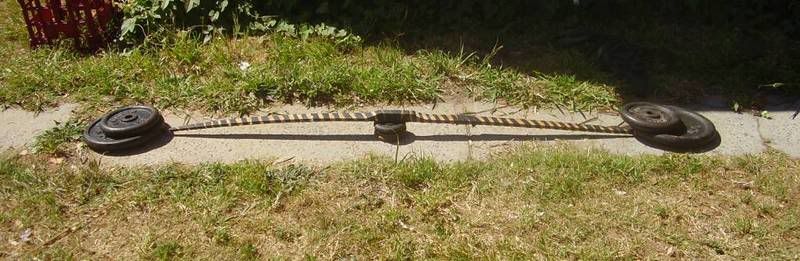
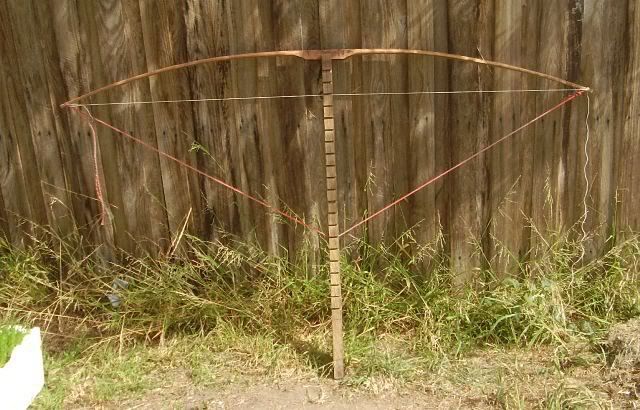
Into the bucket goes dumbell weights, usually 1kg at a time. At each KG, I put a mark on the bit of paper where the test board has deflected to. Then I remove the wieght, and see if the board has taken a set. Here is the beginning of the process:

Image

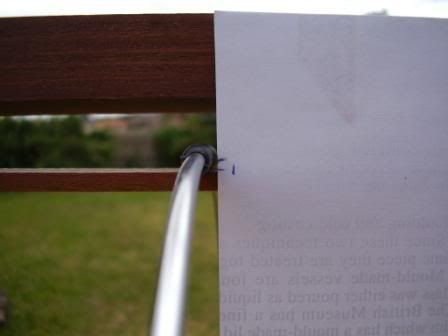
The black mark shows where the board started.

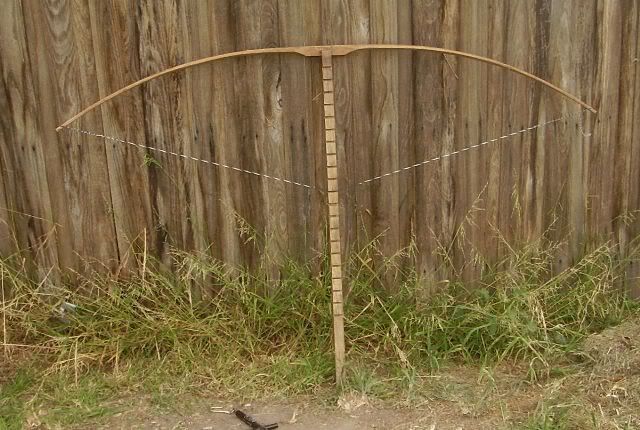
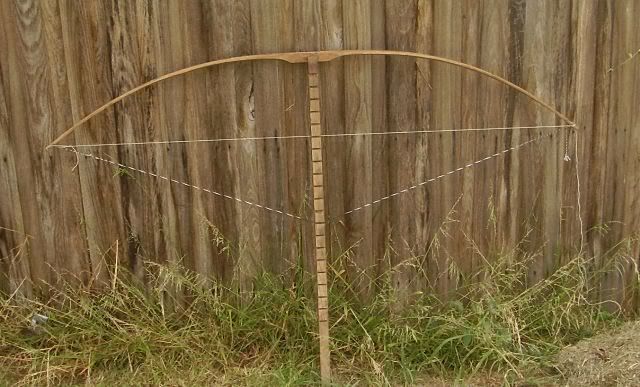
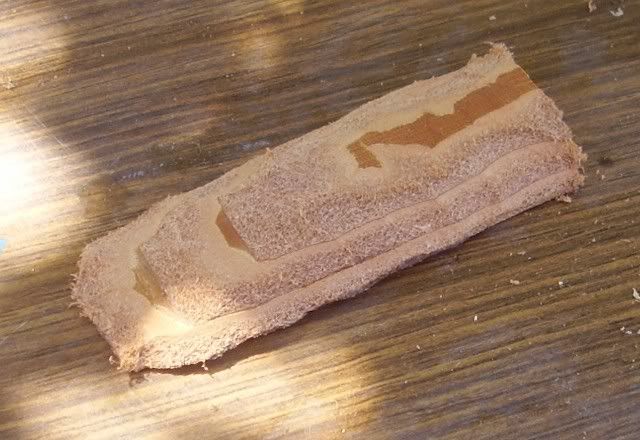
After 7kg, the board was not taking set:

Image

The board did take set at 11kg, and broke at 13. I'm on a pc at uni, otherwise I'd have given all the measurements. Anyway, the numbers I got allowed me to calculate the figures on stiffnes and rupture, which I probably aslo should have brought along to share. Maybe next time.

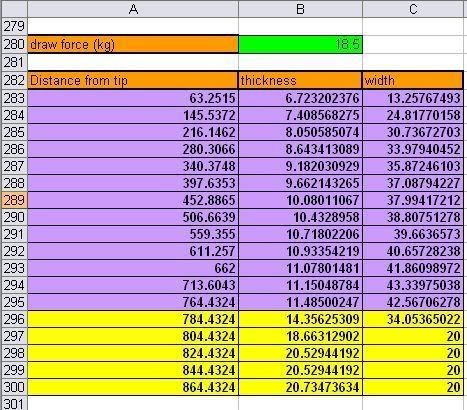
Anyhow...all the numbers i got were put into my special computer, which gave me the dimensions to work this wood down to to get a given draw weight at a given draw length. I'll have to share those next time too, but you should be aware that those numbers will only work with this bit of wood that I have, as all wood has different mechanical characteristics. Both of these bows will be just under 50lb @ 28" when done. As these bows will be reflexed and bamboo backed, I computed these bow blanks to be about 37lb @ 28", as the bamboo and perry reflex will raise the draw weight.

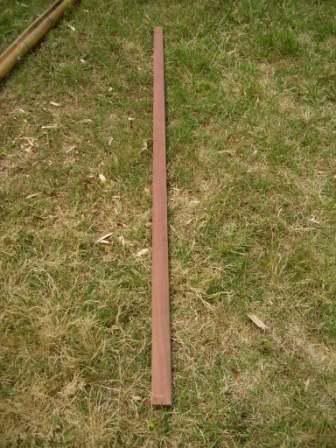
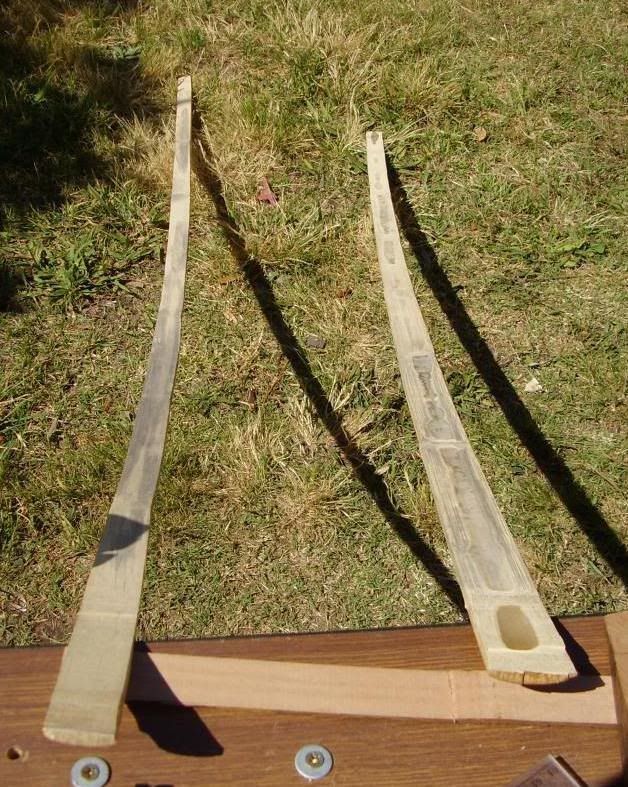
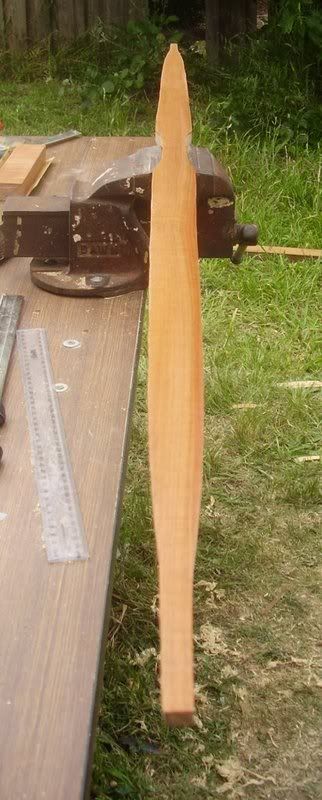
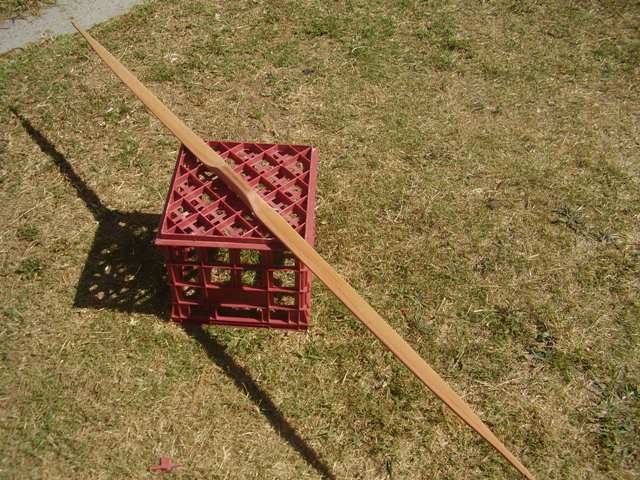
So here is one of the three boards, which I will resaw on my bandsaw into two, then glue on risers.

Image

Here it is sawn. Wasn't that quick! :wink:

Image

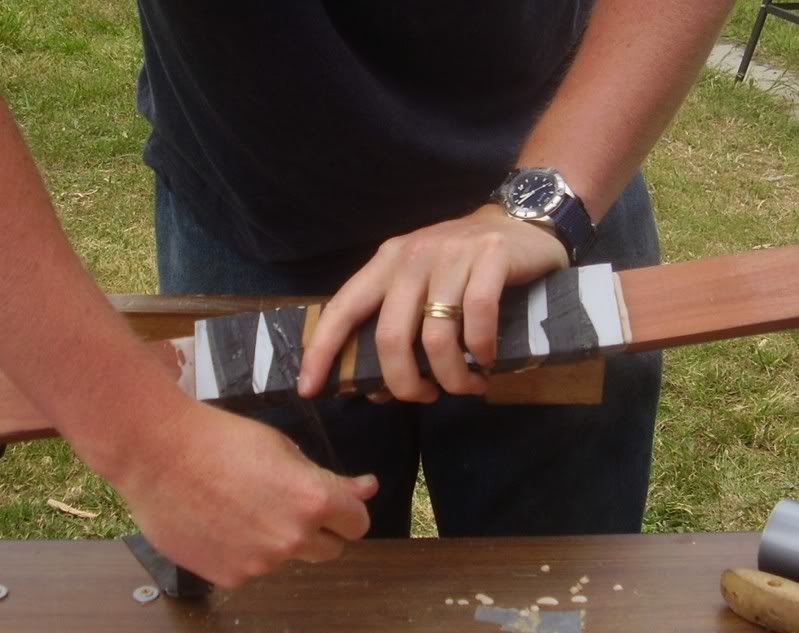
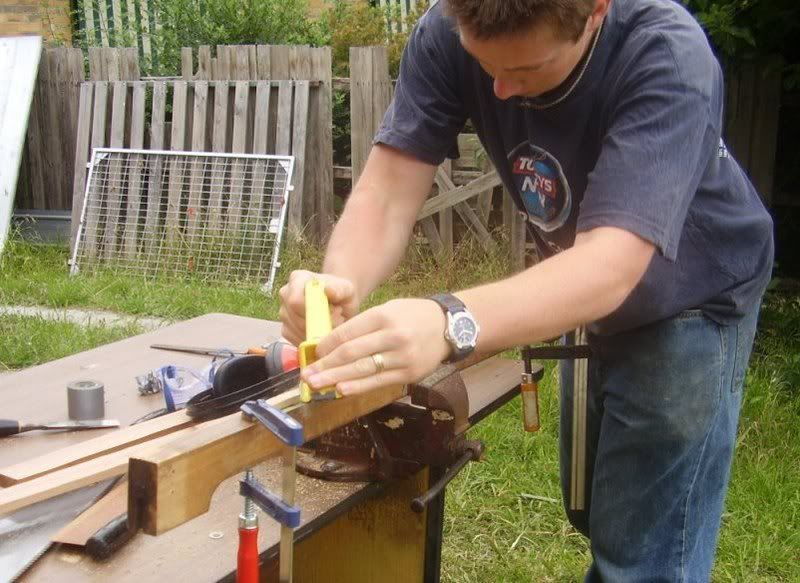
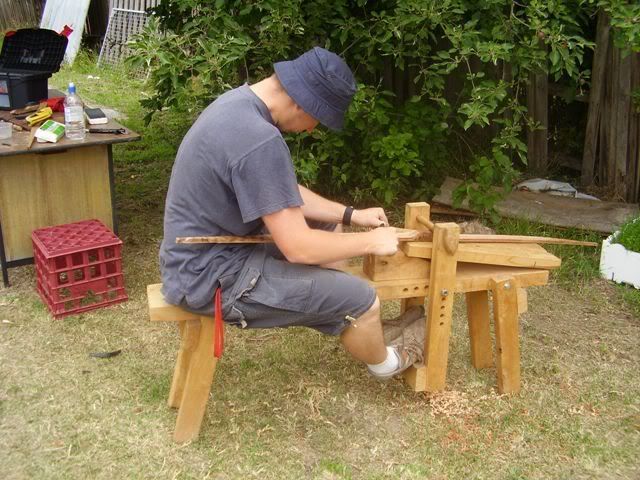
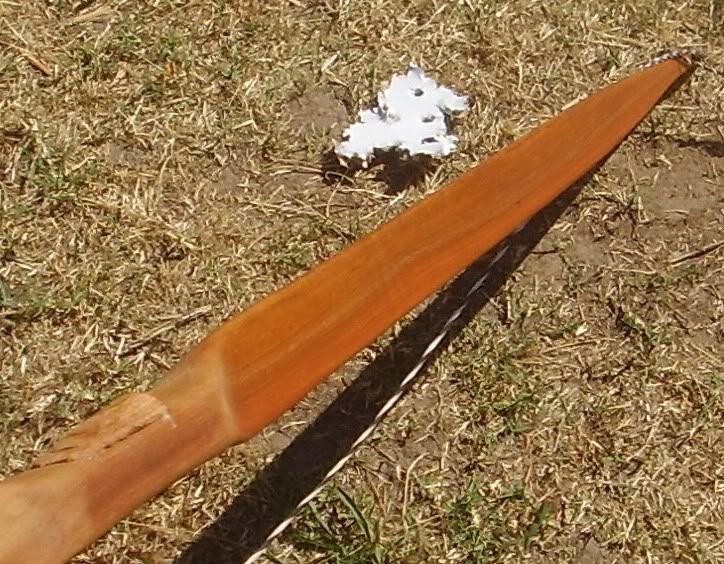
I printed out a full scale schematic of the bow's shape, stuck it on the boards, traced around it, then cut it out. Here's yours truly using the finger-removing device to cut the front view shape of the bow blanks. I don't care how stupid I look wearing the safety equipment...I like looking at stuff and I enjoy music. :wink:

Image

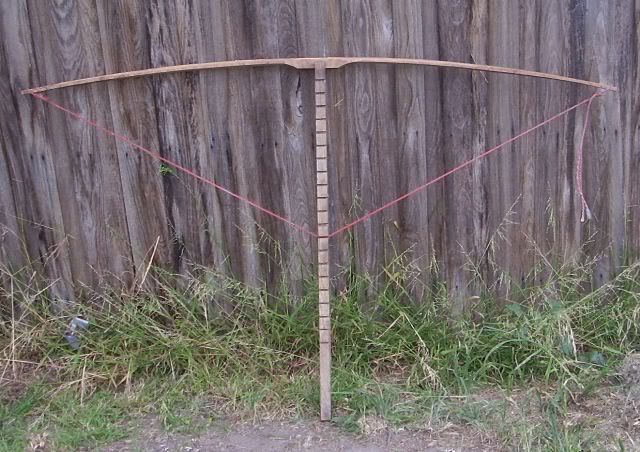
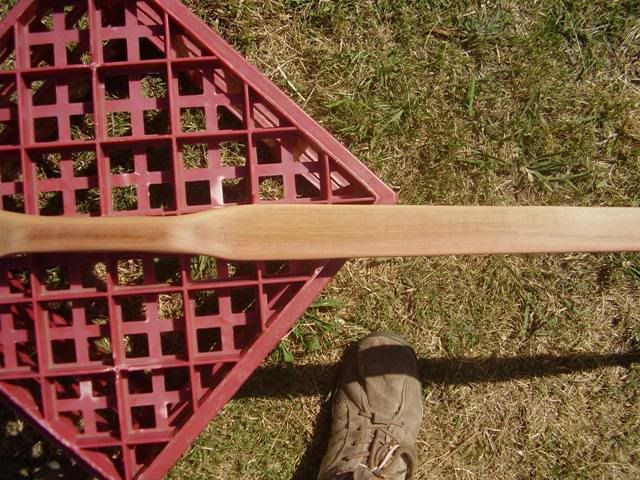
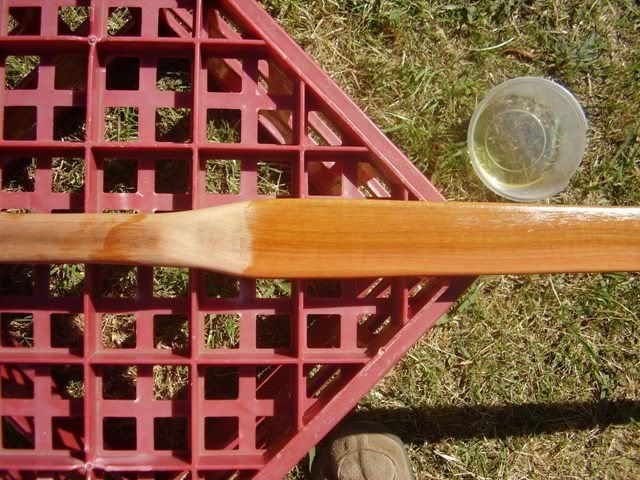
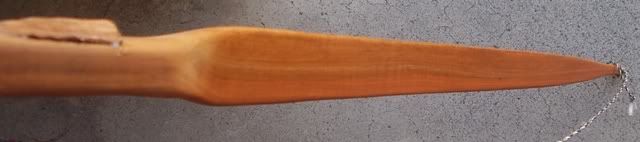
Here are the bow blanks cut to front view shape. The pic may not be very clear. I won't cut the handle shape until the riser is glued on, but I have marked it out.

Image

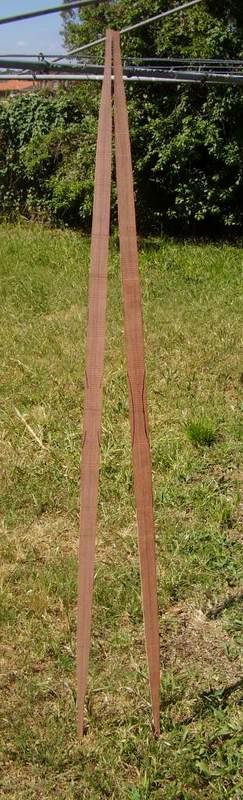
So there they are, ready for smoothing, risers, and backing. I also have to taper the thickness, which I will likely do with a stanley surform, spokeshave and scrapers.

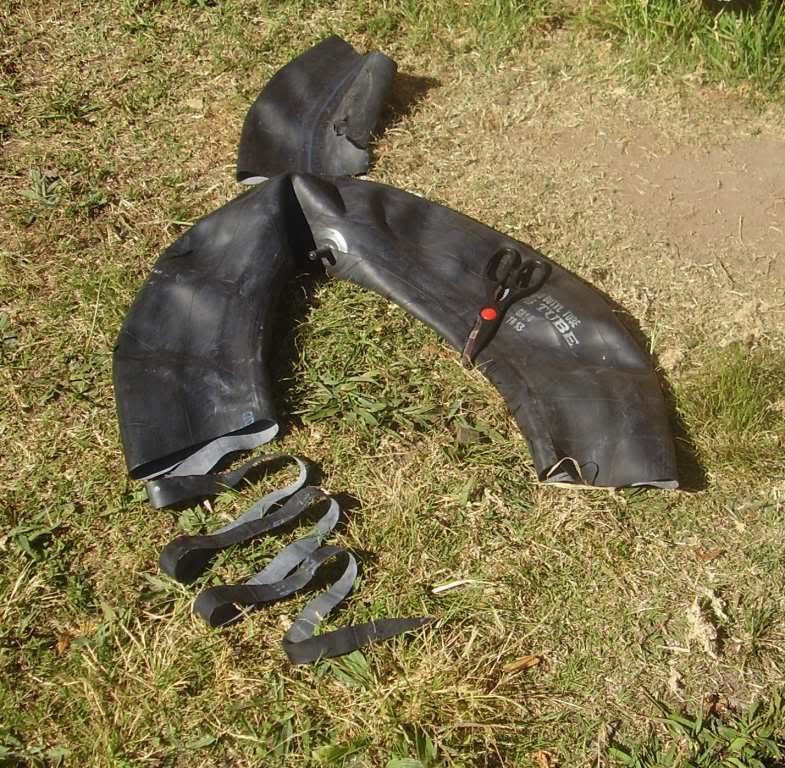
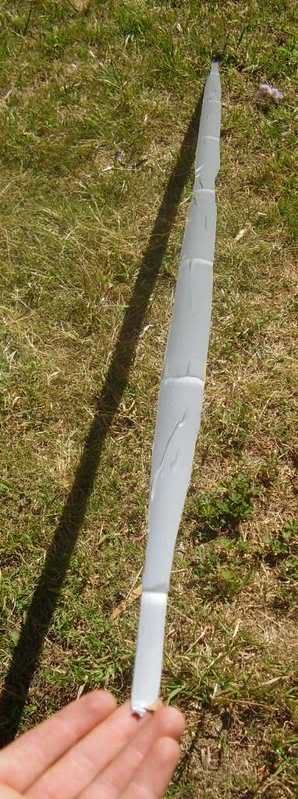
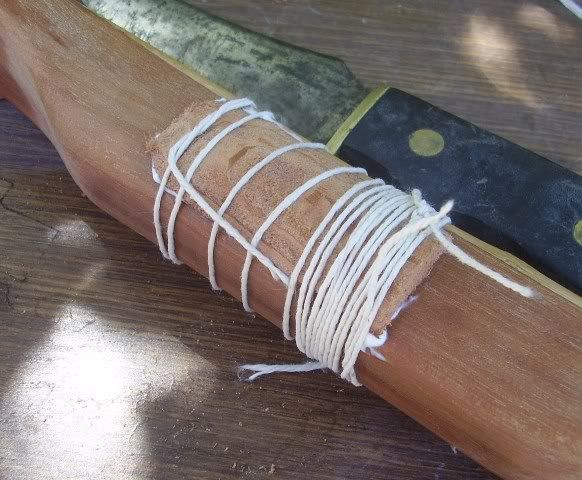
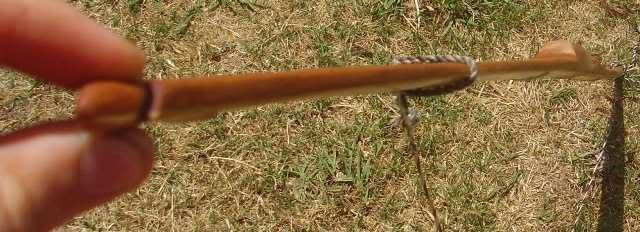
The next step is to get some bamboo ready. Actually I did the bamboo first, but you won't know that coz of the order I've told you and shown the pictures in! The bambo is a 6', 4" pole from bunnings. I chose one that was uniformly round, thick walled, and not already split, with as little taper as possible along the length. Another requirement is that the nodes should be evenly spaced along the pole, as many have the nodes bunched close to the ground, and far apart at the top.

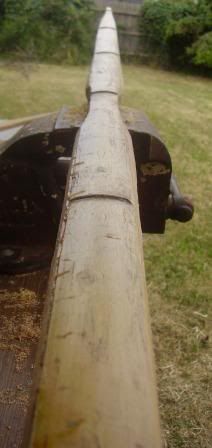
I'm splitting it from the thick end with an original bowie and a plum mallet.

Image

I do it by splitting along one line: the pole has a split down one side but is still whole, and then split the width I need out from the pole. Here it is:

Image

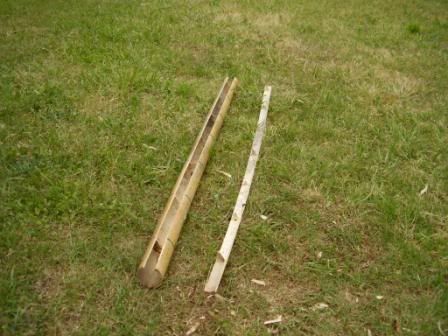
Witha quick turn on the bandsaw, the insides are flattened, but not fully thinned. I tried to do it all on the saw once and ruined the backing, so now I'm a bit more careful.

Image

That's as far as I've got so far. If the rain hold off I'll be doing a lot more on them today, which means more pics in the next few days.

Feel free to ask any quetions, as I'm positive I haven't explained everything well enough. :wink:

Cheers,

Dave[/img]
https://www.instagram.com/armworks_australia/

Bow making courses, knife making courses, armour making courses and more:
http://www.tharwavalleyforge.com/

Articles to start making bows:
http://www.tharwavalleyforge.com/index. ... /tutorials

User avatar
Stickbow Hunter
Supporter
Supporter
Posts: 11637
Joined: Sat Jul 26, 2003 8:33 pm
Location: Maryborough Queensland

#2 Post by Stickbow Hunter » Wed Nov 08, 2006 9:58 am

Dave,

Looks very interesting and I look forward to seeing your progress.

Jeff

User avatar
GrahameA
Posts: 4692
Joined: Thu Mar 10, 2005 4:28 pm
Location: Welcome to Brisneyland, Oz

#3 Post by GrahameA » Wed Nov 08, 2006 10:29 am

Dave

Congrat's on getting through the first part (of Uni)
Grahame.
Shoot a Selfbow, embrace Wood Arrows, discover Vintage, be a Trendsetter.

"Unfortunately, the equating of simplicity with truth doesn't often work in real life. It doesn't often work in science, either." Dr Len Fisher.

User avatar
stace
Posts: 848
Joined: Mon Nov 24, 2003 1:44 pm
Location: Maclean/Northern NSW

#4 Post by stace » Wed Nov 08, 2006 11:01 am

Dave
Looking forward to seeing the progress and finished product

You may have to mow your lawn soon so arrows aren't lost aye
stace

User avatar
archangel
Posts: 750
Joined: Fri Oct 08, 2004 7:26 pm
Location: York, Western Australia

bamboo build along

#5 Post by archangel » Wed Nov 08, 2006 11:18 am

Good work so far Dave, very clear photos. Nice to have some time to get on to these projects. Do you have an electric plane? I found this is the best tool for getting the bamboo down to the right thickness. Hand planing is frought with dangers from slivers. The electric plane also makes the tapering to each end dead easy, using progressively shorter runs each pass. Looking forward to watching progress - you have inspired me to get on with my bambo backed horsebow (using Greybeard's design).

The Gnome!

Bamboo build along

#6 Post by The Gnome! » Wed Nov 08, 2006 2:10 pm

Excellent work so far Dave 8) I will be watching with interest. Very good and clear picks to. You are sensible wearing the correct protective gear, my daughter thinks its cool too 8) Keep up the good work.


Yours in archery.
Gnome!

ed
Posts: 180
Joined: Fri Dec 23, 2005 1:47 pm

#7 Post by ed » Wed Nov 08, 2006 6:14 pm

given that you are backing the bow, how useful is the bend test?

I have watched Dean Torges dvd on "hunting the bamboo backed bow and he does it a little different already. He shapes the bamboo first and then glues it to an unshaped wood stave and then cuts the whole thing down to shape. Any reason you went the other way or is it just habit?

User avatar
Graeme K
Posts: 629
Joined: Thu Feb 02, 2006 9:38 pm
Location: Sydney Glenorie

#8 Post by Graeme K » Wed Nov 08, 2006 7:38 pm

Hi Dave
Congratulations on finishing your degree. I hope it will lead to a career that will bring you enjoyment and satisfaction in your chosen career.
But it is good to see you back to the important things in life. I am looking forward to seeing the build as I am currently out of action and having to get my fix vicariously. ( the site has been a little quiet on the construction side)

You should try an ELB style with the materials you are using. I glued up a Bamboo / Ironbark stave a few weeks ago and it turned out a very nice 50 pound ELB that is sweet to shoot. It is 71 inch and started out 25 wide and 25 thick tapering to 12 X 12 at the nocks. The bamboo is 3 at the centre 1.5 at the ends and I glued it up with 50mm of reflex. After tillering I have lost a lot of thickness as it is now only 15 thick at the centre becaust it was unbelievable heavy to start with but it is still about 12mm and circular in section at the nocks. I have lost all the reflex now it has been shot in but it is holding a straight profile and seems very fast..

I am going to have another go at it as soon as I can as I am sure that the bamboo is just too strong for the wood which is always a problem with bamboo. I have decided to try routing a 12mm groove in the board and gluing the bamboo into it so it is less than the full width of the back - this is the only solution I can think of as the thickness of the bamboo makes little difference to the tensile strength as all the strength is in the outer couple of millimetres. --- Not sure it will work as the glue stresses on the sides of the groove will be ugly but its worth a try.

Graeme

User avatar
yeoman
Posts: 1563
Joined: Mon Mar 08, 2004 1:32 pm
Location: Canberra

#9 Post by yeoman » Thu Nov 09, 2006 1:08 pm

Well, the rain held off and I was able to do some more work on the bows, and even got another one started…as if I needed anything else to do!

This is a long post, so you may want to get a cup of coffee or some matchsticks for your eyes or something.

Before I go on to the next steps, I'll reply to the previous posts.

The next two bows after these ones will be ELB's, coz I like them a lot.

INstead of insetting the boo into the bow, try trapping the back of the bow. This means making the back a percentage narrower than the belly, which allows for a narrower boo strip, and thus thinner too. I've done it with great success.

The bend tests is mainly for interest's sake.

I do the backing my way because that's the way I've always done it. I'd never thought of or heard of Dean's way. I'm sure it works though. Maybe I'll try it sometime. :wink:

I did have an electric plane, but the motor burned up :evil: so much for buying a cheaper brand. I thought it was fantastic for thinning boo too. It was perhaps the loudest household power tool I've ever had though.

Now...onto the next leg of the journey:

To start with, the two current bow blanks needed to have risers glued on. Risers, I’ve found, require the best gluing of just about any joint on a bow. The bending limbs of the bow become enormous levers compared to the handle section, and will pop the handle right off if not secured sufficiently. This I have found at the expense of several bow’s lives .

Picking the right glue is very important. A good epoxy, the best hide glue, or some other fantastic adhesive is required here. Enter my new hero: Titebond III. It’s one part, so there’s no mixing, it washes off with water when wet, so there’s less mess afterwards, it’s ultra strong, which is always good, and waterproof when cured. As an added bonus, it’s non-toxic, so you can have a swig when you’re getting parched (Not really, kids at home). But seriously, it’s got a lot going for it.

Image

Also vitally important in gluing on a handle is getting a clean joint. I sand joints with minimum 120 grit paper, then use a solvent of some kind to make sure there’s no grit, dust or grease on either of the surfaces to be glued.

Have everything ready and laid out in front of you. You don’t want to get your hands covered in glue and realise the other bit of wood is inside on the table! Doing a dry run can help you remember if you left anything out. Also, take your rings off, as your hands are going to get glue on them. Either that or wear latex gloves.

For a long time I’ve used innertube rubber as a clamp when gluing backings, laminations, risers, and heaps of other stuff. It’s far cheaper than buying a whole heap of clamps (busted tubes are free from tyre repair shops), and gives far more even clamping pressure than clamps. This is because the rubber strip, being a long strip, will seek to achieve equal tension, as opposed to clamps which can have differing tightness.

You can get innertube from any tyre shop. Just ask for a busted tube, as they throw these away and are therefore free. It may take some explaining to whatever work experience kid happens to be on that no, you don’t have a puncture, and no, you don’t need to book your car in to get the tyres balanced or something.

So you’ll get something like this:

Image

Now, avoiding the bit that’s punctured, you need to cut the tube up in a spiral pattern, so that you get a really massively long strip of rubber from ¾ to 1 ¼ inches wide, trying to keep the width as even as possible. NOTE: don’t use the fabric scissors from the missus’ drawer, nor the kitchen scissors, unless you like rubbery schnitzels.

Image

Eventually you’ll end up with something like this:

Image

Which you need to cut into about 1.5m lengths for wrapping bows, and shorter lengths for doing handles and stuff.

As I said before, sand and degrease the surfaces to be glued. Having a couple of pencil marks on the bow where the handle will go is helpful. Evenly spread your adhesive as per directions on the bottle, then bring the components together. A bit of electrical tape to hold things in place won’t go astray here, even though it’s not what I did.

Image

Take a strip of rubber and starting at one end wrap it around the whole handle, going in a spiral pattern. When you get to one end, come back the other way. Secure the end with a small clamp or half hitches.

Image

In addition to these two bows, I also started a self-riser bow. It is this stave that I am backing first and will show you how I did it.

Preparing the backing is fairly important. Having taken one of the flattened bamboo strips, take your bow and put it back down onto the upturned boo strip, and trace this onto the boo. Cut this shape out, and thin the bamboo from the already flattened side until the edge is almost a knife edge. This gives a slight thickness tape to the backing which is a Good Thing, and is also more aesthetically pleasing.

Image

The next thing to do is to actually put the backing on. To prepare the backing, the outside, non-glued surface of the boo needs to be protected from the rigours of the gluing process, which is going to get messy. I simply use duct tape, trimmed at the edges.

Image

Then, with the same attention to cleanliness as the handles, sand and degrease the back of the bow and the boo backing. Looks nice, huh? The belly of the bow is going to have a nice contrasting stripe along most of its length.

Image

Put the backing onto the bow and tape it in place on one half of the bow. Then, lift the other half of the backing and apply your glue, spreading it evenly and blah blah.

Image

This is where you really can’t afford to waste time or dither about. Take your first strip of ruber, and starting near the middle of the handle, start wrapping the strip around the backing and stave, barber-pole style. I apply the rubber while pulling the tail of the strip with about 10kg or so. When you get to the end, you can either secure the end of the strip with a small clamp, or if the strip is long enough (which it should be), a few half-hitches. It should look like this:

Image

Continuing with the whole not dithering thing, copy and paste what you just did to the other limb.

Image

Now, to increase the performance of the bow when finished, I put laminated bows into perry reflex, which means the bow sets in a forced reflexed shape. Some use forms, others cauls, but I usually revert back to the trusty old dumbbell weights. 3x1kg plates under the handle, 15kg on each tip, WITH THE BOW FACING BELLY UP, otherwise the bow will be a super-slug.

Image

Here's a screenshot of the dimensions I used. Kinda. There was no way I was going to grind away to the .0000001mm accuracy I'd calculated.

Image

Thanks for the kind words everyone. I'll have some more pics by monday, or maybe before.

Cheers,

Dave
https://www.instagram.com/armworks_australia/

Bow making courses, knife making courses, armour making courses and more:
http://www.tharwavalleyforge.com/

Articles to start making bows:
http://www.tharwavalleyforge.com/index. ... /tutorials

User avatar
Graeme K
Posts: 629
Joined: Thu Feb 02, 2006 9:38 pm
Location: Sydney Glenorie

#10 Post by Graeme K » Thu Nov 09, 2006 2:16 pm

Hi Dave
I have used the trapezing method of reducing the bamboo strength and in fact the bow I mentioned has this done but I have found that as the bows get to 50 pound and over this method does not reduce the strength enough.
I guess that the deal is that the bamboo is potentially twice as strong in tension as the best timber is in compression so as you begin to exploit this with higher draw weights to get a balance between the two you only need half the width of bamboo as timber on the belly.
Graeme

User avatar
archangel
Posts: 750
Joined: Fri Oct 08, 2004 7:26 pm
Location: York, Western Australia

#11 Post by archangel » Thu Nov 09, 2006 4:35 pm

Looking excellent Dave. Good to hear more about Titebond 3 adhesive performance - much cheaper and cleaner than 2-part epoxy. I too like the rubber tube technique with bamboo as clamps just can't handle the curved surfaces. The other advantage with this is you can put the glued stave out in the sun to cook - bit difficult when it's clamped onto your workbench. Cheapo spring clamps are also handy for holding the rubber temporarily if you need to start a new one.

I like how you have pre-shaped the bamboo backing. John Scifres and Norseman on the Leatherwall recommend this and they have built dozens (hundreds?) of bows. I have tried trapezing the bamboo before glueing, but found its just as easy to do once the glue has set. A sharp block plane and cabinet scraper do a fine job. Good luck, thanks for the steps so far.

User avatar
Stickbow Hunter
Supporter
Supporter
Posts: 11637
Joined: Sat Jul 26, 2003 8:33 pm
Location: Maryborough Queensland

#12 Post by Stickbow Hunter » Thu Nov 09, 2006 7:30 pm

Lookin' good Dave. Great photos also. I guess the Titebond is only for wood to wood surfaces?

I like your nice airy workshop too. I had one the same many years ago. :D

Jeff

User avatar
yeoman
Posts: 1563
Joined: Mon Mar 08, 2004 1:32 pm
Location: Canberra

#13 Post by yeoman » Fri Nov 10, 2006 9:37 am

There's a few holes in my roof to be sure so working in the rain isn't too fun...but otherwise it's great working outside.

Titebond says it bonds all sorts of stuff, but I'm not sure about wood/glass, which is what you might be thinking.

Took the bow off the form today. It was clamped with 2" reflex, and has 1" when sitting unsupported. It's all looking sweet, more pics next week.

Dave
https://www.instagram.com/armworks_australia/

Bow making courses, knife making courses, armour making courses and more:
http://www.tharwavalleyforge.com/

Articles to start making bows:
http://www.tharwavalleyforge.com/index. ... /tutorials

Running Bear Eagle Eye
Posts: 78
Joined: Fri Jul 28, 2006 4:56 pm
Location: Melbourne

#14 Post by Running Bear Eagle Eye » Sat Nov 11, 2006 12:03 pm

Where can i get titebond is it available from bunnings?
How much does it cost as i currently use araldite and it works well but it is very expensive.

User avatar
bleeroyb
Posts: 124
Joined: Sun Jul 09, 2006 6:27 pm
Location: Melbourne, Australia

#15 Post by bleeroyb » Sat Nov 11, 2006 3:34 pm

Nice work Dave, its looking great! Nicely taken pictures that go well with the informal instructional style :P

Keep it up, I'm looking forward to seeing the finished product!

Cheers,

Leeroy
Days, when the ball of our vision
Had eagles that flew unabashed to the sun;
When the grasp on the bow was decision,
And arrow and hand and eye were one.

-George Meredith (excerpt of 'Ode to youth in memory')

wheres the myrtle
Posts: 62
Joined: Mon Oct 18, 2004 4:53 pm

#16 Post by wheres the myrtle » Sun Nov 12, 2006 10:51 am

Running Bear Eagle Eye wrote:Where can i get titebond is it available from bunnings?
How much does it cost as i currently use araldite and it works well but it is very expensive.
http://www.carbatec.com.au/store/store_select.php

Also have Techniglue.

West system...looks like just about a one stop shop for our gluing and finishing needs.

User avatar
yeoman
Posts: 1563
Joined: Mon Mar 08, 2004 1:32 pm
Location: Canberra

#17 Post by yeoman » Thu Nov 16, 2006 7:57 am

Yep, $19 will get you a 475mL bottle, which is enough to do a stack of bows.

As an update as to where I'm up to:

Hallelujah, there is a bunch of rain in melbourne. Unfortunately, this means I can't get much work done as I only work outside, not having a big enough shed to do any work in. What I have managed to do is get another bow glued up, this timew with 3" reflex.

I also did some minor work on a couple of kid's bows, as I was able to do them inside.

So sorry to say, there's not a lot of real progress to share...but on the upside the ground is all wet! :D

Oh yeah: thanks for all the encouraging words guys. :)

Dave
https://www.instagram.com/armworks_australia/

Bow making courses, knife making courses, armour making courses and more:
http://www.tharwavalleyforge.com/

Articles to start making bows:
http://www.tharwavalleyforge.com/index. ... /tutorials

User avatar
yeoman
Posts: 1563
Joined: Mon Mar 08, 2004 1:32 pm
Location: Canberra

#18 Post by yeoman » Wed Nov 22, 2006 10:24 am

PROGRESS PROGRESS PROGRESS

OK, the rain held off, I've done my major bit of medievaling for the year, and the bows came out to play.

I started work on one of the staves monday morning at 10am. By 4:30pm tuesday, it was shooting 40lb @25".

I'm geting ahead of myself. I'll pull up for a minute and take you through what I've done.

The first thing I did was to trap the bowstave to match the backing. I made the edges nice and round to kinda blend into the boo. I don't know how well you'll see it but here it is:

Image

With the stave as it was, it was far too stiff to do anything with. If it didn't break, I reckon it would've been about 140lb@28". Therefore, it needed a lot of reducing before I got a string on.

I started at the horse with the spokeshave, but found it a bit slow...

Image

...so to the bench I went and pulled out my Stanley plane, which my grandmother says is older than I...

Image

I use a tiller stick rather than a tiller tree. A tree is a fixed post with a pulley and rope used for testing the bow. The stick is simply a board with notches in all the right places.

Before putting the short string onto the bow, I use a long string to exercise the bow and to giv me an idea on where the wood should be coming off.

Image

I only start by pulling the string a few inches to start with, then progressively pull it further.

Image

"Yeoman you fool! It's bending too much near the handle!" I can hear you lament. But worry not. When using a long string, the leverage is different to that applied by a short string. So tillering what appears to be too much near the handle at this stage suddenly turns into perfect tiller when the short string goes on.

One trick which I developed (but I'm sure others have too) is to run a length of string between the nocks when the bow is on the tiller. This somehow makes seeing flat spots and hinges easier for me. But it might be useless for others though.

Image

What I do is put the bo on the tiller, be it with or without the 'assistance thread' and step back for a moment to check the bend. Then, pencil in hand, I mark the belly where wood needs to come off, and if necessary mark areas that should be left well alone.

NOTE don't rush to get the short string on. The sooner you put the short string on, the more chance there is to overstress the stave...then all that lovely work you put into getting reflex is lost before the tillering really starts.

Then, off with the string and onto the horse where I take the pencil lines off with spokeshave, scraper, file or sandpaper, dpending where the bow is at in the tiller process.

So anyway...on with the short string. Hmm, not bad. In this pic I've got the bow only to 30lb, which it reached at 16" draw. The bow will eventually be about 45lb, but right now I'm just having a recconoitre (sp?) of the bend.

Image

More work wioth the 'assistance thread':

Image

There is a huge difference between fast tillering, and rushed tillering. Don't rush. Don't think 'Man, I've been marking this wood and shaving a bit off for ages now. I'm just gonna get my power planer and really hurry this along.' As soon as you think that, your bow is as good as dead. I got this bow from barely bending to nearly finished in only a few hours, but by no means did I rush.

Also, tillering takes a lot of concerntration. So, if you're feeling frustrated by the way things are going, or you're unsure of what to do next, take a break. The bow will be there when you get back...it doesn't mind waiting. You may find that whe you come back, the flat spots are more obvious, the wood comes off easier, and the tillering is once again therapeutic, not a hair pulling exercise.

I did have a short vid of me shooting the bow at its current 40lb@28", but the computer isn't playing fair, so you'll have to wait for it.

All things going the way they are, it should be final-tillered by the end of today and ready for the finish and handle accoutrements.

Once again, if you have any questions, fire away!

Cheers,

Dave
https://www.instagram.com/armworks_australia/

Bow making courses, knife making courses, armour making courses and more:
http://www.tharwavalleyforge.com/

Articles to start making bows:
http://www.tharwavalleyforge.com/index. ... /tutorials

Running Bear Eagle Eye
Posts: 78
Joined: Fri Jul 28, 2006 4:56 pm
Location: Melbourne

#19 Post by Running Bear Eagle Eye » Wed Nov 22, 2006 7:01 pm

Have you got any pics that shows the bows reflex once you took the weights off?

User avatar
Stickbow Hunter
Supporter
Supporter
Posts: 11637
Joined: Sat Jul 26, 2003 8:33 pm
Location: Maryborough Queensland

#20 Post by Stickbow Hunter » Wed Nov 22, 2006 7:17 pm

It is looking good Dave. I look forward to seeing photos of the finished bow. Let us know how much of the reflex you end up loosing once the bow if finished.

Jeff

User avatar
greybeard
Supporter
Supporter
Posts: 2992
Joined: Tue Feb 07, 2006 9:11 am
Location: Logan City QLD

#21 Post by greybeard » Wed Nov 22, 2006 7:22 pm

Hi Dave,
After removing excess wood during the tillering process do you exercise the stave before pulling it further down on the tiller stick?
It's looking good,
Daryl.

User avatar
yeoman
Posts: 1563
Joined: Mon Mar 08, 2004 1:32 pm
Location: Canberra

#22 Post by yeoman » Thu Nov 23, 2006 10:17 am

Well, the bow is now shooting sweet, 47lb @ 28".

I haven't got any full draw pics, but I did manage to get the video of me shooting it at 40lb@28".

http://www.youtube.com/watch?v=U_Esn2gb2uI

Hope that works. The quality of video is terrible, as I'm using the digi cam. You'll also have to excuse the far from perfect shooting form and spend all your concerntration trying to pck out the shape of the tiller. When She Who Must Be Obeyed gets home, I'll see if I can get her to take a pic at full draw.

The bow came out of the form with 1" net reflex. For some reason one of the limbs was slightly more flexed than the other. Now the tillering has finished, one limb, the more reflexed one, still lies some 1/3 to 3/8" forward of the handle after shooting and unstringing. The other limb is about 1/4 to 1/3 behind the back of the handle, though that reduces after a while.

As such, the bow has some nice high early draw weight. I might even be so bold as to say this is perhaps the best performing bow I've made yet.

The rest of the tillering went pretty smoothly. I went from spokeshave to scraper, then 40, 80 and finally 120 grit sandpaper. Irobark seems to take to sandpaper very well, coming up smooth as a baby's bot-bot. :D

At every stage in the tillering, I shoot the bow maybe a dozen times or so to make sure the bow is properly exercised, then I measure it again, then continue. I do this with a very complicated and highly technical measuring device (an arrow with a rubber band wrapped around it at the desired drawlength as a draw-stopper).

As I said, it ended up being 47lb @ 28", which happens to be the heaviest bow I've made or shot in a long time. There was an 80lb longbow once, but that was a long time ago...

Anyhow, more pics:

Here's the near-grip before I add the handle. I didn't apply finish to the handle because I've still got to glue on a leather wrap yet.

Image

Here's the whole bow with no finish

Image

I think it looks pretty good the way it is. However, there wopuld be absoloutely no pretection from the elements leaving it the way it is...plus, putting the finish on makes it look even better.

Here is the near-grip with the finish

Image

and here is the whole bow

Image

another

Image

Unfortunately, the contrast between the sapwood and heartwood isn't as...well...contrasty as I'd like, but it's still quite visible. In person, at least.

You may not have guessed it, but the finish is good old vegetable oil, applied with a rag, left in the sun, and done again a few more times. Good effect, huh? I tried using some commercial oil-based stain and varnish on a scrap bit of the same timber, and quite frankly the results weren't much different to using veggie oil. I guess the stain only works on already light wood.

That's about all I've got for today. The handle goes on this arvo, so maybe more pics tomorrow...but more likely next monday.

I'll try to remember to take a pic of how much reflex the stave has lost.

One thing I forgot to mention yesterday:

When I got the bow to brace height, I weighed the physical mass of the bow. 800g. When I finished the tiller of the bow, it had come down to just over 700g. So to take the bow from a fairly stiff stave to finished shooting bow only required the removal of some 100g of wood. Amazing stuff.

Cheers,

Dave
https://www.instagram.com/armworks_australia/

Bow making courses, knife making courses, armour making courses and more:
http://www.tharwavalleyforge.com/

Articles to start making bows:
http://www.tharwavalleyforge.com/index. ... /tutorials

User avatar
yeoman
Posts: 1563
Joined: Mon Mar 08, 2004 1:32 pm
Location: Canberra

#23 Post by yeoman » Fri Nov 24, 2006 10:26 am

More stuff to report.

Doing the handle:

This bow will have a fairly simple arrow rest. I make mine from several bits of leather glued together with PVA:

Image

The leather is not quite as wide as the handle is thick. When the glue is set, the leather is almost like a bit of wood. The first thing I do is roughly shape it with a sharp knife.

Image

Then I take to it with a file to smooth it off. Hold it in place with your bow hand to make sure it is comfortable, file where necessary.

When I'm happy with it, I glue it in place with more PVA, and hold it in place with some cooking twine.

Image

The next step is to put the handle copver on, but I haven't done that yet so can't show you. :P

What I can show you though is more pics of the rest of the bow.

Here's a not too great shot of the bow just unbraced

Image

Here's another of the same. It's a link coz I'm not too sure how big it will come out. The upper limb is on the right and has maintained reflex, the lower limb has lost it, but only just.

http://s102.photobucket.com/albums/m98/ ... braced.jpg

Now that the oil has soaked into the bow, the colour has changed a bit. Here are a few showing the bow now, although the camera distorts the color a tad.

Image

Image

Image

Here is one of the tips. It's not as narrow as some that I've done, but still nice and narrow to reduce mass, withe the beyond-nock wood being sharply tapered for the same reason.

Image

Image

And finally, here is a full draw shot. I would have preferred a more side-on view, but alas this is what you get. Please excuse the ugly mug drawing the bow. :wink:

Image

Well, that's all for now folks. More to come next week.

Cheers,

Dave
https://www.instagram.com/armworks_australia/

Bow making courses, knife making courses, armour making courses and more:
http://www.tharwavalleyforge.com/

Articles to start making bows:
http://www.tharwavalleyforge.com/index. ... /tutorials

User avatar
Stickbow Hunter
Supporter
Supporter
Posts: 11637
Joined: Sat Jul 26, 2003 8:33 pm
Location: Maryborough Queensland

#24 Post by Stickbow Hunter » Fri Nov 24, 2006 11:09 am

Dave,

Looks just great!!! Thanks for the detailed photos and explainations.

Just a thought regarding the reflex. In the photo showing the weights holding the bow in the reflexed postion it appears as there is uneven bend in the two limbs. The limb on the right doesn't appear to be curving the same as the other. This maybe why it didn't hold as much reflex - if it is the same limb of course????

Jeff

User avatar
yeoman
Posts: 1563
Joined: Mon Mar 08, 2004 1:32 pm
Location: Canberra

#25 Post by yeoman » Fri Nov 24, 2006 11:35 am

Yep, I think you nailed it. One limb actually was a few mm thicker than the other, hence it took less reflex, thus retained less (none). It is indeed the same limb.

I'll try to do better next time.

Cheers,

Dave
https://www.instagram.com/armworks_australia/

Bow making courses, knife making courses, armour making courses and more:
http://www.tharwavalleyforge.com/

Articles to start making bows:
http://www.tharwavalleyforge.com/index. ... /tutorials

Luke Anderson
Posts: 15
Joined: Mon Sep 04, 2006 4:27 pm
Location: melbourne

#26 Post by Luke Anderson » Fri Nov 24, 2006 4:19 pm

great job on the bow mate :)
where abouts in melbourne do you get your ironbark?
>>-luke->

User avatar
greybeard
Supporter
Supporter
Posts: 2992
Joined: Tue Feb 07, 2006 9:11 am
Location: Logan City QLD

#27 Post by greybeard » Fri Nov 24, 2006 7:51 pm

Hi, Dave
Nice job on the bow, well done.
You will get more enjoyment shooting off the knuckle.
Daryl.

User avatar
bleeroyb
Posts: 124
Joined: Sun Jul 09, 2006 6:27 pm
Location: Melbourne, Australia

#28 Post by bleeroyb » Sat Nov 25, 2006 2:14 pm

Very nice! You should be proud of yourself, looks to be a very nice bow! :lol:
You always tend to get more satisfaction when you make things yourself, well done.

Cheers,

Leeroy
Days, when the ball of our vision
Had eagles that flew unabashed to the sun;
When the grasp on the bow was decision,
And arrow and hand and eye were one.

-George Meredith (excerpt of 'Ode to youth in memory')

User avatar
ole_silver
Posts: 451
Joined: Sat Jan 01, 2005 9:15 am
Location: Townsville, Qld

#29 Post by ole_silver » Sat Nov 25, 2006 9:36 pm

ABSOLUTLEY WONDERFUL..........

the shot by shot with commentary, great looking bow, well done Dave...


regards
Steve..
ole_silver1..................

"have a go now, 'fore ya can't have a go at all"

User avatar
yeoman
Posts: 1563
Joined: Mon Mar 08, 2004 1:32 pm
Location: Canberra

#30 Post by yeoman » Mon Nov 27, 2006 8:45 am

Thanks for the kind words guys. More bows of the same general concept being made this week, hopefully a bit faster this time.

Greybeard: I do enjoy shooting off the knuckle, and for my own personal bows, that is what I do. However, this bow is for someone else, and they asked for an arrow rest, so that is what they got.

Luke, I get my wood from Australian Recycled Timber, out on sydney road past the car factories. www.yellopages.com.au should find them for you. Ask for Josh Alexander, as I've trained him in the way of bow wood choice. :wink:

Thanks again guys,

Dave
https://www.instagram.com/armworks_australia/

Bow making courses, knife making courses, armour making courses and more:
http://www.tharwavalleyforge.com/

Articles to start making bows:
http://www.tharwavalleyforge.com/index. ... /tutorials

Post Reply